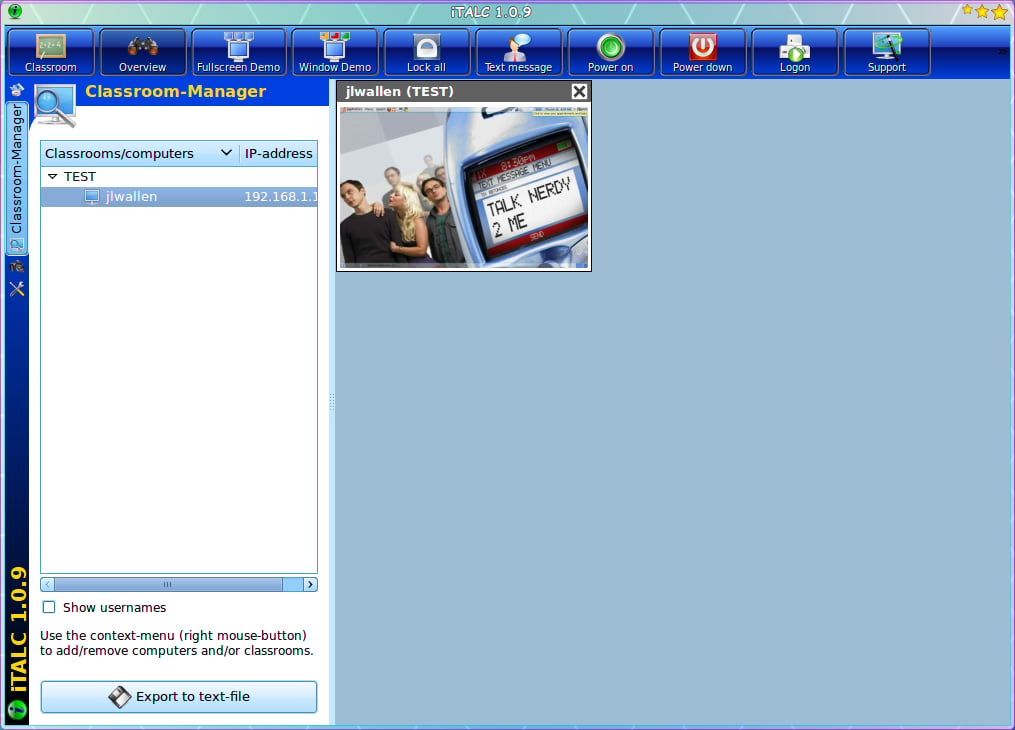
From this Master Control Station the teacher can take control of machines and much more.
For a full review of iTALC, check out the TechRepublic Product Spotlight Blog.
Image created by Jack Wallen for TechRepublic.
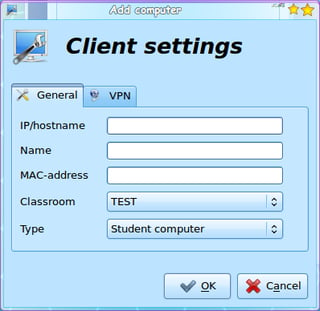
Adding a new client is as simple as right-clicking the left pane, selecting \u201cAdd New Computer\u201d, and filling out the information you see here.
For a full review of iTALC, check out the TechRepublic Product Spotlight Blog.
Image created by Jack Wallen for TechRepublic.
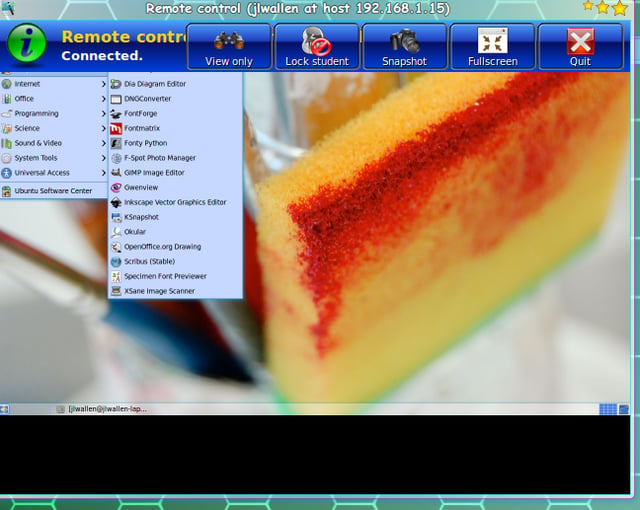
While controlling or viewing a workstation, if you hover your mouse at the top of the screen the Icon (or Control) bar will appear.
For a full review of iTALC, check out the TechRepublic Product Spotlight Blog.
Image created by Jack Wallen for TechRepublic.
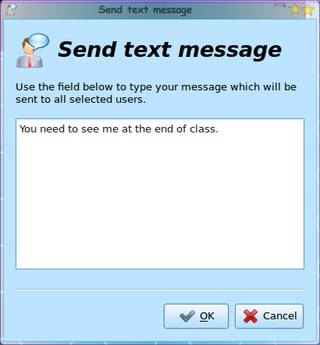
Send private messages to students/workstations so not to interrupt class time.
For a full review of iTALC, check out the TechRepublic Product Spotlight Blog.
Image created by Jack Wallen for TechRepublic.
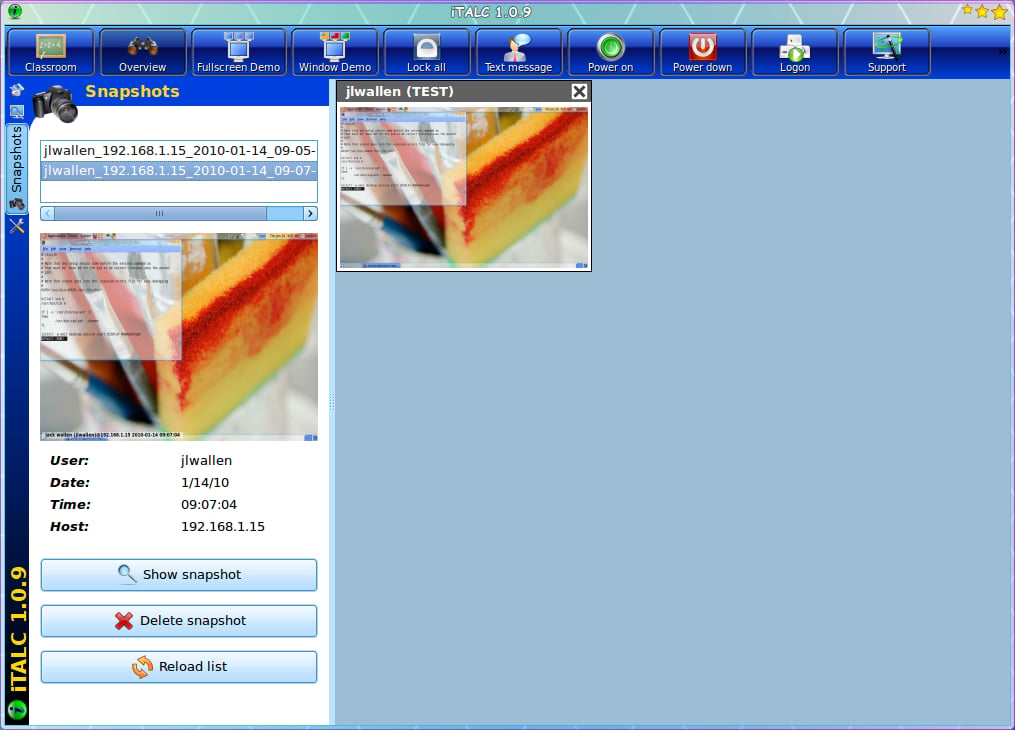
Take screenshots of a students’ workstation at any time. All snapshots will be listed (by name and IP address) in the snapshots listing (click the Camera icon in the left navigation).
For a full review of iTALC, check out the TechRepublic Product Spotlight Blog.
Image created by Jack Wallen for TechRepublic.
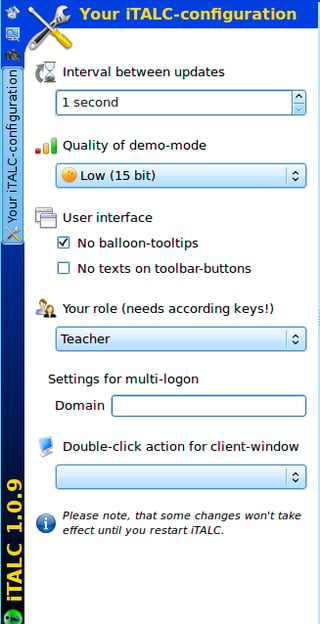
This is the entire configuration necessary for iTALC. Notice that you can use a Domain login for mult-login. Depending upon your hardware, you can adjust the Quality of demonstrations down to get better performance.
For a full review of iTALC, check out the TechRepublic Product Spotlight Blog.
Image created by Jack Wallen for TechRepublic.

Mark W. Kaelin has been writing and editing stories about the information technology industry, software, hardware, gaming, finance, accounting, and technology geekdom for more than 30 years.


