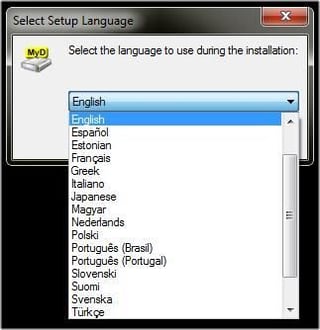
Download and run the MyDefrag-v4.2.6.exe file and you will see the Select Setup Language screen. You can choose from 22 languages.
I am including the setup screens because there are a number of important installation options that I want to discuss.
For a full review of MyDefrag, check out the TechRepublic Product Spotlight Blog.
Image created by Alan Norton for TechRepublic.
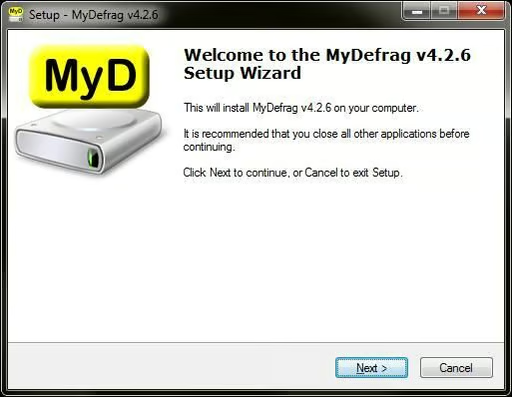
Next you will see the Welcome screen.
For a full review of MyDefrag, check out the TechRepublic Product Spotlight Blog.
Image created by Alan Norton for TechRepublic.

Accept the terms of the EULA if you agree with them. This is a fairly standard EULA with no surprises but please read it carefully and decide for yourself.
For a full review of MyDefrag, check out the TechRepublic Product Spotlight Blog.
Image created by Alan Norton for TechRepublic.
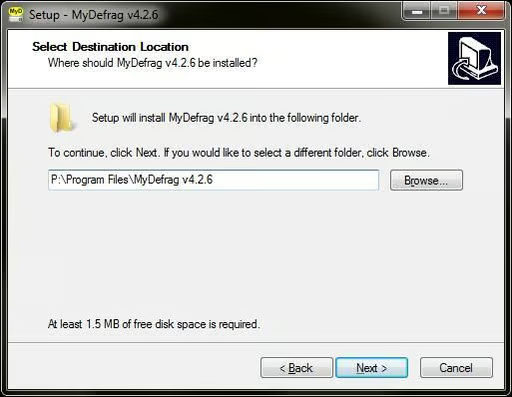
If you use the Browse button to select a different destination drive, you will have to also select the Program Files (x86) or Program Files folder. Or you can, as I usually do, simply change the drive letter.
For a full review of MyDefrag, check out the TechRepublic Product Spotlight Blog.
Image created by Alan Norton for TechRepublic.
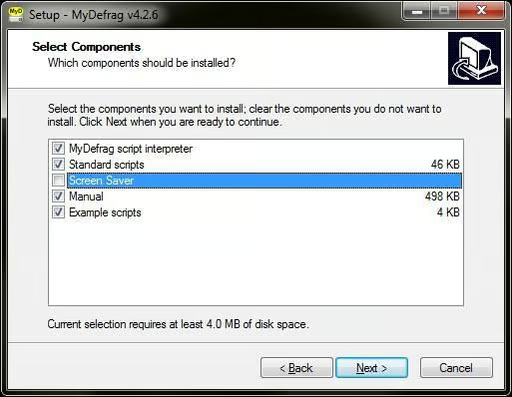
All components are selected by default.
The MyDefrag script interpreter and Standard scripts are options, but MyDefrag will not work without them. Be sure to leave both checked!
Select the Screen Saver component only if you don’t mind turning off the UAC.
Note: You must completely disable the UAC and restart the computer before installing MyDefrag if you want to install the Screen Saver component and have it work properly.
The manual is excellent. Unless you want to use the help available on the MyDefrag Web site or are an experienced MyDefrag user you should install this component.
Note: You cannot load the manual from MyDefrag. Select it from Start -> All Programs -> MyDefrag v4.2.6 -> Manual.
You can skip the Example scripts component unless you are an advanced user and want to work with the unique MyDefrag scripting language.
In the example I have deselected the Screen Saver component.
For a full review of MyDefrag, check out the TechRepublic Product Spotlight Blog.
Image created by Alan Norton for TechRepublic.
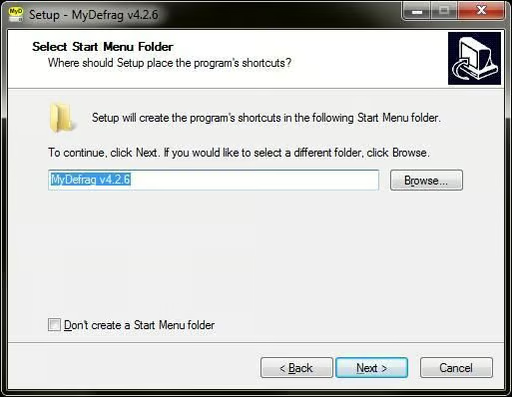
Unless for some bizarre reason you want to change the Start Menu folder name, click Next.
For a full review of MyDefrag, check out the TechRepublic Product Spotlight Blog.
Image created by Alan Norton for TechRepublic.
Note: This screen may appear differently depending on the components you chose in the Select Components screen.
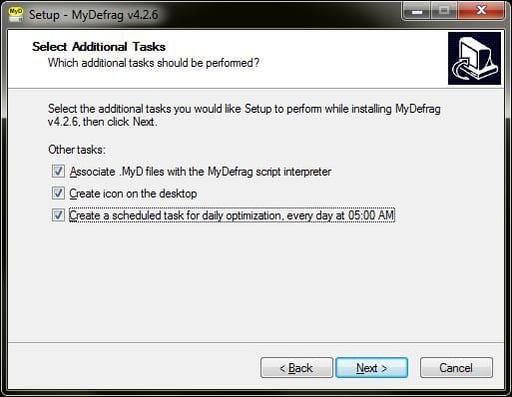
The Associate .MyD files with the MyDefrag script interpreter and Create icon on the desktop options are selected by default.
You can deselect the Associate .MyD files with the MyDefrag script interpreter option if you do not plan to run any MyDefrag scripts from the command line. You should leave this option checked if you want to launch MyDefrag when opening a .MyD script file.
If you chose the Screen Saver component earlier you will see an option to select and activate the screen saver. If you don’t choose the Select and activate the MyDefrag Screen Saver option during setup you can manually turn it on later in Windows Screen Saver Settings.
Choose the Create a scheduled task for daily optimization, every day at 05:00 AM option if you want MyDefrag to perform a fast daily defragmentation and optimization.
I have selected the Create a scheduled task for daily optimization, every day at 05:00 AM option in the example.
For a full review of MyDefrag, check out the TechRepublic Product Spotlight Blog.
Image created by Alan Norton for TechRepublic.
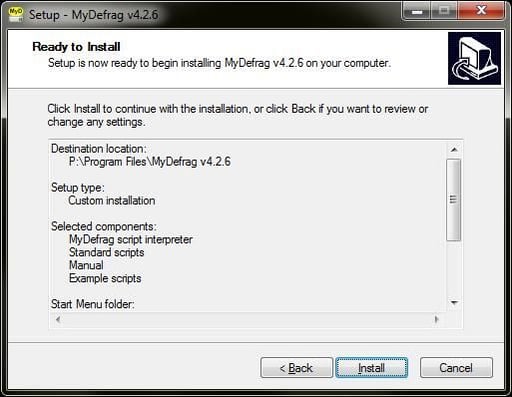
Review your choices and click the Install button if correct.
For a full review of MyDefrag, check out the TechRepublic Product Spotlight Blog.
Image created by Alan Norton for TechRepublic.
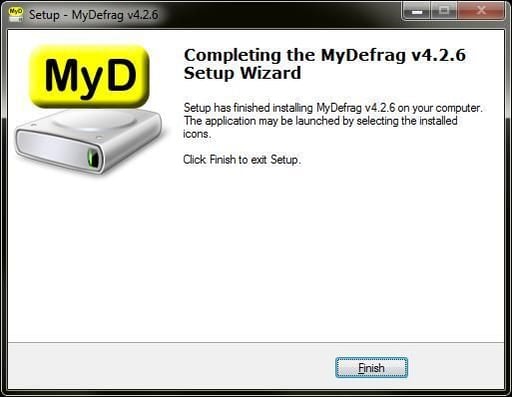
Click the Finish button when the installation is complete.
To start MyDefrag you can double-click on the MyDefrag icon on the desktop if you chose this option during installation or select MyDefrag v4.2.6 and then MyDefrag from the Start menu.
For a full review of MyDefrag, check out the TechRepublic Product Spotlight Blog.
Image created by Alan Norton for TechRepublic.
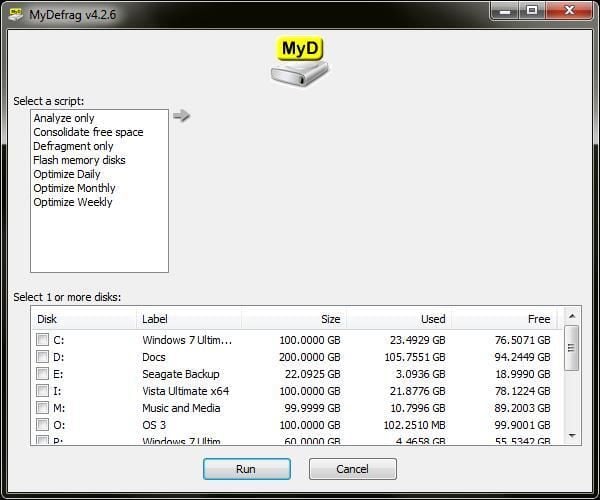
The MyDefrag main screen is one of only two screens. You can select from seven options or scripts as they are called in MyDefrag. All drives are selected by default when you select a script. The Optimize Daily, Optimize Monthly and Optimize Weekly are the key options. Choose one of these to perform the standard defragmentation, consolidation and optimization tasks.
For a full review of MyDefrag, check out the TechRepublic Product Spotlight Blog.
Image created by Alan Norton for TechRepublic.
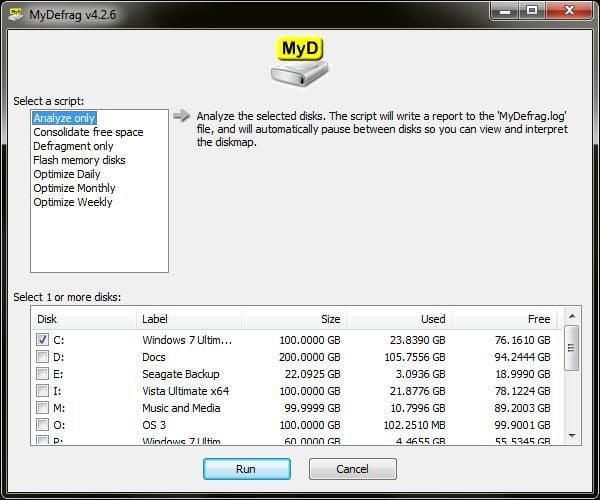
Select the Analyze Only option to perform an analysis only of the selected drives. The text to the right of the Select a script: list details the steps that will be performed.
For a full review of MyDefrag, check out the TechRepublic Product Spotlight Blog.
Image created by Alan Norton for TechRepublic.
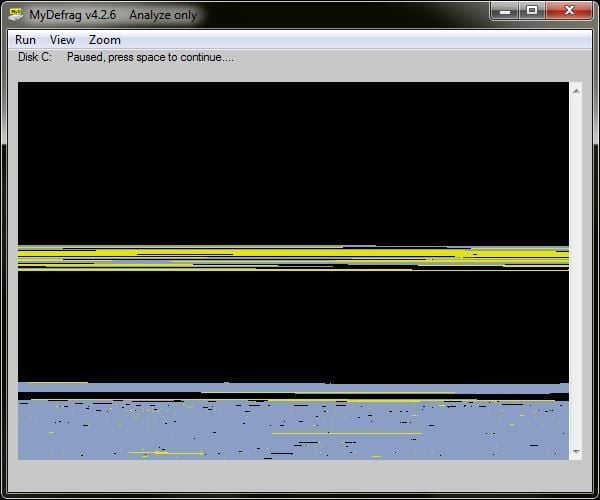
J.C. Kessels calls the display that graphically shows the files and file segments on the disk a diskmap. The default colors and what they mean can be found at this MyDefrag FAQ question.
If you don’t like one or more of the colors, you can modify it in any of the script files (advanced).
This is an example of the diskmap that you will see when you select the Analyze Only option.
For a full review of MyDefrag, check out the TechRepublic Product Spotlight Blog.
Image created by Alan Norton for TechRepublic.
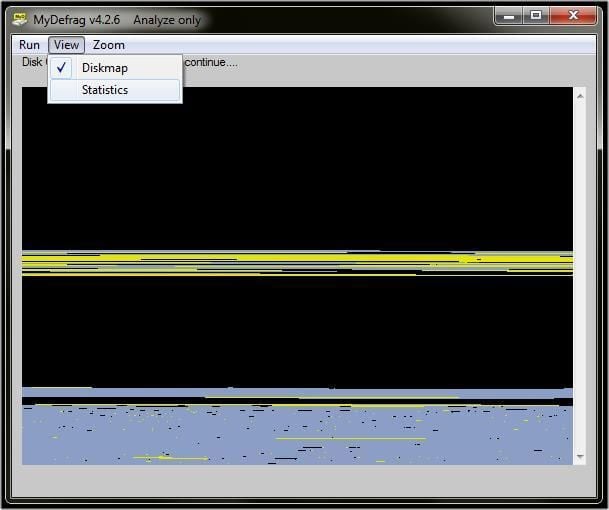
From the menu you can select View -> Statistics to see a textual listing of the statistics for the selected drive.
For a full review of MyDefrag, check out the TechRepublic Product Spotlight Blog.
Image created by Alan Norton for TechRepublic.
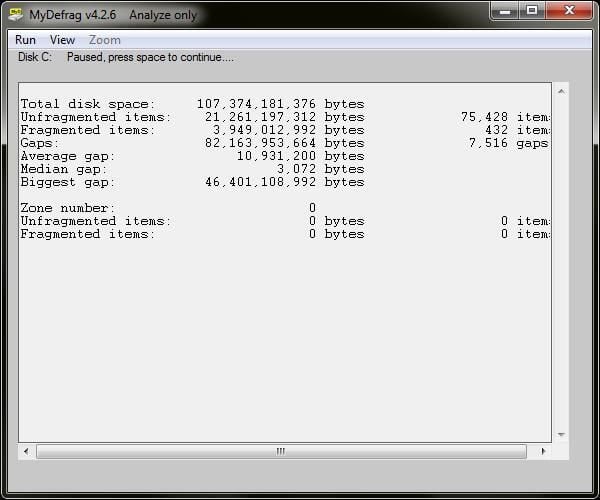
This is a sample of the statistics you will see for the current drive being processed. Pressing the [space bar] will show the next drives statistics.
For a full review of MyDefrag, check out the TechRepublic Product Spotlight Blog.
Image created by Alan Norton for TechRepublic.
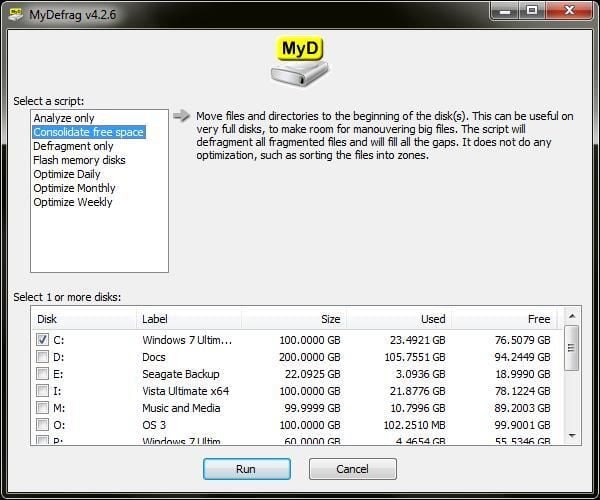
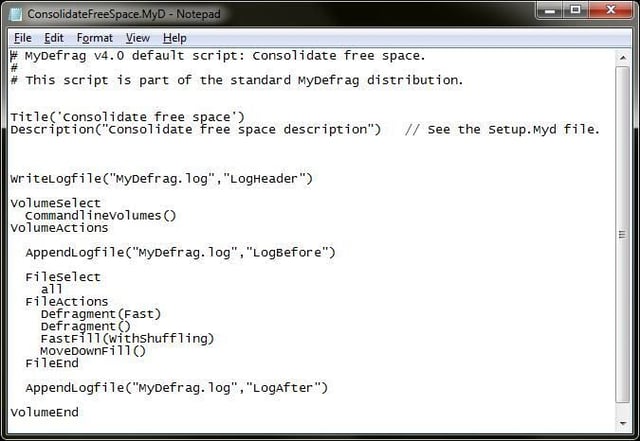
Select the Consolidate Free Space option to only consolidate the files on the selected drives. The text to the right of the Select a script: list details the steps that will be performed.
Note: You must select one or more drives before pressing the Run button for this and all options. I have selected drive C: in this example.
For a full review of MyDefrag, check out the TechRepublic Product Spotlight Blog.
Image created by Alan Norton for TechRepublic.
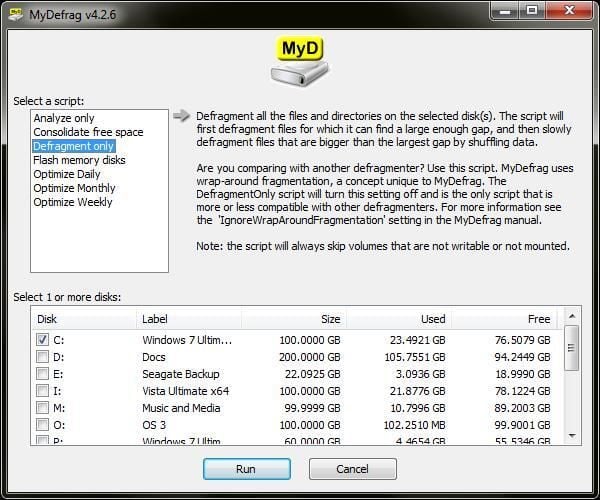
Select the Defragment Only option to only defragment the selected drives. The text to the right of the Select a script: list details the steps that will be performed.
For a full review of MyDefrag, check out the TechRepublic Product Spotlight Blog.
Image created by Alan Norton for TechRepublic.
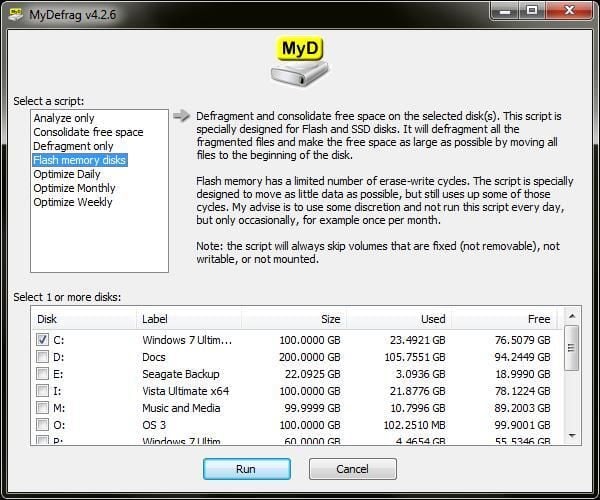
This is a special option for defragmenting only flash drives and SSD drives. The text to the right of the Select a script: list details the steps that will be performed. Be sure to uncheck all drives that are not flash drives.
Note: Flash drives and SSD drives have a limited number of write cycles. While this option is designed to achieve the greatest level of defragmentation using the least amount of disk writes, this option should be used infrequently.
For a full review of MyDefrag, check out the TechRepublic Product Spotlight Blog.
Image created by Alan Norton for TechRepublic.
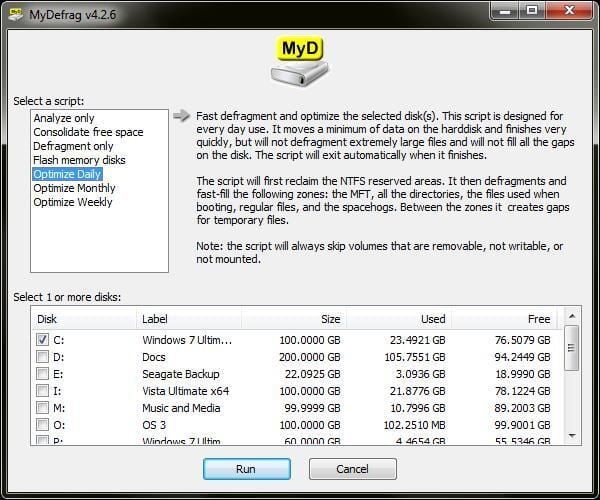
elect the Optimize Daily option to perform the least thorough reorganization of the disk. This option is intended for more frequent use. This script will only do simple defragmentation and optimization of the selected drives. Files larger than 50MB will be skipped though this can be easily changed in the OptimizeDaily,MyD script if you want. The text to the right of the Select a script: list details the steps that will be performed.
For a full review of MyDefrag, check out the TechRepublic Product Spotlight Blog.
Image created by Alan Norton for TechRepublic.
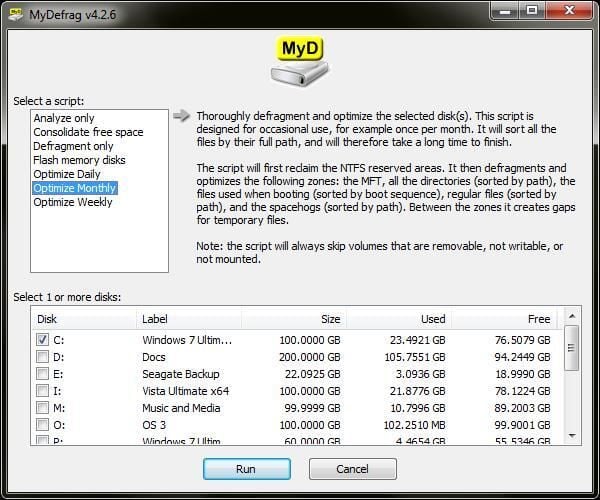
Select the Optimize Monthly option to perform the most thorough defragmentation, consolidation and optimization of the selected drives. This option should be the first option performed after installing MyDefrag and occasionally thereafter. The text to the right of the Select a script: list details the steps that will be performed.
For a full review of MyDefrag, check out the TechRepublic Product Spotlight Blog.
Image created by Alan Norton for TechRepublic.
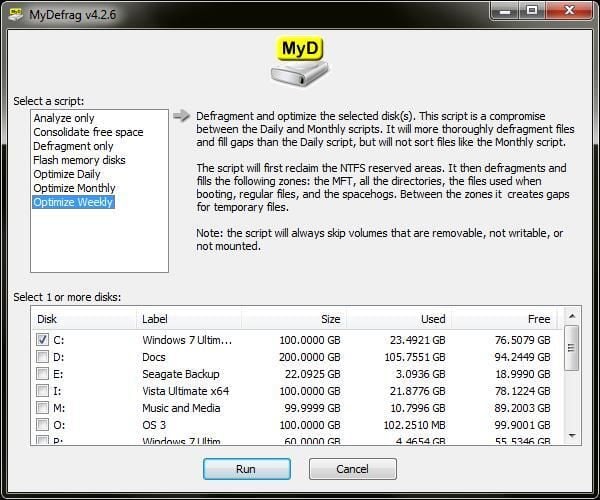
Selecting the Optimize Weekly option is more thorough than the Optimize Daily option but not as thorough as the Optimize Monthly option for the selected drives. It is intended for occasional use but for all practical purposes can be skipped altogether if the Optimize Monthly option is used. The text to the right of the Select a script: list details the steps that will be performed.
For a full review of MyDefrag, check out the TechRepublic Product Spotlight Blog.
Image created by Alan Norton for TechRepublic.
This is an example of one of the standard scripts.
For a full review of MyDefrag, check out the TechRepublic Product Spotlight Blog.
Image created by Alan Norton for TechRepublic.
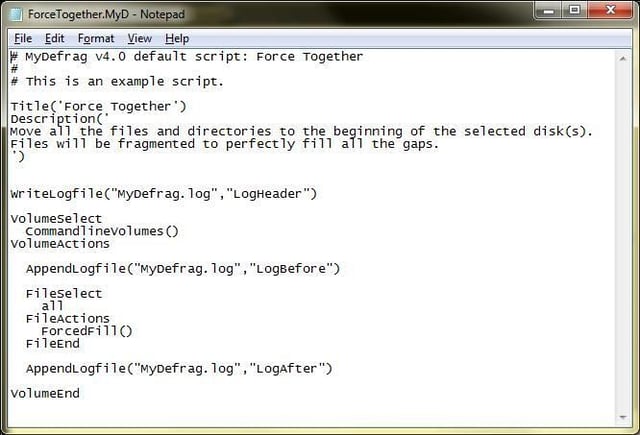
This is what the Force Together example script looks like. Advanced users can modify these scripts or use them as examples to create new scripts of their own.
For a full review of MyDefrag, check out the TechRepublic Product Spotlight Blog.
Image created by Alan Norton for TechRepublic.
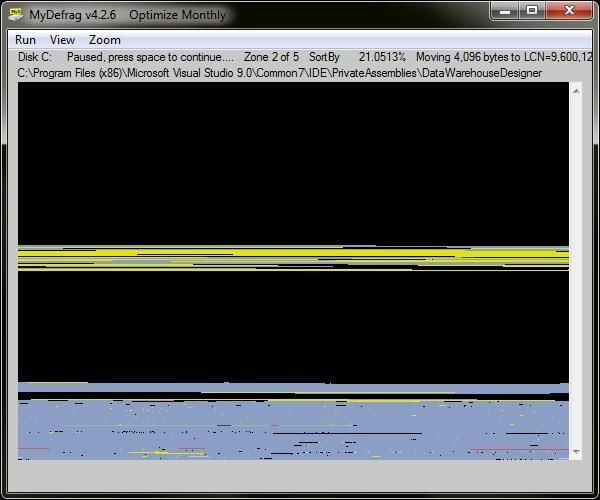
When running MyDefrag for the first time you should select the Optimize Monthly script. The screen shot below shows MyDefrag in action. The first status line at the top of the window shows the disk being processed, the current zone and total zones, how the optimization is sorting the files, the percentage complete, the number of bytes currently being moved and the LCN (Logical Cluster Number) of the move. The second status line shows the file being processed.
For a full review of MyDefrag, check out the TechRepublic Product Spotlight Blog.
Image created by Alan Norton for TechRepublic.
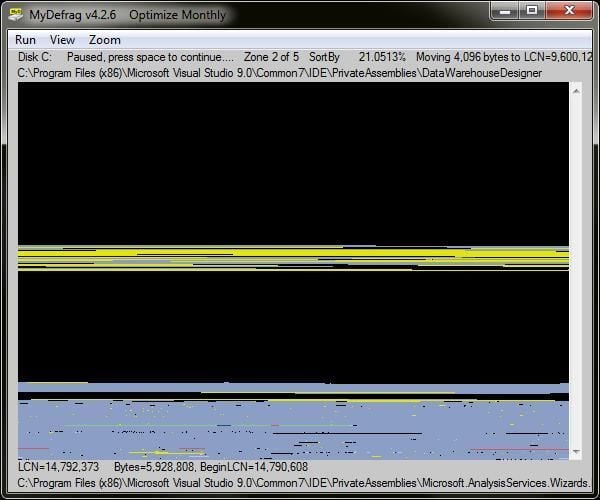
The bottom of the screen displays two more status lines. When you move the cursor to any position in the diskmap, detailed information about that position on the drive will be displayed. The third status line at the bottom of the windows details the current LCN, total bytes for the selected file and the beginning LCN. The fourth status line shows the path and file name selected.
For a full review of MyDefrag, check out the TechRepublic Product Spotlight Blog.
Image created by Alan Norton for TechRepublic.

You can contact me at mail@pecos-softwareworks.com. I began my career as little more than a data retrieval and reporting person. Early in my career I did whatever I could to be productive, creating spreadsheets in Framework and charts in GraphWriter. I was PC oriented and soon learned how to tap into the data on the mainframe to produce the charts via a data download to the PC. I found a niche building client/server systems where I was responsible for each phase of the project life cycle. \ \ I am fortunate to have enjoyed a broad background in IT including interfacing PC's and shop floor insertion machines to the mainframe database. I have also been an independent contractor, perhaps the most satisfying part of my career. I transitioned several mid-frame systems to a PC network based Access/Visual Basic system in the contract position and learned what it takes to be successful on your own. \ \ My last position was an analyst/programmer for a large IT service provider in support of their global help desk reporting team including a role as project lead. \ \ I consider myself lucky to have been in at the beginning of the personal computer revolution. I am currently semi-retired and learning a new skill, professional writing.


