
By default, a cell will adapt to the size of an inserted picture, which can wreck a predefined table in no time. If you’ve gone to the trouble to design a table, you probably don’t want this to happen. Fortunately, you can freeze a cell’s size so it won’t change when you insert a picture file–forcing the picture file to adapt to the cell’s size. In a nutshell, you’re turning the cell into a placeholder. This solution isn’t without its limitations, but it’s definitely easier than resizing every picture and cell after the fact.
I’m using Word 2016 on a Windows 10 64-bit system, but you can use these instructions in older versions of Word. It isn’t adaptable to 365’s browser version. You can work with your own file or download the demonstration .docx or .doc file.
Word’s default behavior
First, let’s look at Word’s default behavior. Figure A shows a simple table with two columns and three rows. I used the Table dropdown in the Tables group on the Insert tab to insert the simple table into a blank document. Then, I added a few owl facts in the column to the right.
Figure A
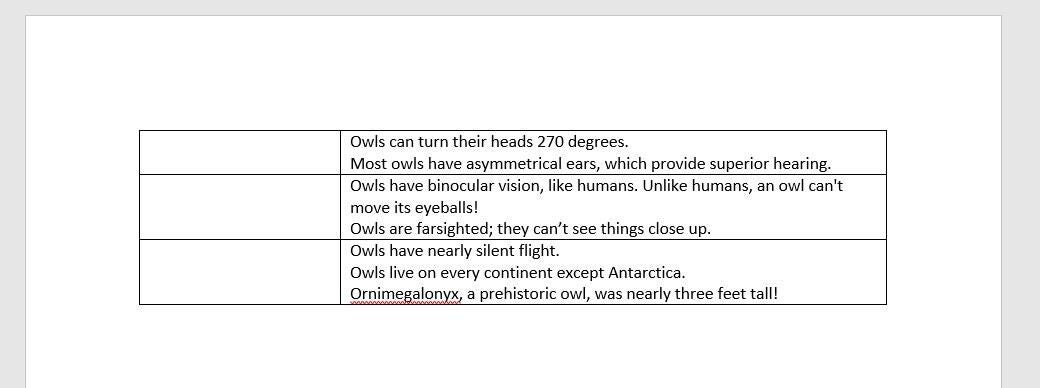
Use the Table dropdown to create a quick, empty table.
Let’s insert a picture to see what happens:
- Click inside the cell where you want to position the picture file (first cell in the first row for this example).
- Click the Insert tab.
- Click Pictures in the Illustrations group.
- Use the Insert Pictures dialog to find and insert the picture.
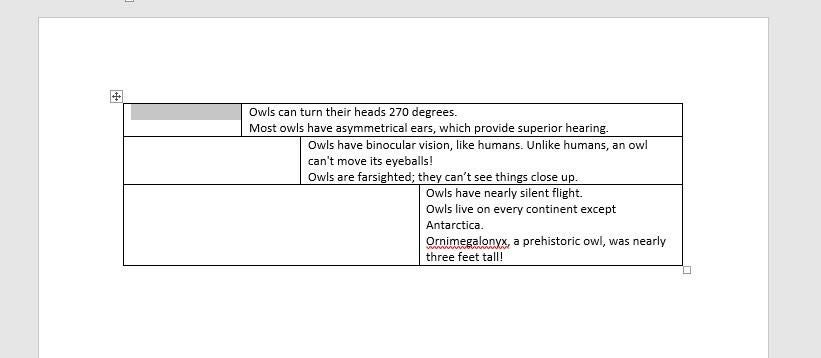
As you can see in Figure B, the cell increases its width and height to accommodate the size of the picture. In fact, the increase is significant–more than doubling its original size. If you resize the picture in the cell, the cell’s dimensions change accordingly. But the bad news might be that the cell’s dimensions change at all; the picture determines the cell’s size, not you. If you don’t like the size, you’ll have to resize the picture.
Figure B

Adapting to the picture is a default behavior.
Adapting to fit the picture isn’t a bad behavior. In fact, it might be exactly what you want. If, on the other hand, you want to control the cell’s size, you’ll need to do the following:
- Determine the cell’s persistent size.
- Resize the cell manually.
- Disable the cell’s ability to adjust its size on the fly.
SEE: Five things Microsoft got right in 2016
Step 1: Determine the cell’s size
You might already have a cell size in mind–you might even be locked into a requirement. If that’s the case, you can skip this section. If you don’t have a predefined cell size, simply resize cells as necessary until you’re satisfied with the balance. In situations where you need to find out the exact height and width of any cell, do the following:
- Click inside the cell you want to use as a picture placeholder.
- Click the contextual Layout tab.
- In the Cell Size group (Figure C), note the height and width.
Figure C

A cell’s dimensions are visible in the Cell Size group on the Layout tab.
Knowing a cell’s exact size can be helpful when documenting your work or if you want to match the dimension in other cells.
Step 2: Resize the cell
If you want to change a column’s size, use the options in the Cell Size group. Within the context of this example, you’d use the Width option to change the picture-placeholder column’s width. Use this route when you want all pictures in the column to be the same width. You could reset both the height and width, but doing so would most likely distort your pictures.
To resize a single cell so you can accommodate different widths, select a cell and then drag its right border. You can select a cell by clicking inside the cell and then pressing [Shift]+[Right Arrow]. When a cell is selected, Word highlights the top row, as shown in Figure D. If you don’t see that gray highlight, you haven’t selected the cell. To show the flexibility of this technique, all three picture-placeholder cells (in the first column) are different widths.
Figure D
When you select a cell, Word will display a gray highlight.
Step 3: Disable the resize property
You should change the size of the cells before inserting a picture file, but the cell will still adjust to fit the picture. So once your cell is the size you want, you must disable its ability to change its size on the fly. To do so:
- Select the table by clicking the table handle (in the top-left corner).
- Right-click the selection and choose Table Properties. Or click the contextual Layout tab and click Properties in the Table group.
- Click the Table tab if necessary.
- Click Options in the bottom-right corner.
- In the resulting dialog, uncheck the Automatically Resize To Fit Contents option (Figure E).
- Click OK twice.
Figure E

Deselect this setting to disable resizing.
This is a table property, which means you’re disabling this feature for all cells, not only those holding pictures. Cells with text will continue to accommodate new content by adjusting the row height if necessary.
After setting the appropriate cell widths to suit your needs, you’re ready to insert the picture files. As you can see in Figure F, the picture adapts to fit the cell, not the other way around. Notice that the picture in the third row doesn’t quite fill the cell. You can force the picture to a smaller size, but you can’t force a picture to fill a cell that’s larger than the picture’s full size. (A comprehensive discussion of graphic file size is beyond the scope of this article.)
Figure F
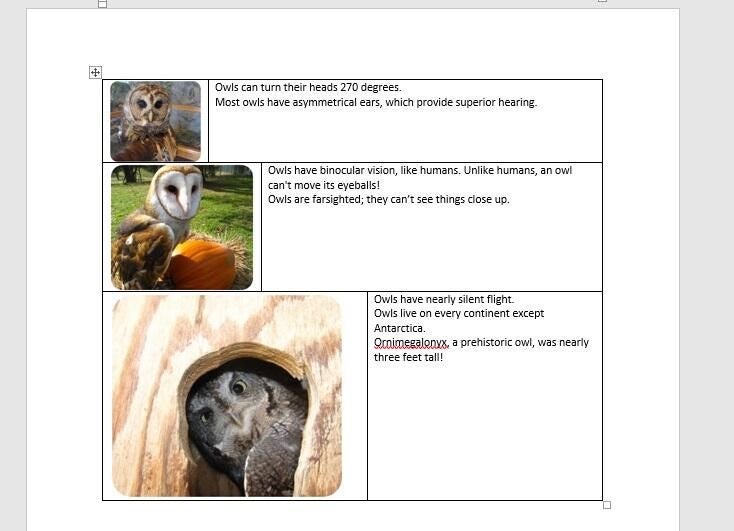
The pictures adapt to the cell’s size.
Easy placeholders
In a one-time simple document, adjusting both a picture and cell size isn’t a big deal. If, however, you’re doing this a lot, you might consider creating a template or a Quick Table so you don’t have to tweak the table every time. By using picture-placeholder cells, you can insert your pictures and complete your table without resetting the picture and cell sizes first. In addition, you might consider using SmartArt as an alternative to using a table. Many of the predefined lists use picture placeholders for consistent sizing.
Send me your question about Office
I answer readers’ questions when I can, but there’s no guarantee. Don’t send files unless requested; initial requests for help that arrive with attached files will be deleted unread. You can send screenshots of your data to help clarify your question. When contacting me, be as specific as possible. For example, “Please troubleshoot my workbook and fix what’s wrong” probably won’t get a response, but “Can you tell me why this formula isn’t returning the expected results?” might. Please mention the app and version that you’re using. I’m not reimbursed by TechRepublic for my time or expertise when helping readers, nor do I ask for a fee from readers I help. You can contact me at susansalesharkins@gmail.com.
Also read…
- Office Q&A: Three simple problems with quick solutions
- How to update multiple Outlook contacts using an easy grouping trick
- Three ways to expose formatting inconsistencies in a Word document
- Two technique enhancements from readers during 2016
- Office Q&A: How to replace direct formats with styles in a Word document