


Highlighting is a common task in Microsoft Word, allowing readers to quickly find specific words or phrases. If the text frequently occurs, manually highlighting all instances would be tedious and unnecessary. In this article, I’ll show you two ways to highlight recurring text: using Word’s “Find and Replace” and “Find” options. Both are effective tools for reviewing surrounding text rather than making a blanket change. Both are easy to do — but come with a few limitations.
I’m using (desktop) Microsoft 365, but you can use earlier versions. You can work with your document or download the simple demonstration .docx file.
What is the shortcut to highlight certain words?
The keyboard shortcut for Find & Replace is Ctrl + H on Windows or Command + F on Mac.
How to highlight in Word using Find & Replace
To highlight in Word, visit the Replace menu on the Home bar. Using the shortcut or selecting the menu will open the Find & Replace box. Search for the word you want to highlight in the Find field. Selecting “Find Next” will highlight the word in the document.
After highlighting, you can quickly peruse your document and make updates as necessary. The highlighting will stay in place until you remove it. You can even save the highlights.
However, all this quick highlighting has its limits:
- If you highlight another word or phrase — regardless of the highlight color you use — Word will remove the results of the Highlight All task.
- If you remove the highlight from any of the highlighted instances, Word will remove them all.
Now, let’s do the same thing using Find in the Navigation pane.
SEE: Microsoft Word often autoformats an em dash, but there are ways to include an em dash manually.
How to highlight in Word using Find
There’s more than one way to highlight recurring text, and you’ll want to be familiar with both.
Different methods may work depending on the version of Word you are using. For now, we’ll use the Find option, but you can skip choosing a highlight color because Word will ignore the setting. The following may highlight text in older versions of Word:

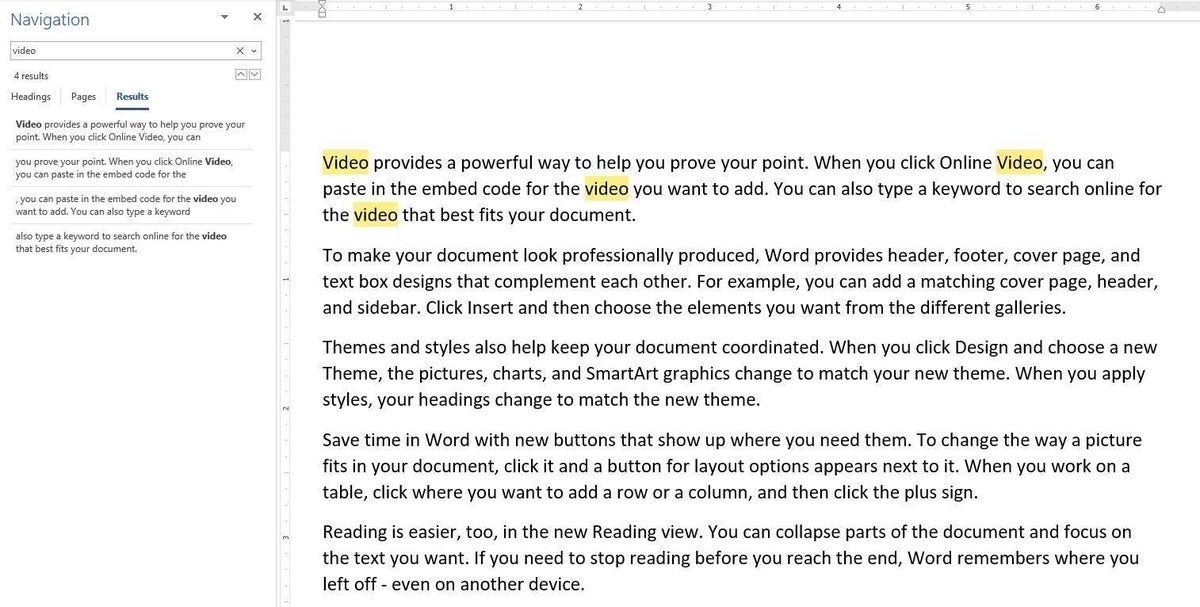
- Click Find in the Editing group or press Ctrl+F to open the Navigation pane.
- From the text dropdown, choose Options, check the Highlight All setting, and click OK.
- In the text control, enter the selected word (in this case, “video”) and press Enter. Word will automatically highlight all instances.
The same caveats apply as before when trying to work with subsequent highlighting. In addition, when you close the Navigation pane, all highlights disappear. For this reason, I find this option less flexible, but if you’re working in the Navigation pane for other reasons, it works well.
More about Microsoft
- Best Free VPNs
- Best Free CRM Software
- Best Free Accounting Software
- Best Free Project Management Software
Highlighting text in Word for web
In Word for a web browser, use the same keyboard shortcuts (Ctrl + H on Windows or Command + F on Mac) as above to open the Find sidebar in the Navigation section. Typing a word or character into the search box will highlight it in the body of the text. At the side of the search bar are settings that can highlight whole words only or match cases.
How can one easily identify and replace duplicate words in a Microsoft Word document?
Once words have been selected using Find, Replace will be easy to spot. The Replace and Replace All buttons sit at the bottom of the Find and Replace menu in contemporary versions of the Word application, or beside Find in the Navigation tab in the browser version. Insert the word you want to replace the highlighted text with and select Replace to make one change or Replace All to apply the change to the entire document.
Megan Crouse updated this article in January 2025.