


Recently, I was tasked to add a MySQL database GUI for a client and came up against an issue where the database server wasn’t properly configured to accept remote connections. This can be a bit tricky to pull off, but it’s not impossible.
I’m going to walk you through the process of configuring MySQL 8 to connect to it remotely as a user with access to all databases. Understand that this is a significant security risk, so you want to make absolutely certain that not only is your LAN secure, but you’re using very strong passwords for the MySQL users — which you should be doing anyway.
With that said, let’s get this configuration up and running.
Must-read developer coverage
- What Powers Your Databases? Take This DZone Survey Today!
- Microsoft’s Historic 6502 BASIC Code is Now Open Source
- TIOBE Index: Top 10 Most Popular Programming Languages
- TechRepublic Exclusive: AWS Says Entry-Level Workers Need ‘Curiosity’ In the Age of AI
What you’ll need
To make this connection, you’ll need a running instance of MySQL and either a Linux machine to test the connection or any number of MySQL clients that allow for remote connection setup. You’ll also need a user on the MySQL server with sudo privileges.
SEE: Here’s a refresher on how to configure your MySQL root password.
That’s it. Let’s make some database magic.
1. Configure MySQL for remote connections
The first thing we must do is configure MySQL for remote connections. To do this:
- Log into your MySQL database server, and open the configuration file with the command:
sudo nano /etc/mysql/mysql.conf.d/mysqld.cnf - In that file, look for the line:
bind-address = 127.0.0.1 - Change that line to:
bind-address = 0.0.0.0 - Save and close the file.
- Restart the MySQL service with:
sudo systemctl restart mysql
At this point, MySQL is open for remote connections, but you’ve yet to create a user for access.
2. Create a user for remote access
Next, create a new MySQL user. We’re going to call this user dbadmin. This user cannot be called “root” because, depending on how the MySQL server is configured, it may not be possible to add an account with remote access that is named “root.”
To create a new MySQL user:
- First, access the MySQL console from the server hosting MySQL with the command:
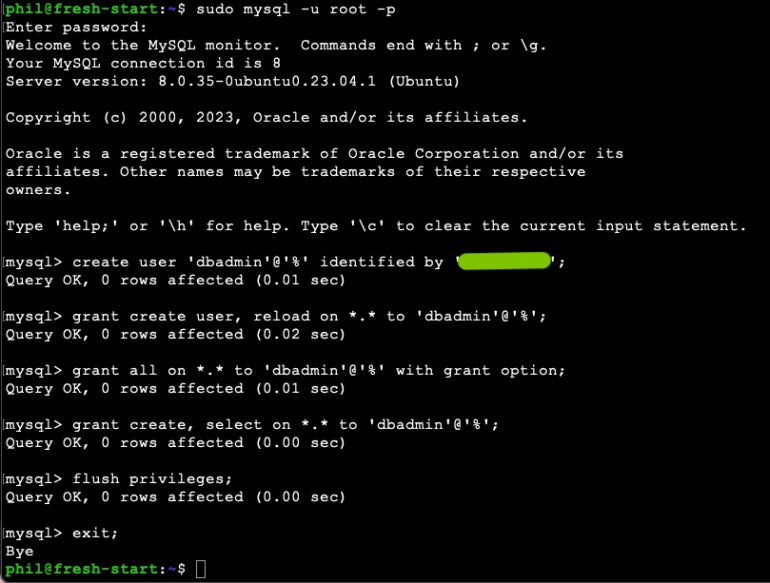
sudo mysql -u root -p - Once at the MySQL console, create the new user with the command:
create user 'dbadmin'@'%' identified by 'PASSWORD';
where PASSWORD is a strong and unique password. - Grant the user the rights to create new users and the ability to reload on global rights with:
grant create user, reload on *.* to 'dbadmin'@'%'; - Grant all further rights to the new user, along with the right to grant new rights to other users:
grant all on *.* to 'dbadmin'@'%' with grant option; - Grant database creation and select privileges:
grant create, select on *.* to 'dbadmin'@'%'; - Flush the privileges and exit the console with:
FLUSH PRIVILEGES;
exit
The command sequence should look similar to what is shown below (Figure A).
3. Test the connection
If you have access to another Linux machine with MySQL installed, you can test the connection by running this command on the second machine:
mysql -u dbadmin -h SERVER -p
where SERVER is the IP address or domain of the MySQL hosting server.
When prompted for the password, type the strong password you created for the new dbadmin user. If you’re testing this from a second Linux machine, you should see something similar to Figure B.
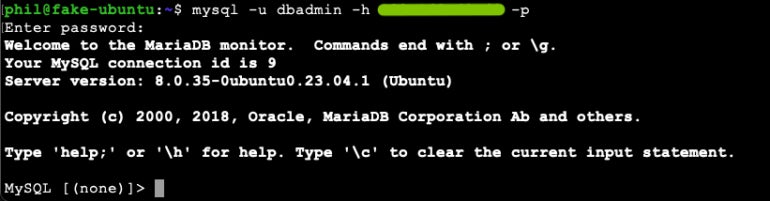
You should be granted access to the MySQL console, where you can manage any of the databases on the system.
4. Use GUI tools to access the database server
Once the system tests out fine, you can then connect to that database server with a graphical user interface tool such as Beekeeper Studio or Adminer.
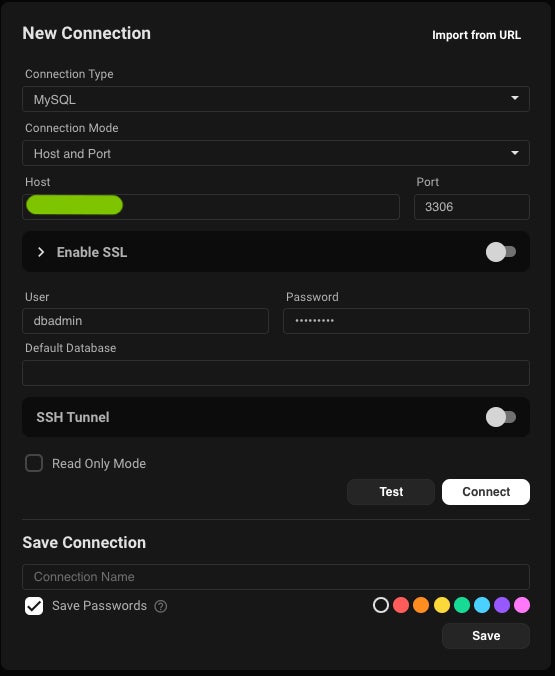
With Beekeeper studio, create a new connection, select MySQL as the connection type and fill out the following details (Figure C):
- Host: The IP address or domain of your MySQL server.
- Port: 3306.
- User: dbadmin.
- Password: The password you set for the newly created dbadmin user.
- Default Database (optional): The name of one of your databases found on the MySQL server, which can be listed from the MySQL console with the query
SHOW DATABASES;.
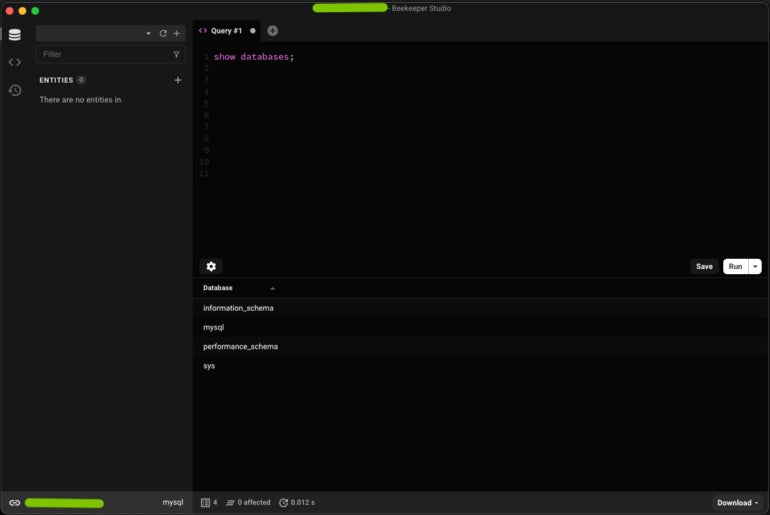
Once you’ve filled out the details, click Test to make sure the connection works. After getting the OK, give the connection a name, and click Save. Finally, click Connect, and the GUI should successfully connect to your remote database (Figure D).
Setting up more connections
Congratulations! Not only have you configured MySQL 8 for remote connections, you’ve also created a user with access to all databases and connected to the remote server with both the command line and a GUI. Time to don your database admin hat and get to work.
PREMIUM: Take advantage of this back-end developer hiring kit.
Now that you’ve learned how to set up remote connections for MySQL 8, here’s how you can connect the MySQL database with LibreOffice, DBeaver and Grafana.