I take a lot of screenshots and videos from my desktop. Screenshots are incredibly simple to deal with. Some operating systems and desktops have built-in tools for that task, and if not, there are plenty of third-party tools like EaseUS RecExperts.
But for video, it’s not quite as cut and dry. Yes, you can record video on macOS with Quicktime, which is actually pretty easy. Even Windows 11 includes the Xbox Game Bar for recording video of nearly any application you use.
But those built-in tools are often limited in features. For those who want more, such as features like auto-stop, scheduling, recording from a webcam, etc., those included tools might not be enough.
That’s when you turn to the likes of EaseUS RecExperts, which not only includes the features listed earlier, but it also supports automated recording, 4K resolution, 60 frames per second, audio capture from any mic and even system sounds, webcam overlay, countdown timer, Spotlight, Zoom Meetings, playlists, built-in video player, watermarking, basic editing for things like intros and outros, and even an annotation feature.
I installed EaseUS screen recorder on macOS Monterey and wanted to share my experience with you.
SEE: Windows, Linux, and Mac commands everyone needs to know (free PDF) (TechRepublic)
Pricing
First off, EaseUS isn’t free. In fact, some might think the price is a bit high. You can purchase a license for the Windows version as either a monthly ($19.95) or yearly ($49.94) subscription, or pay a one-time fee of $69.95. They do offer a 30-day money-back guarantee, so if the product doesn’t meet your needs, you can rest assured you can get your money back.
Installing EaseUS RecExperts on macOS
The installation on macOS is as simple as any application. You’ll download the dmg file, double-click it and then drag the app icon into the folder as prompted. However, during the installation, you will also have to give the app permission to record the contents of the screen. During the installation, the Security & Privacy window will automatically open (Figure A).
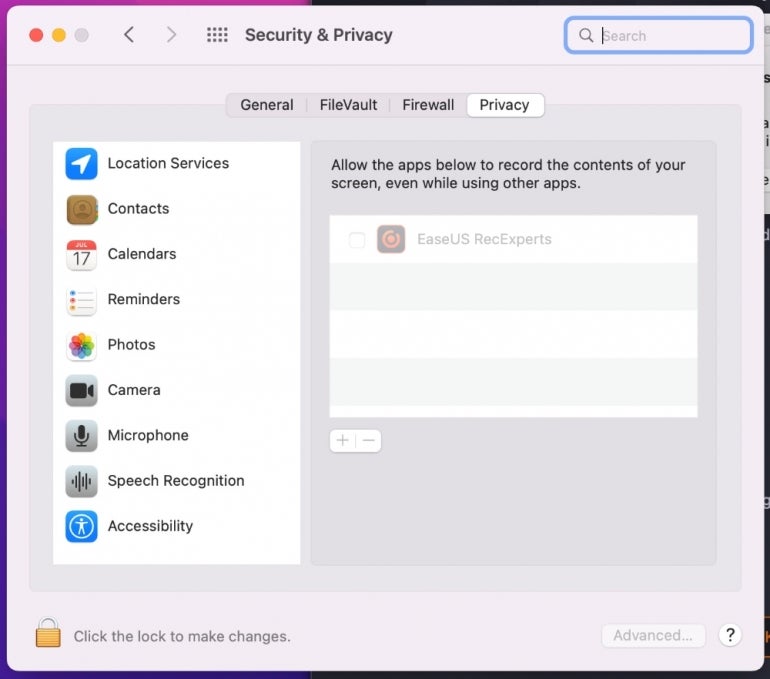
Click the lock at the bottom of the window, and when prompted, type your password or touch your finger to the fingerprint scanner. Once unlocked, click the checkbox associated with EaseUS RecExperts to give the app the necessary permissions.
But there’s more.
Once the app is installed, a new window will open (Figure B), where you must hand over even more permissions.
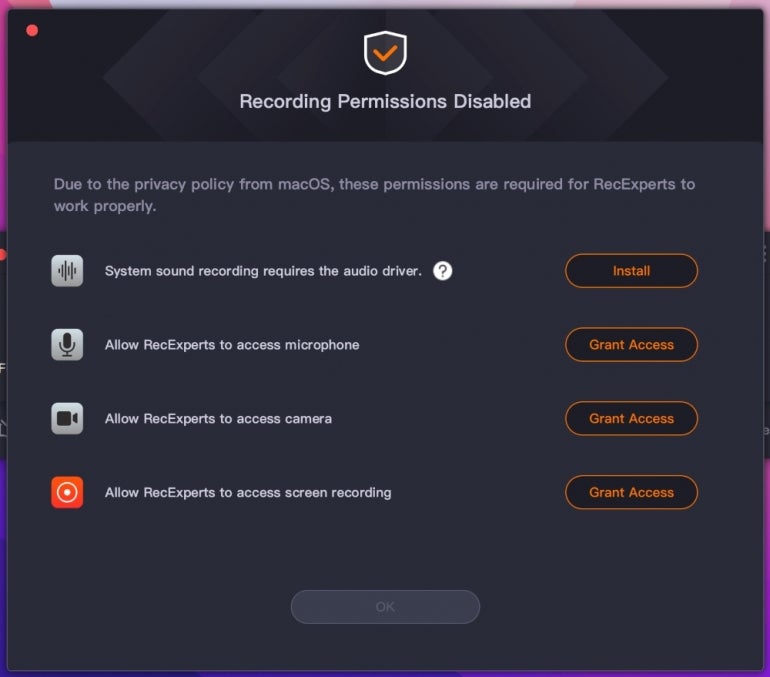
After the installation completes, you’ll find EaseUS in Launchpad. Launch the app, and you’re ready to record.
Usage
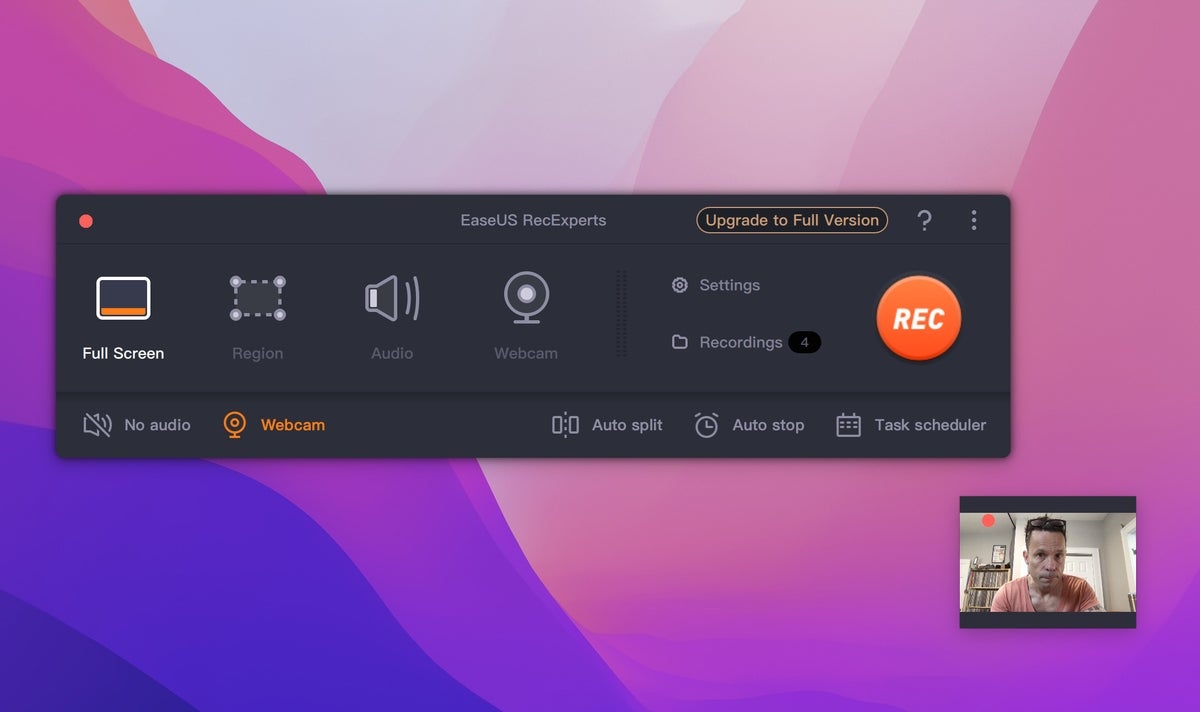
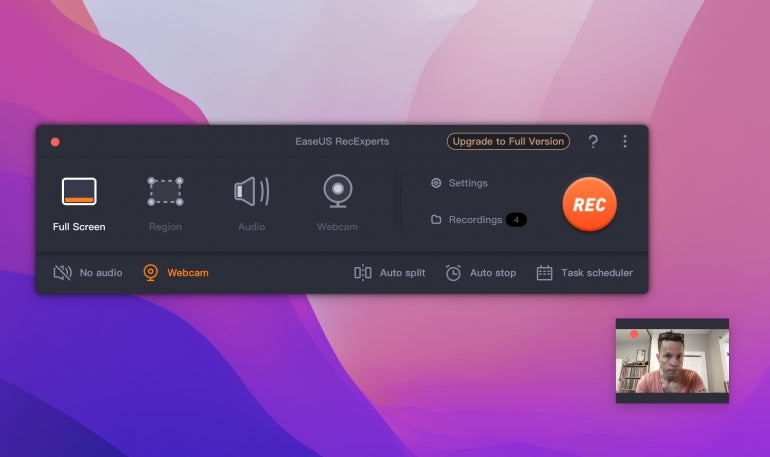
Using EaseUS is quite simple. The app opens as a small window with all of the controls necessary to record your screen (Figure C).

From the control window, you can select to either record full screen, choose a region to record, enable audio, enable your webcam and several other features. One thing to note is that the cursor is hidden from recordings by default. To enable the cursor, you must click Settings and then click Show Mouse Cursor (Figure D).
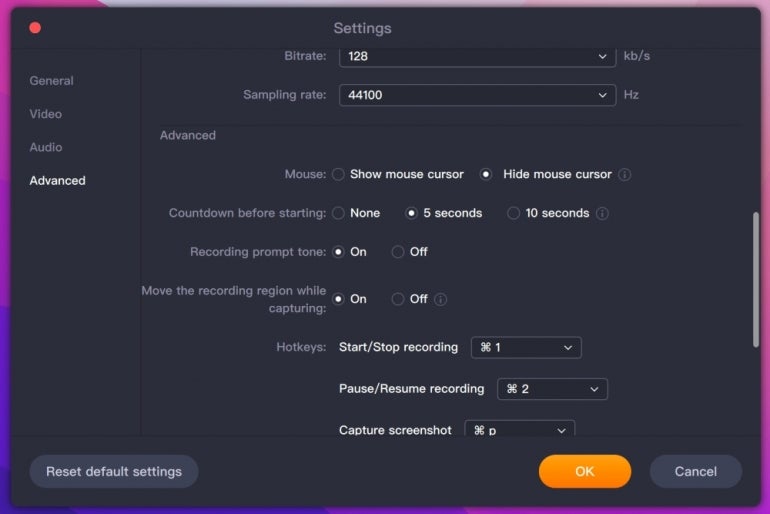
You might also want to set the floating toolbar to auto-hide once you start recording. To do that, go back to Settings and scroll down to Hide Floating Toolbar. Click On, and the toolbar will auto-hide when you start a recording.
If you choose to auto-hide the toolbar, you’ll then control the pausing/stopping/quitting of EaseUS from the macOS top bar (Figure E) or the Windows system tray.

An effective and intuitive video option
If you find your operating system’s built-in screen recording software too limiting (or it simply doesn’t exist), EaseUS is an outstanding option that offers more features than the average tool in this space as well as screen recording tips to make your videos shine. The only caveat to EaseUS is the cost, but if you can afford the price of entry, this tool will serve you well.
EaseUS is simple to use; effective; creates stunning recordings, especially when using the 4K option; and can save video files in MP4, MOV, FLV, MKV, AVI and GIF formats. Give EaseUS a try, and see if it doesn’t become your go-to screen recorder.
Subscribe to TechRepublic’s How To Make Tech Work on YouTube for all the latest tech advice for business pros from Jack Wallen.
