


A bibliography is a list of sources referred to in a document. Many scholarly documents require one, and you probably had to create a few while in school. The list comprises citations, which include the title, author, publisher, date of publication, and so on for each source. You’ll use a bibliography to credit quotes and other facts to lend legitimacy to your document. The technical process in Microsoft Word is similar to footnote/endnotes or indexing and has three steps: Adding the sources as a citation, citing the citation, and then generating the bibliography. I’ll show you how simple it is to add sources and generate a bibliography.
I’m using Office 365, but you can use earlier versions of Word. When using the .doc format, you will lose some features. You can work with your own document or download the demonstration .docx and .doc files. Word’s browser edition will display existing bibliographies, but you can’t add or edit sources or generate a bibliography while in the browser.
How to add a source in Microsoft Word
Sources can be any kind of published work, from books to articles on the web. The information you include for a source will depend on you or the publisher. Word supports several styles, but the three most common are Modern Language Association (MLA), American Psychological Association (APA) and Chicago. These styles determine the information needed and how that information is formatted. We won’t cover individual styles in this article–you will need to do a little research to determine what your publisher or recipient requires.
First, you need a source, so let’s run through a quick example.
- After entering the quote or fact that requires verification, click the Reference tab.
- In the Citations & Bibliography group, choose the appropriate style. APA is the default and, for our purposes, we’ll retain it.
- Click Insert Citation and choose Add New Source from the dropdown list.
- In the resulting dialog, enter the fields required by your style (Figure A). You can enter the name using first name lastname or lastname, first name format. Separate multiple authors with a semi-colon ( ; ).
- Click OK. As you can see in Figure B, Word adds a text reference to the citation. (Don’t worry if your results don’t match mine.)
Figure A
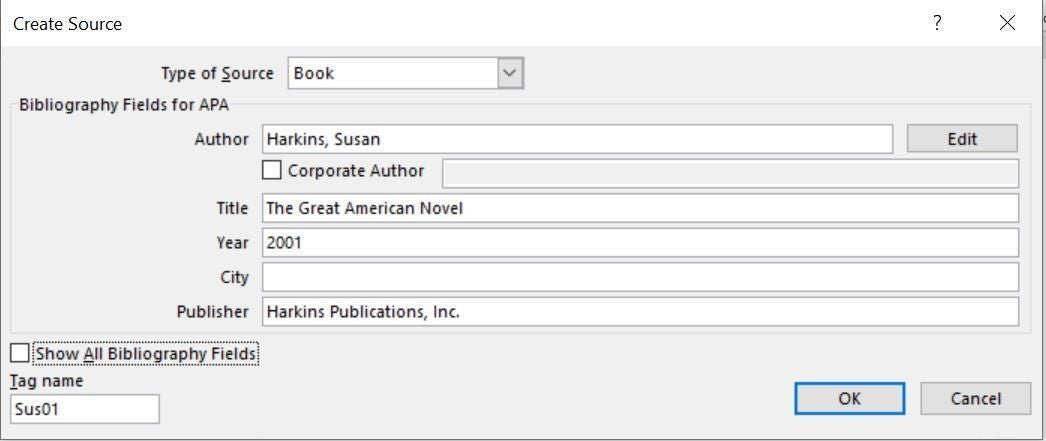
Most of these fields (Figure A) are self-explanatory, though I want to call your attention to two options:
- Show All Bibliography Fields: When enabled, it shows a lot more fields. Most of us will never need those fields, but they’re available.
- Tag Name: This field is automated–it’s comprised of the author’s name and year. Word uses this tag internally to identify each citation.
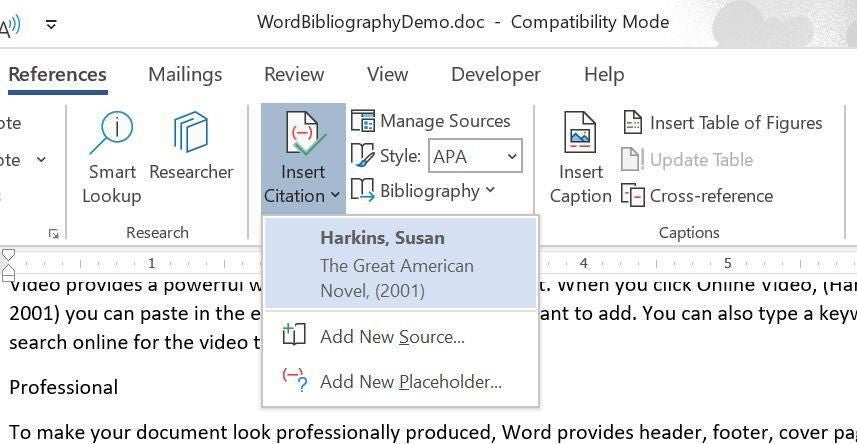
Figure B

Once the citation exists, you don’t have to enter the information again. When referencing that source again, click Inert Citation in the Citations & Bibliography group and choose it from the resulting dropdown (Figure C).
More about Software
- Software Installation Policy
- Five Methods to Insert a Checkmark Into Microsoft Office Products
- How to Hide and Handle Zero Values in an Excel Chart
- How to Use Section Breaks to Control Formatting in Word
Figure C
Note about the author name and tags: When entering author names, you should be consistent because of the tags. Word uses the first three characters of the first name you enter: Susan Harkins 2001 is Sus01 but Harkins, Susan 2001 is Har01.
Before we continue, enter a few more sources using the different types of sources (books, periodicals, etc.)–you’ll want more than one citation when you create the bibliography. Notice that the fields change with different source types. Although this tool is flexible, it can’t correct typos. Be careful with your case, spelling, and so on. Bibliographies are very difficult and tedious to proof after the fact.
How to add a bibliography in Microsoft Word
After you have added all your sources and cited (marked) all your text references, you’re ready to create the bibliography. It’s similar to adding an index or table of contents—Word does most of the work for you. To add the bibliography, follow these steps.
- Click where you want to insert the bibliography—usually at the end of the document.
- Click the Reference tab. Then, click Bibliography in the Citations & Bibliography group.
- From the resulting dropdown list, choose a bibliography. There are several, and I suggest you explore the options at another time.
That’s it! Everything you need is already in the document. Word will pull everything together for you. Figure D shows the results of choosing the first item in the dropdown list.
Figure D
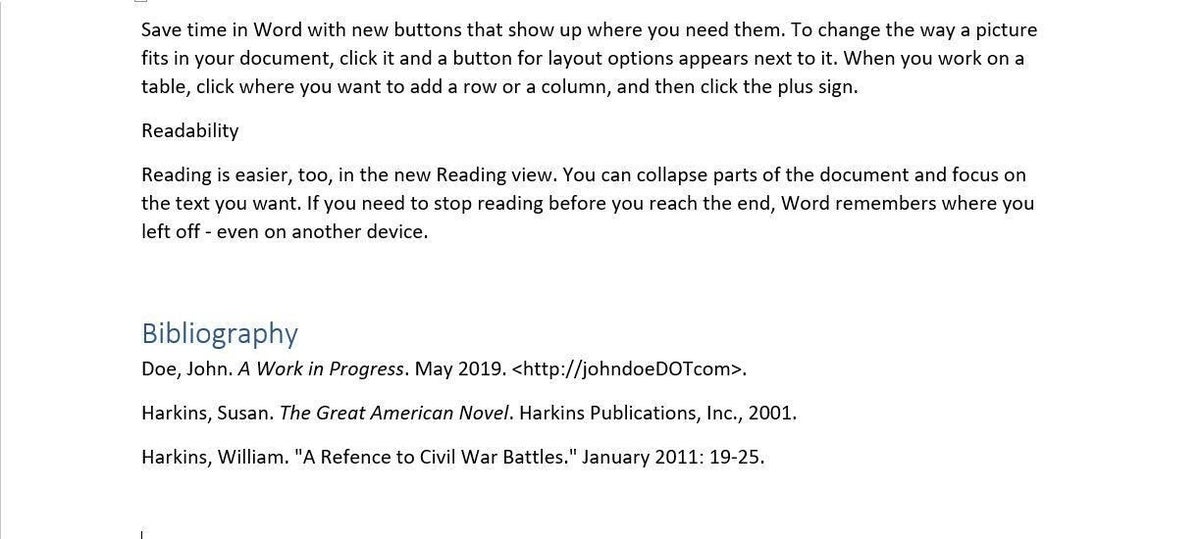
If you had chosen a style other than APA, the list would be formatted a bit differently, but Word knows where to put all the commas, periods, what needs to be italicized or in quotes, and so on.
Understanding sources
If you don’t get all the items you expected, you might need to take one more step. In the Citations & Bibliography group, click Manage Sources. If there are citations in the left list (which is the master list) that aren’t in the current list to the right but should be in the current document’s bibliography, copy them to the current list (Figure E). You can also see a preview of the APA style. Then, try again. This isn’t a bug–you control which citations go in the document and which don’t. Once you add a source, it’s available to other documents.
Figure E
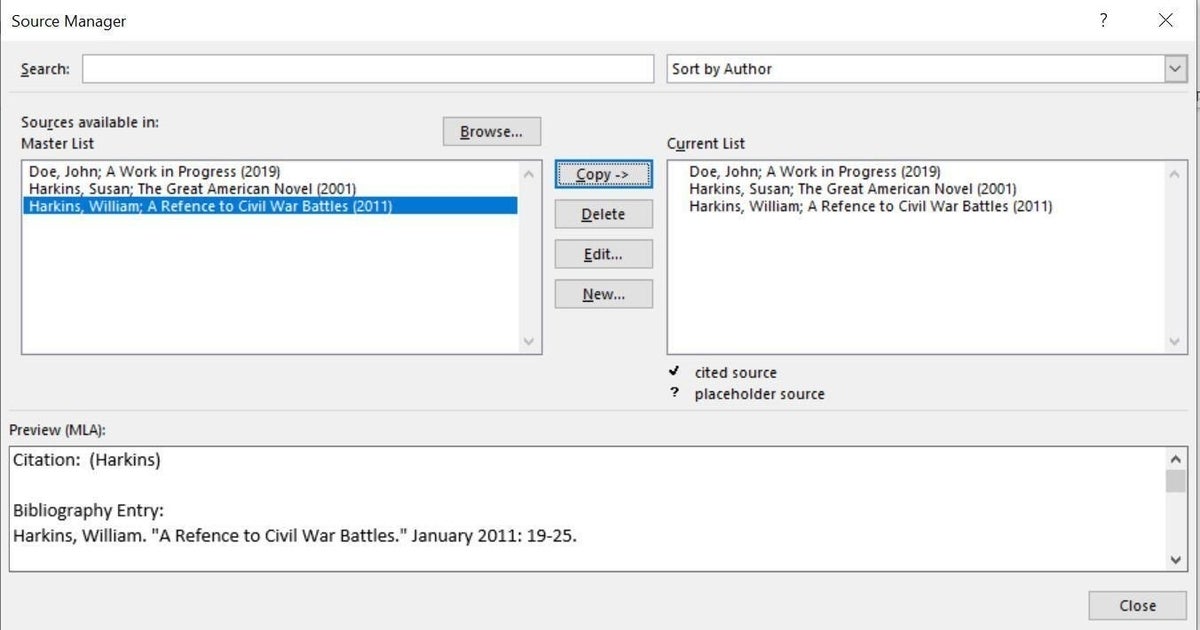
The Source Manager gives you access to all sources. You can search for a title or sort by author. You can edit a source. Sources are stored separately from the document, so you can cite a source that you created for one document in another. The master and current lists represent all sources and sources for the current document, respectively.
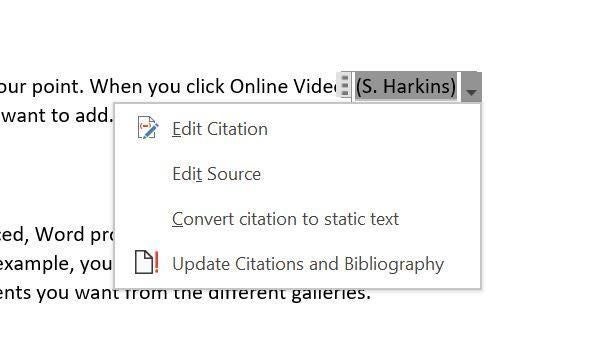
You can edit a source without using the Manage Sources dialog. You can do a lot from the citation at the document level because these “text” references are actually field codes. Simply click it and then click the dropdown arrow to display the available options shown in Figure F.
Figure F
How to fix a known bug with the APA style
There is a known bug with the APA style (sixth), and fortunately, it has an easy fix. If you end up with multiple citations from the same author, Word might fill in the title when it isn’t supposed to. If this happens, try this quick fix.
- Click the citation (code)—the one in the document that follows the in-text reference.
- Click the dropdown arrow and choose Edit Citation.
- Click Title checkbox and click OK.
Share your experiences of creating a bibliography in Word
Creating a bibliography in Word is easy. You can create a custom style if necessary, but doing so requires specialized knowledge in .xml development. If you’ve had trouble with a complex document and worked through it, share your experience in the comments section below.
Send me your Microsoft Office question
I answer readers’ questions when I can, but there’s no guarantee. Don’t send files unless requested; initial requests for help that arrive with attached files will be deleted unread. You can send screenshots of your data to help clarify your question. When contacting me, be as specific as possible. For example, “Please troubleshoot my workbook and fix what’s wrong” probably won’t get a response, but “Can you tell me why this formula isn’t returning the expected results?” might. Please mention the app and version that you’re using. I’m not reimbursed by TechRepublic for my time or expertise when helping readers, nor do I ask for a fee from readers I help. You can contact me at susansalesharkins@gmail.com.