


Status labels are far more important than you may give them credit for. With the right status label, anyone can see exactly where an asset is in the workflow. From planning, in progress, testing, done and shipped, these status labels make it much easier to create a viable workflow for your teams.
SEE: Hiring kit: Project manager (TechRepublic Premium)
Out of the box, most project management platforms come with a set list of status labels. These are fairly generic and are sufficient for most projects, but sufficient probably isn’t good enough for your needs. Every project is different and has unique needs that might well require status labels that are outside the norm. You might need labels for things like:
- Planning
- Pre-production
- Post-production
- Beta testing
- Focus groups
- Delivered
The list could go on and on. With some project management tools, creating unique statuses can be a bit of a challenge. With monday work management, however, it’s quite simple. Let me show you how it’s done.
What you’ll need to create unique status labels on monday work management
The only thing you’ll need for this is a valid monday work management account. You can use either a free or paid account, as the option to create new status labels is available for both plans.
How to create a new status label on monday work management
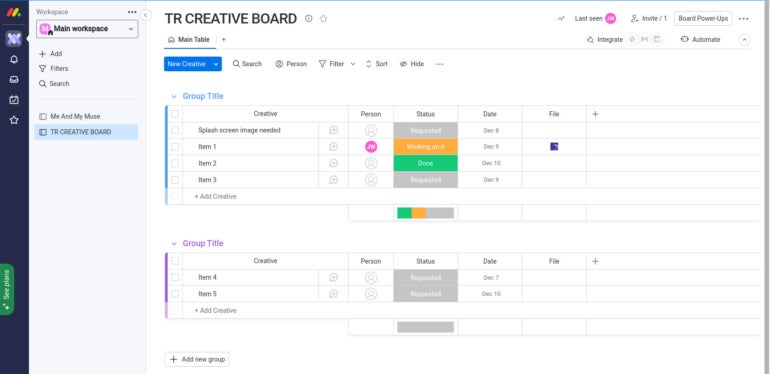
The first thing to do is log into your monday work management account. Once you’ve done that, navigate to the Workspace and board you want to use. The best view to do this in is the Main Table view, but you can also do it from the Kanban view fairly easily.
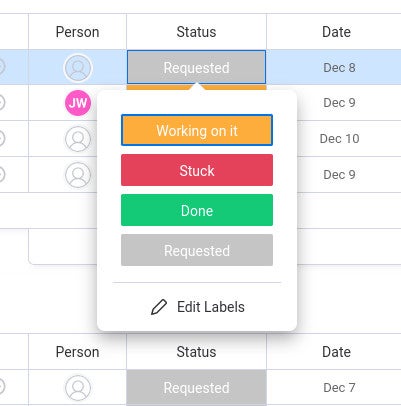
You might think this task is taken care of within the Settings window: It’s not. Instead, go to your Main Table view and click on any status (Figure A).
Figure A
A pop-up will appear. From that pop-up, click Edit Labels (Figure B).
Figure B
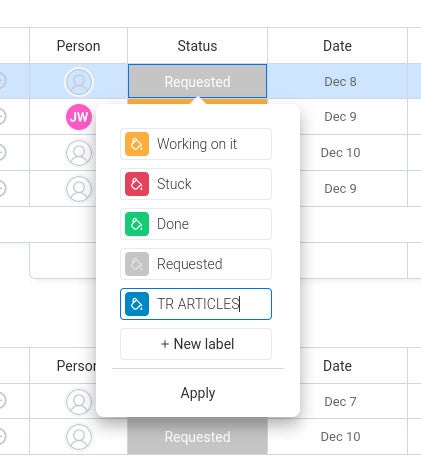
The pop-up will change to include a New Label button (Figure C). Click that to create the new button.
Figure C

Type the name of your new label (Figure D), select a color for it and click Apply.
Figure D
The new label won’t automatically apply to the status you selected. If you want to change the status to the new label, select it in the pop-up and you’re good to go.
Labels make everything flow better
With the right labels, your project will flow better because it’ll be simple to know exactly where a task is in the process. You don’t want to leave team members guessing, so create the right collection of status labels and make things easy for everyone.
Subscribe to TechRepublic’s How To Make Tech Work on YouTube for all the latest tech advice for business pros from Jack Wallen.