Google added a pen tool to let a presenter add marks on Google Slides; the pen joins the laser pointer option as a way to draw attention to parts of your presentation. While laser pointer lines disappear soon after you draw them, pen marks persist while you present and go away when you exit the slideshow.
The pen and laser pointer tools help you direct attention or emphasize a point; however, only the pen tool makes it possible to draw on your slides as you present. And, since the annotations remain on the slides only for the duration of your presentation, you may use the pen to add information that you might not want to otherwise permanently place on a slide.
This tutorial covers how to use the pen tool in Google Slides when you present from the web or Apple mobile devices. If you want to deliver a drawing-centric presentation using another Google tool, Jamboard is worth exploring.
Jump to:
- How to use the pen in Google Slides
- How to change the pen color in Google Slides
- How to erase pen annotations in Google Slides
- How to draw on Google Slides in the mobile apps
- Want to preserve annotation or collaboration? Explore Jamboard
How to use the pen in Google Slides
Initially, explore the methodical way to access the pen when you present. This sequence exposes a variety of other Google Slides controls, such as access to speaker notes, captioning and auto-play options.
- Open your presentation with Google Slides in a web browser.
- Select the Slideshow button in the upper-right area.
- Select the three dot button to access the options menu in the lower-left, next to the slide advance indicator.
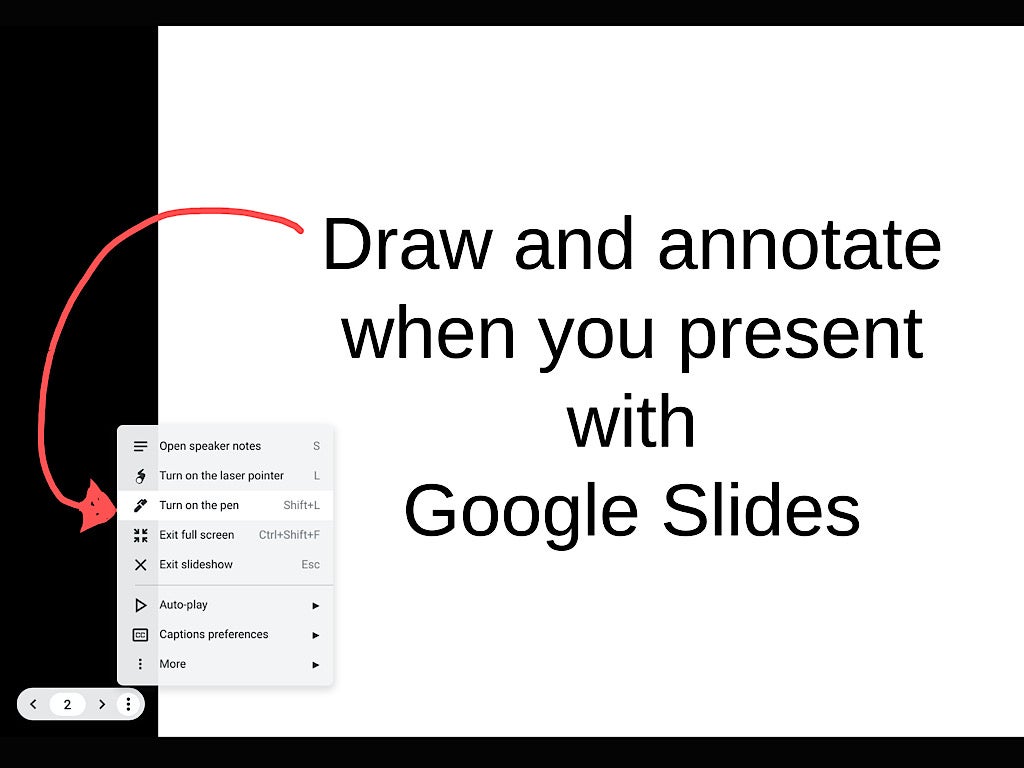
- Select the Turn On The Pen option (Figure A).
Figure A
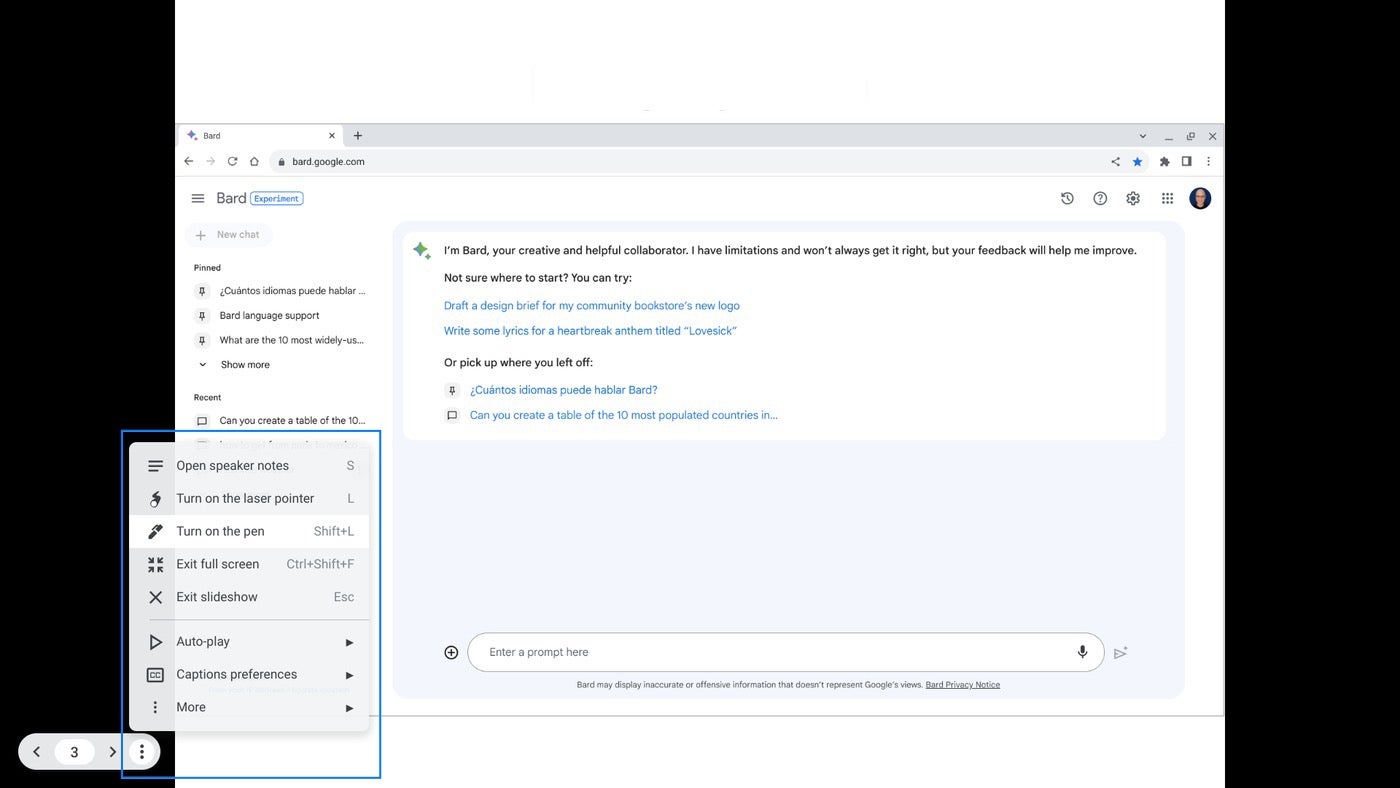
With the pen enabled, you may click-and-hold to draw with a mouse or touchpad, or with a stylus on a touchscreen device. The entire screen, aside from the control area in the lower-left, can serve as your canvas. In the event your slides don’t fill the screen, such as when you present 4:3 format slides on a 16:9 screen, you may make marks in the margins. Just make sure to use a color that contrasts with the display background — a black pen on a black background won’t leave a visible mark.
Later, learn the keyboard shortcut to toggle the pen: Shift+L. One memory aid for this is to recall that the L key toggles the laser (starts with L) pointer while presenting with Google Slides. So the pen toggle is the laser key plus Shift.
How to change the pen color in Google Slides
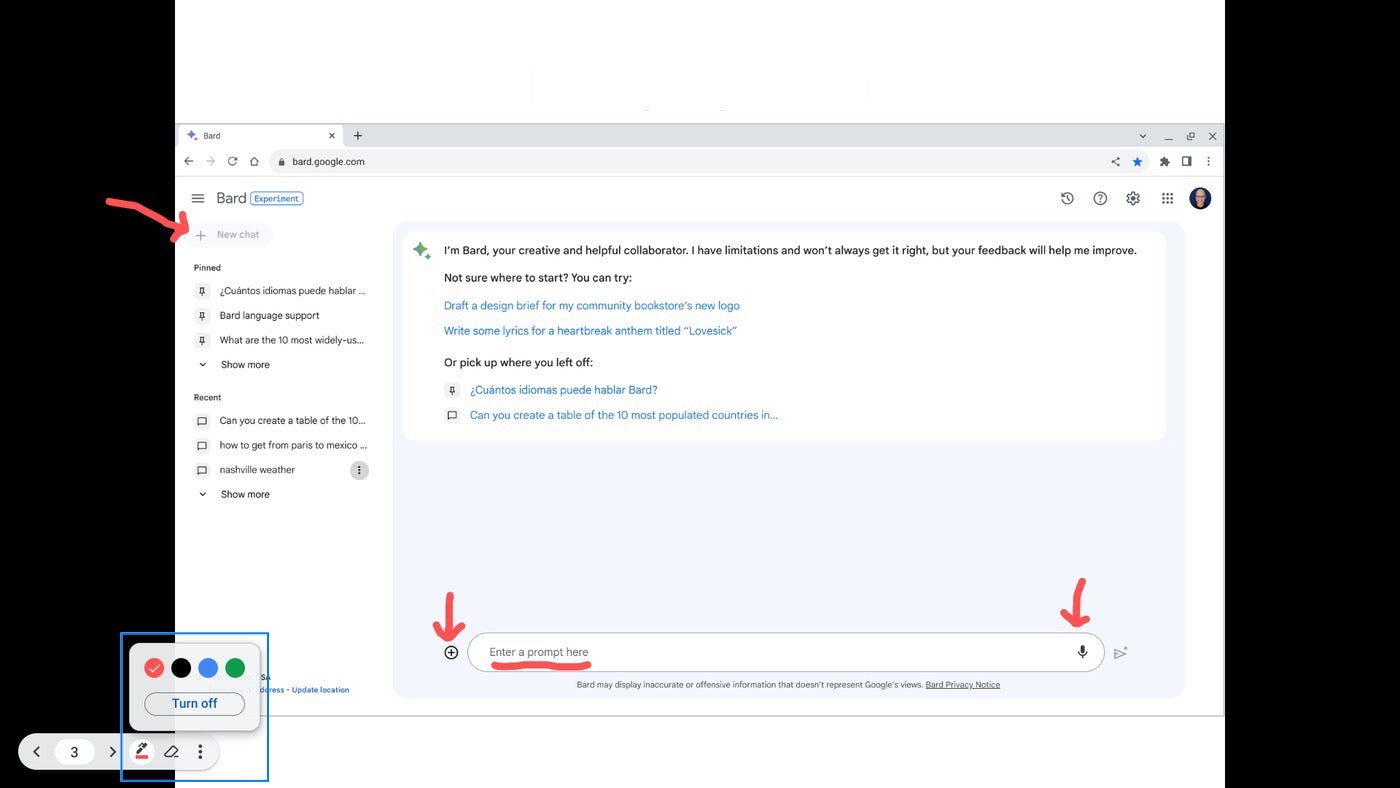
The presentation pen is red by default, but you may switch it to black, blue or green at any time. To do so, follow these steps.
- Move the mouse into the lower left corner area. The presentation controls will display.
- Select the pen icon to access the pen menu.
- Select any of the four available colors: Red, Black, Blue or Green (Figure B). The menu also offers a Turn Off option.
Figure B
- Return to drawing on your slides as desired.
How to erase pen annotations in Google Slides
Your annotations only remain on your slides when you present; if you exit the presentation, they’ll automatically be removed. Alternatively, you may remove all annotations by pressing Shift+A at any time.
If the pen is active, you may also access the eraser icon from the pen menu by following these steps.
- Move the mouse into the lower left corner area. The presentation controls will display.
- Select the eraser icon to access the erase menu.
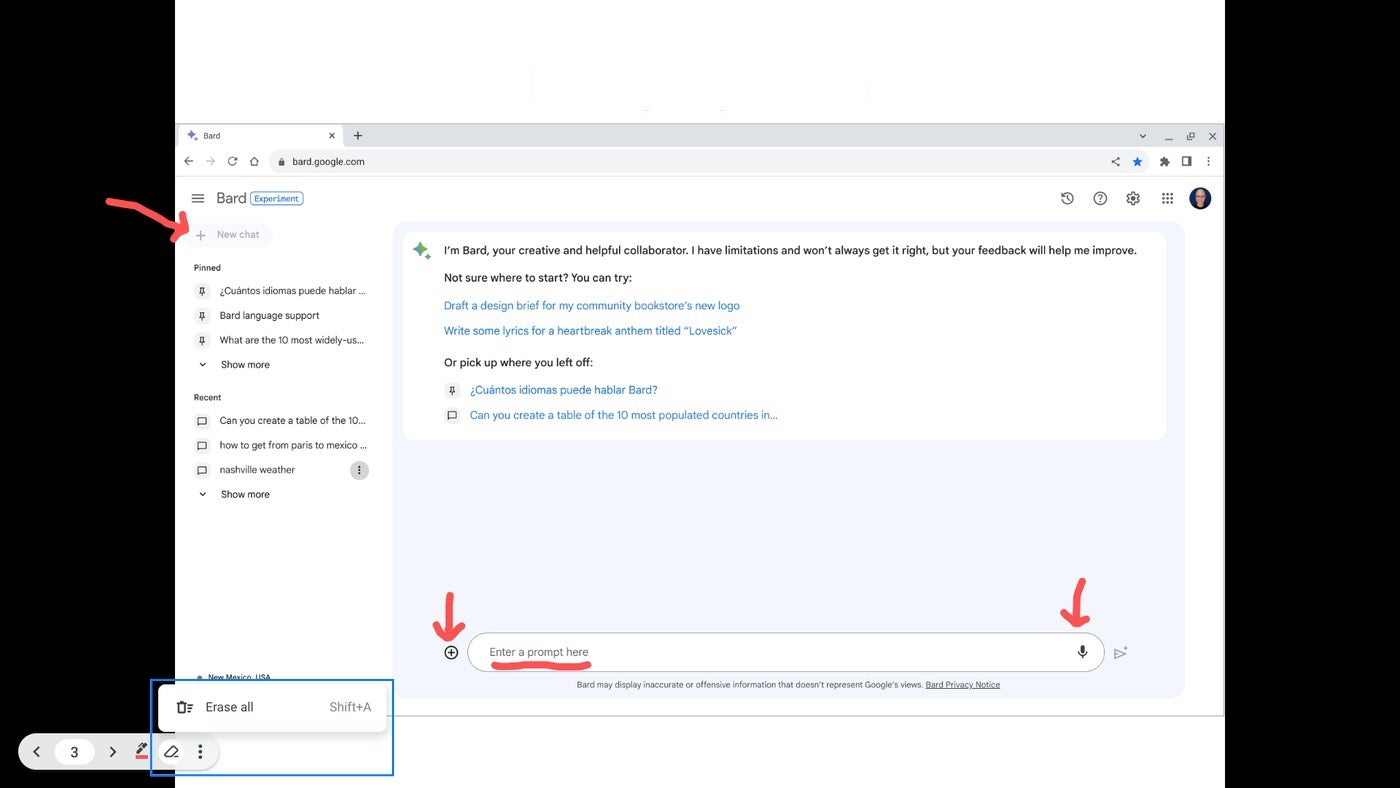
- Select Erase All (Figure C). All of the pen marks you have made throughout your presentation will be erased.
Figure C
How to draw on Google Slides in the mobile apps
When you present from Google Slides to Google Meet with the mobile apps on iPhone or iPad, a pen icon displays at the top of the display (Figure D, top). Select it and you may draw in red on the slide. Tap the Clear drawing button at the bottom (Figure D, bottom) to remove your annotations.
Figure D
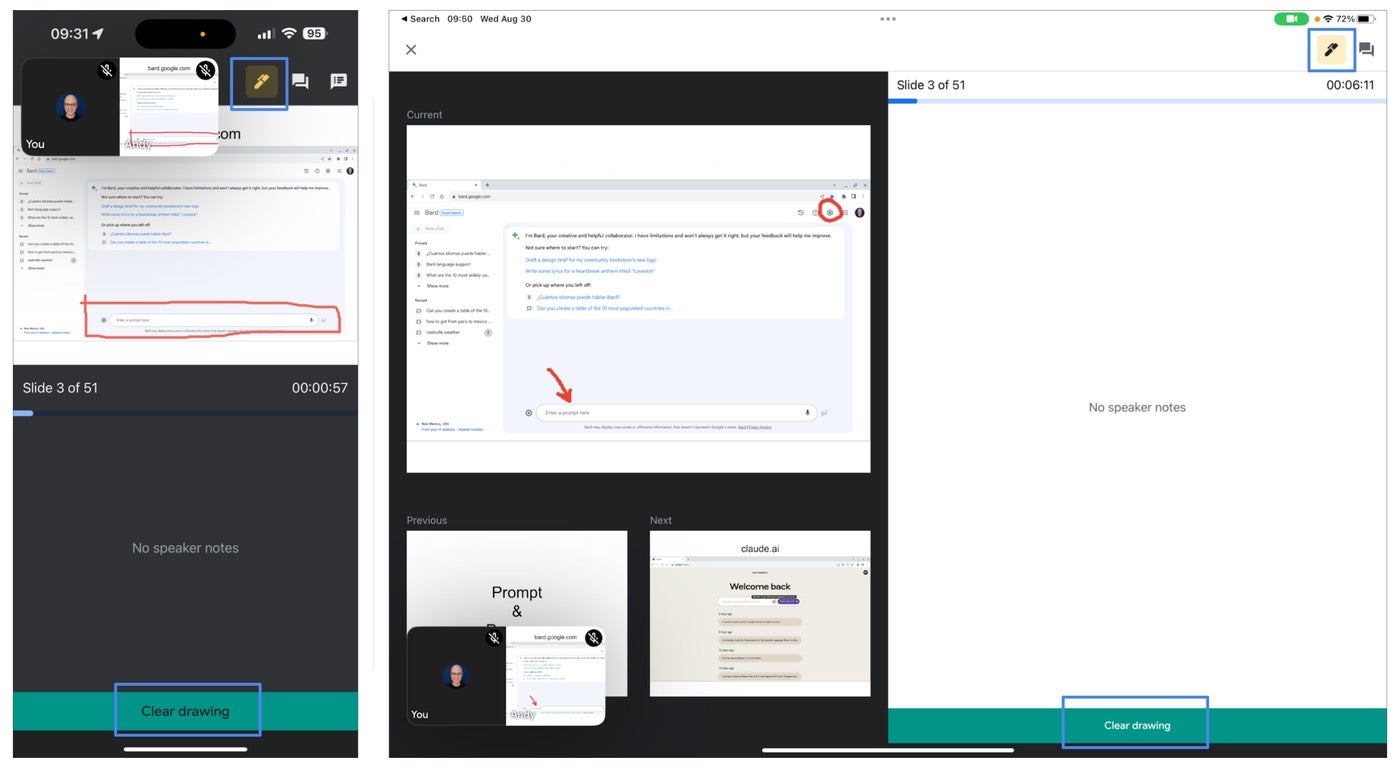
Unlike when you present from the web, your annotations do not persist as you move between slides; they disappear as soon as you move to another slide. (The draw feature is not available when presenting from Google Slides to Google Meet on Android.)
Want to preserve annotation or collaboration? Explore Jamboard
Google Jamboard allows you to give something closer to an old-school chalk talk, which is a talk delivered by a presenter accompanied only by text or illustrations drawn on a chalkboard, without prepared slides. You technically could give this type of talk with a blank slide in Google Slides and the pen tool, but Jamboard offers a more robust set of tools for drawing.
SEE: How to use five Jamboard features to create, illustrate and collaborate (TechRepublic)
To get started, access the Whiteboarding tool in Google Meet by going to Activities | Whiteboarding or go to https://jam.new in a modern browser. Jamboard lets more people draw simultaneously (up to 50, rather than just the presenter in Google Slides), with more pen options (four, rather than one in Slides) and more pen colors (six, rather than four in Google Slides) (Figure E). The Jamboard eraser lets you erase lines, not just all annotations as in Google Slides. Jamboard also lets you quickly add shapes, images and notes.
Figure E
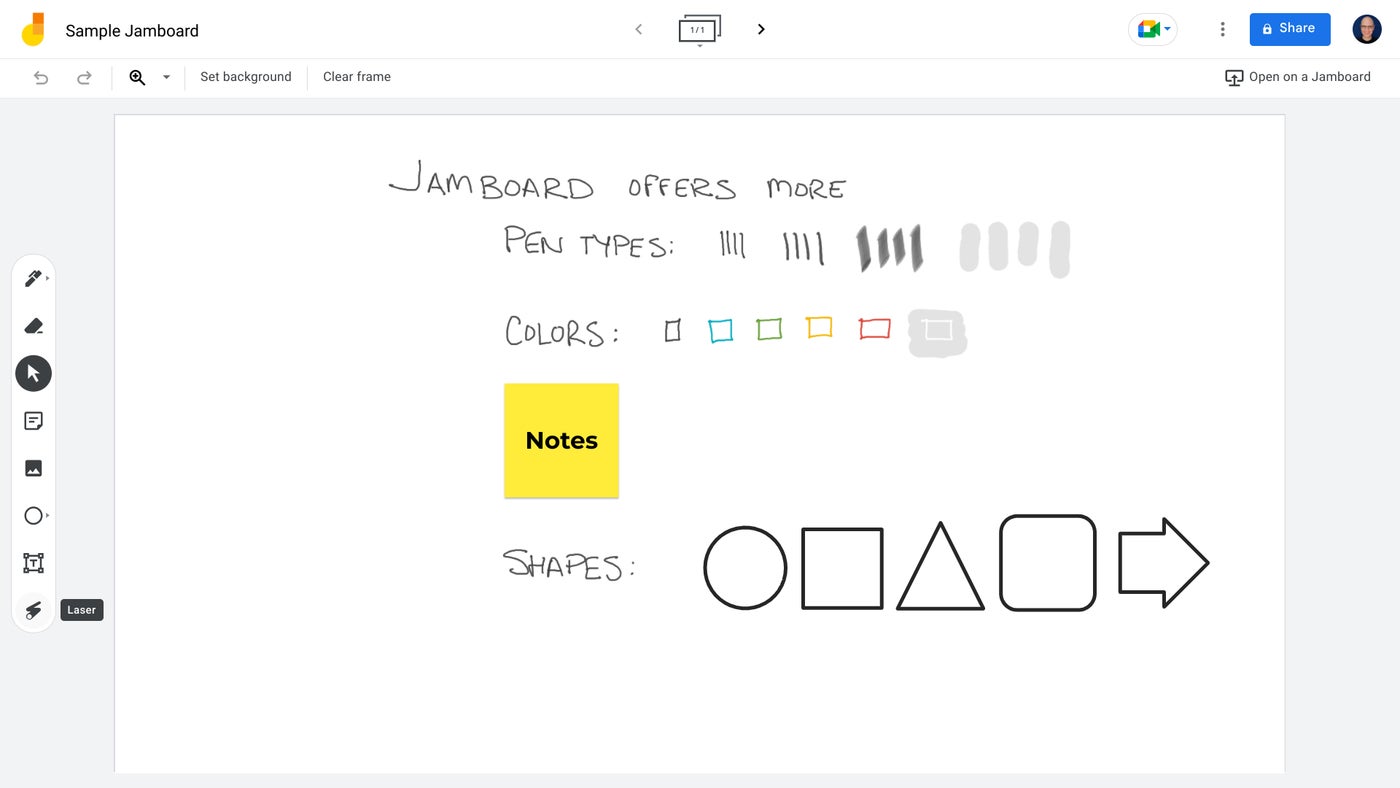
However, be aware that Google has announced that Jamboard will wind down in late 2024, so you will need to seek an alternative before then.
Mention or message me (@awolber) on Mastodon to let me know how you use the pen and laser pointer in Google Slides to annotate your presentations or how well Jamboard serves your drawing-centric presentation needs.
