I cannot tell you how many times I’ve power washed my various Chromebooks–it happens regularly. Maybe I’ve switched from the stable to the beta channel, or maybe I just want a fresh start. No matter the reason, there’s always the threat of something happening when I go through the process of resetting a Chromebook back to factory defaults.
That something is losing any and all files I’ve downloaded.
When you power wash a Chromebook, it trashes everything in the Downloads folder. The problem is, you inevitably remember that the second it’s too late. Because of this, some time ago I started configuring the default Downloads folder for all of my ChromeOS devices to a non-standard location. By doing this, it’s saved me a lot of headaches.
This change also has the added benefit of making any file I download available from within Google Drive, so instead of the file being housed in local storage, it’s now in my Google cloud account. Win-win.
If you’re an astute Chromebook user, you’ve already picked up on what I’m about to show you. If you’re one to do a regular power washing on your ChromeOS devices, I highly recommend you make this change.
Let me show you what I’m talking about.
SEE: Top cloud providers in 2020: AWS, Microsoft Azure, and Google Cloud, hybrid, SaaS players (TechRepublic)
A better default download location
By default, the Downloads folder for a Chromebook resides on the device’s internal storage. That’s why, when you reset a Chromebook, everything you’ve downloaded is permanently removed.
What I opt to do is change that default Download location to a folder within my Google Drive account. Obviously, this comes with a bit of a caveat: In order to access Google Drive, the Chromebook must have an internet connection. For most, this isn’t an issue, but if you find yourself frequently beyond the realm of connectivity, I have a solution for that as well.
Let’s find out how to make this work.
How to change your default downloads location
The first thing we need to do is create a folder to house your downloads on Google Drive. To do this, log in to Google Drive and click New. From the drop-down, click Folder. Name your folder something like CHROMEBOOK or DOWNLOADS. Click Create and the folder is ready to be used.
Now that you have a destination folder created, let’s configure Chrome to use it on your Chromebook. To do this, open the Chrome browser on your Chromebook, click the Menu button in the upper-right corner and click Settings from the drop-down.
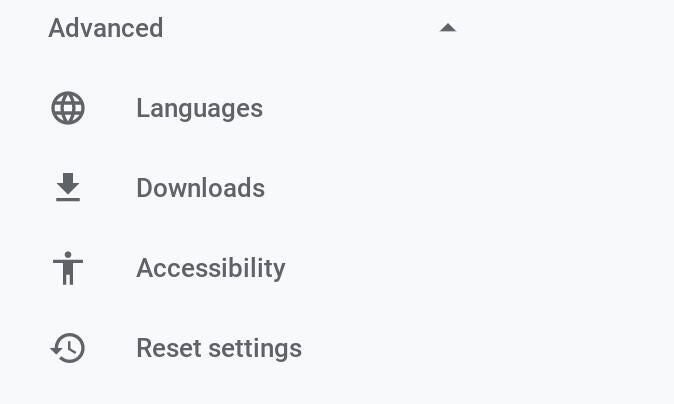
In the Settings window, click to expand the Advanced section in the left sidebar (Figure A).
Figure A

Click Advanced | Downloads and then click Change (Figure B).
Figure B

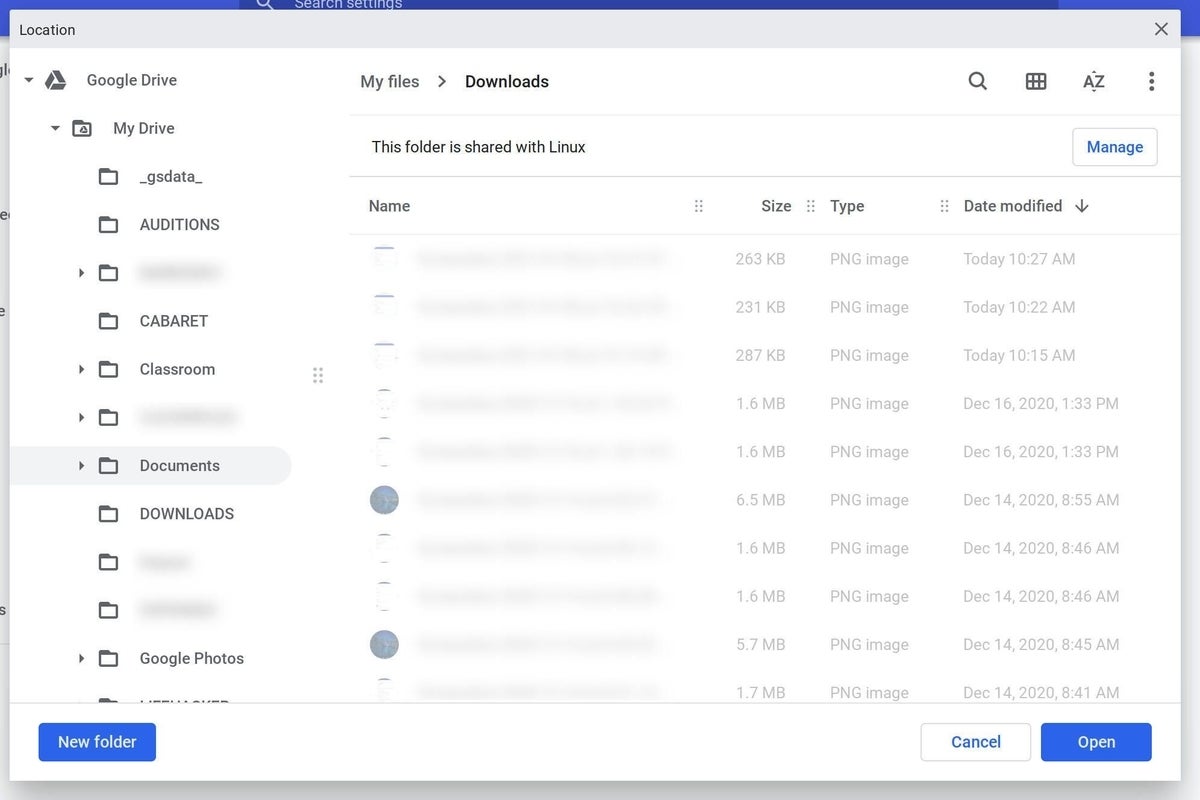
In the folder selection window, expand My Drive, navigate to the newly-created folder, select that folder, and click Open (Figure C).
Figure C

If you’re one to frequently find your Chromebook without a network connection, make sure to enable Ask Where To Save Each File Before Downloading. By doing this, Chrome will always ask you where to save the downloaded file. That way, if you don’t have a network connection (and cannot access the new Downloads directory on Google Drive), you can still save that file to the local storage. Of course, if you don’t have a network connection, chances are pretty slim that you won’t be downloading any files anyway, so that point is mostly moot.
Reconfiguring your Chromebook to save downloaded files to Google Drive is a great way to ensure you never lose those files. On top of which, it’ll save precious internal storage space on your Chromebook. Yes, it does require a network connection, but if you find yourself in a situation where you don’t have a network connection, you won’t be downloading files in the first place. This should be considered a no-brainer.
Subscribe to TechRepublic’s How To Make Tech Work on YouTube for all the latest tech advice for business pros from Jack Wallen.

Image: Jack Wallen