A Google Form gives you a great way to gather responses from people. From a one-question form to a long multi-section quiz, a Google Form eliminates the need to decipher and tally responses on sheets of paper. A form also serves as an elegant alternative to asking a group of people questions in email.
What's hot at TechRepublic
- Blackpoint Cyber vs. Arctic Wolf: Which MDR Solution is Right for You?
- Why AWS Sellers Choose Deepgram Over Other Voice AI Tools
- SS&C Intralinks DealCentre AI vs. Datasite: Which platform is built for the future of dealmaking?
- SS&C Intralinks FundCentre AI vs. Juniper Square: Which platform better supports modern private markets fund managers?
- Verito vs. Rightworks: Which IT Provider Is Best for Your Firm?
Google Forms can compile all the standard survey fields–such as text, multiple choice questions, dropdowns, linear scales, and grids–to serve all sorts of data collection needs. They can be used to collect contact information on a website, gather inventory data, collect votes, obtain feedback, evaluate a product or service, test knowledge with a quiz, or replace a basic customer intake form.
And Google Forms also handles videos, photos, and files. You can include photos and/or YouTube videos in your form, and you can allow people to upload files in their responses. You can use these capabilities to show people a video, then ask for a response, or to ask people to vote for different images. A conference organizer, for example, could ask people to submit a photo or logo for use in a brochure, and ask people to upload the file. (You can limit both the types and sizes of file uploads allowed in your form.)
Here are four steps to help you get started with Google Forms.
1. Create your questions
First, create your questions. For a short form, such as a web contact form that gathers an email address, name, and message, you can likely draft your questions directly in a Google Form. But for longer surveys or quizzes, I prefer to draft my questions in a Google Doc first. I find this helps me focus on the wording of each question.
Ask only the questions to which you truly need a response. What action will you take based on the responses? Do you really need to know the phone number, email address, and mailing address for every respondent? Can you omit questions? For example, when you view responses in a Google Sheet, you might notice that the first column contains the date and time that each response was submitted–so you can omit fields you might have used on a paper form to track the date and/or time that a form was completed.
2. Create your form
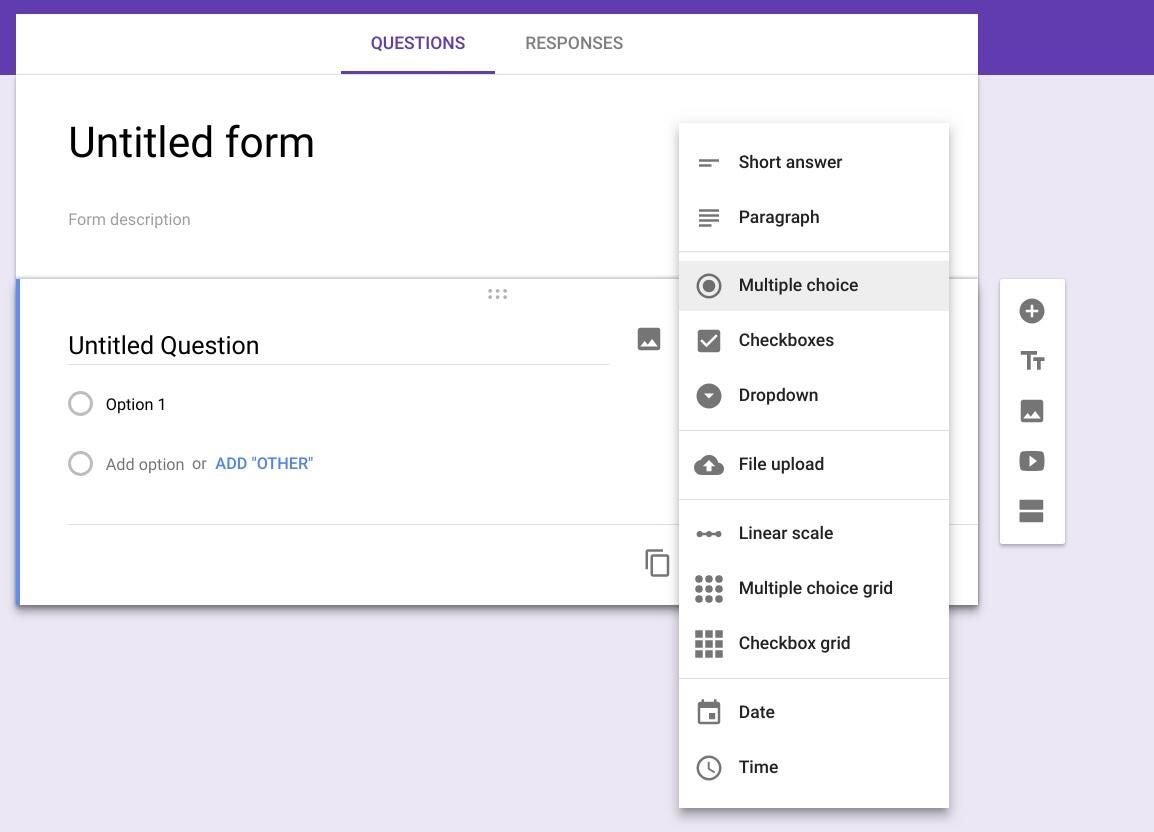
Next, go to https://forms.google.com in a desktop browser and select the button the lower right to create a new form. Add a title and description for your form, then enter your questions. Add new questions with the + to the right of your form. And add text, images, videos, or section breaks, as you wish. Change the question type by choosing an alternative from the dropdown list in the upper right of each question area.
To turn your form into a quiz, choose the sprocket in the upper right (to the left of the Send button), select the “Quizzes” tab, and move the slider to “Make this a quiz.” Review the grade release options, and modify what respondents can see here. Then save your settings.
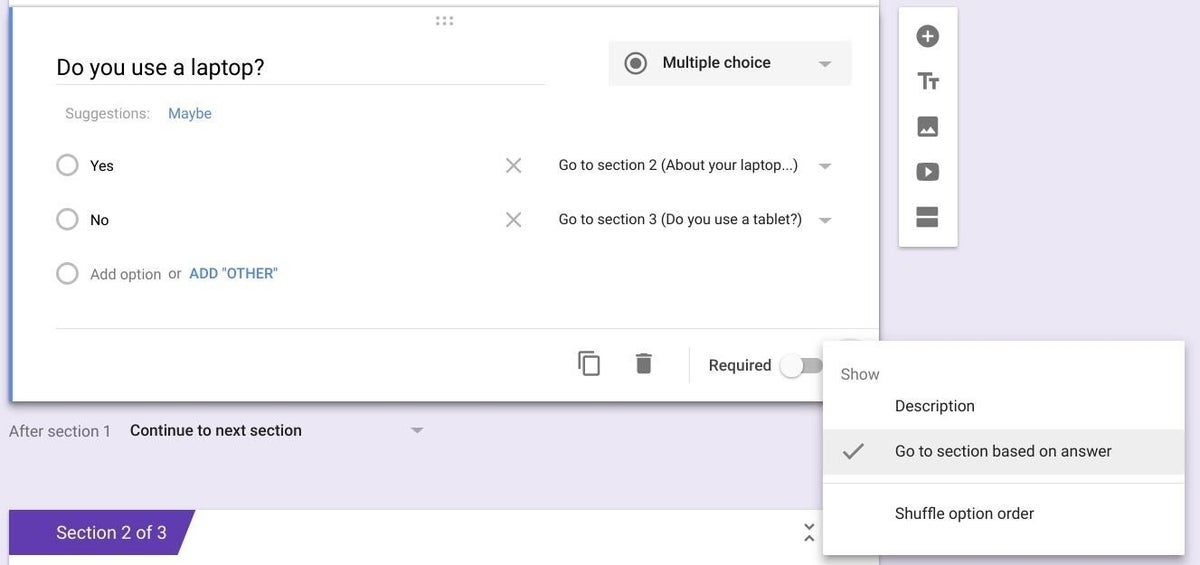
You can configure your form so that not every person has to answer every question: Forms lets you skip a section of questions, based on a person’s response to a multiple choice or dropdown question. For example, if a person responds “No” to “Do you use a laptop?,” you can configure Forms to skip to the next section of questions. To do this, when on a multiple choice or dropdown question, choose the three vertical dots (to the right of the ‘required’ slider), then choose “Go to section based on answer,” then specify the series of questions to ask next for each answer.
If you intend for your form to be filled out only by other people in your G Suite organization, choose the sprocket (to the left of “Send” in the upper right), then check the box to “Restrict to <your organization> users.”
3. Send your form
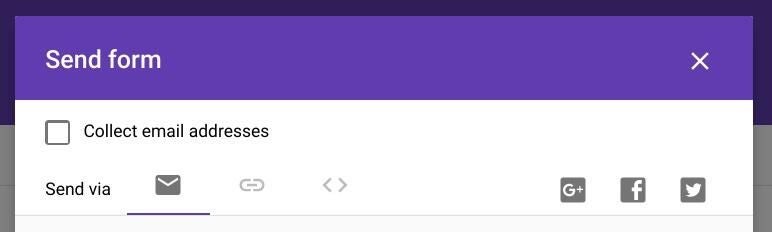
When you’re ready to accept responses, select the “Send” button in the upper right. Then choose from one of six ways to share your form: Email, a link, an embed code (for display on a web page), Google+, Facebook, or Twitter.
4. Receive and review responses
You can review responses at least three different ways. On the “Responses” tab in the form, you can view either a summary of responses or see each individual response. Or, select the Google Sheet icon to view data in rows and columns–with timestamps–in spreadsheet format.
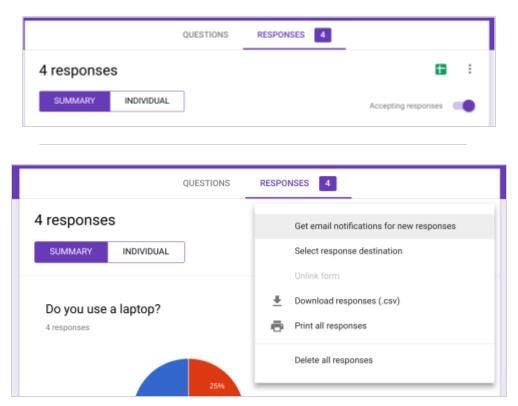
You may choose to receive an email when you receive a response. On the Responses page, select the three vertical dots (to the right of the Google Sheets icon), then select the “Get email notifications for new responses” to enable email notifications. This can be especially helpful when you embed a Google Form as a contact form on a website, for example. (Note there are two other ways to access your form data on this same menu: Either download it as a csv file or print it.)
And, that’s it. The next time you create–or modify–a printed form, take a few extra minutes to turn it into a Google Form.
Your thoughts?
How do you use Google Forms at your organization? What data gathering processes have you replaced with Google Forms? Have you used video, images, or file uploads in your Forms? Let me know in the comments or on Twitter (@awolber).