You may have set up a CentOS server and, in the process, accidentally set it up with DHCP. If your CentOS server uses a GUI, changing that IP address from dynamic to static is very simple. But what if your server is a text-only machine? What do you do then? Fortunately, it’s not all that hard to configure that GUI-less server with a static IP address–you just have to know where it’s configured and know the syntax of the configuration. Of course, by nature of what we’re working on this is all done manually, so be prepared to type.
I’ll be working on CentOS 7. I’ll assume you already have the operating system installed and working properly, have access to the machine, and have an administrative account. With that out of the way, let’s set up that static IP address.
Find your interface
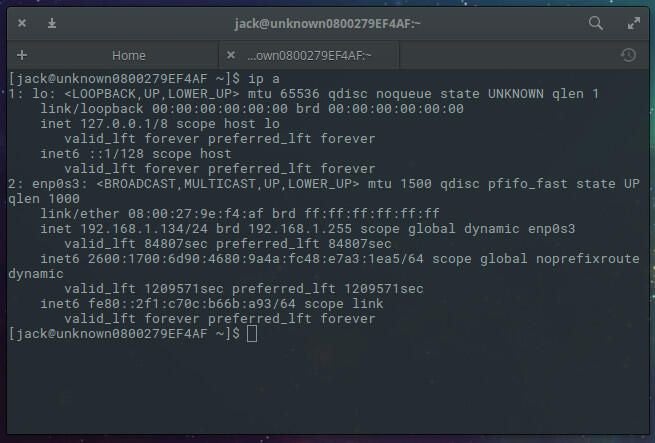
The first thing we must do is find out the name of our ethernet interface. A static IP address cannot be configured without this name. To do this, log into your server and issue the command ip a. The output of this command (Figure A) will include the name of the interface.
Figure A

As you can see, from my output, the name of my interface is enp0s3. Now that we know the name of our interface, we can configure the static address.
Configuring the address
Within the directory /etc/sysconfig/network-scripts/ you should find the file ifcfg-INTERFACENAME (Where INTERFACENAME is the name of your interface). In my instance, the file is ifcfg-enp0s3. It is important that you configure that file, and not the ifcfg-eth file. Open the correct file for editing with the command sudo nano /etc/sysconfig/network-scripts/ifcfg-enp0s3. We need to modify that file in order to not only change the protocol from dhcp to static, but to add the specific IP address. So when you open up that file, you’ll want to change:
BOOTPROTO=dhcp
To:
BOOTPROTO=static
Now you’ll need to add the entries to set not only the IP address, but the netmask, gateway, and DNS addresses. At the bottom of that file, add the following:
IPADDR=192.168.1.200

NETMASK=255.255.255.0

GATEWAY=192.168.1.1

DNS1=1.0.0.1

DNS2=1.1.1.1

DNS3=8.8.4.4
NOTE: All fields in bold, you will edit to reflect your networking needs. If you have fewer or more DNS entries, add or remove them as needed.
Save and close that file. In order to make the changes take effect, issue the command sudo systemctl restart network. Once the networking system has restarted, issue the command ip a to see that your IP address has changed to reflect your configuration.
And that’s all there is to setting a static IP address on CentOS. That wasn’t so hard, now was it? Don’t think this technique is limited only to GUI-less CentOS servers. You can use the same method to set a static IP address on a CentOS server with a GUI as well.
Enjoy having more control over your CentOS network interfaces.