


Soon after last week’s article, How to use Robocopy to quickly back up all your data in Windows 10, was published, I received email from several readers who were happy to learn about another way to back up and restore their data. In several of those email messages, I found complaints about File History’s inability to transfer data files to a new Windows 10 installation. For example, folks were encountering problems transferring data from an old PC to a new PC or restoring data on the same PC after replacing a hard disk.
Confused, I replied to back to these folks and let them know that File History can indeed be used to transfer data files from one Windows 10 installation to another. However, the responses I got surprised me and sent me on a Google search mission. The results revealed that the majority of Windows 10 users had problems using File History–so they concluded it can’t be used to transfer data files.
I then embarked on a on a week-long backup and restore expedition with File History, where I successfully transferred data from one Windows 10 installation to another multiple times. Along the way, I was able to replicate some of the most common mistakes that people make and figured out how to work around them.
In this article, I’ll walk you step by step through the correct way to use File History to restore files in a new Windows 10 installation. As I do, I’ll point out some of the most common stumbling blocks and explain how to avoid them. In next week’s article, I’ll show you how to work around the end result of those stumbling blocks if you have already fallen prey to them.
Must-read Windows coverage
- CrowdStrike Outage Disrupts Microsoft Systems Worldwide
- 10 Best Project Management Software for Windows in 2024
- Windows 10 Extended Security Updates Promised for Small Businesses and Home Users
- Securing Windows Policy
Working assumptions
To begin, I’m going to make a couple of assumptions. Of course, since we are talking about transferring existing data from one Windows 10 installation to another, I’m assuming that you have used File History to back up your data files on an external USB hard disk. I’m also going to assume that you are signing into both of your Windows 10 systems using the same Microsoft account. (Doing so will facilitate the replication of certain settings in your old Windows 10 installation to your new Windows 10 installation. For example, you’ll find the same user account picture, wallpaper, and email in your new Windows 10 installation.)
Finally, I’m going to assume that you are running the Creators Update version of Windows 10 on both your installations. The procedure should be similar in previous versions of Windows 10. I’m just pointing this out since my test systems are all running the Creators Update and that is the version you’ll see in the screen shots.
SEE: 20 pro tips to make Windows 10 work the way you want (TechRepublic PDF)
Getting started
Once you have signed into your new Windows 10 installation, connect the external hard disk containing your File History backup to your PC. When Windows recognizes the USB drive, click Start and type File History. You’ll then see the File History screen shown in Figure A, which informs you that no file history was found and that File History is turned off. This is normal, since you haven’t yet run File History in your new Windows 10 installation.
Figure A
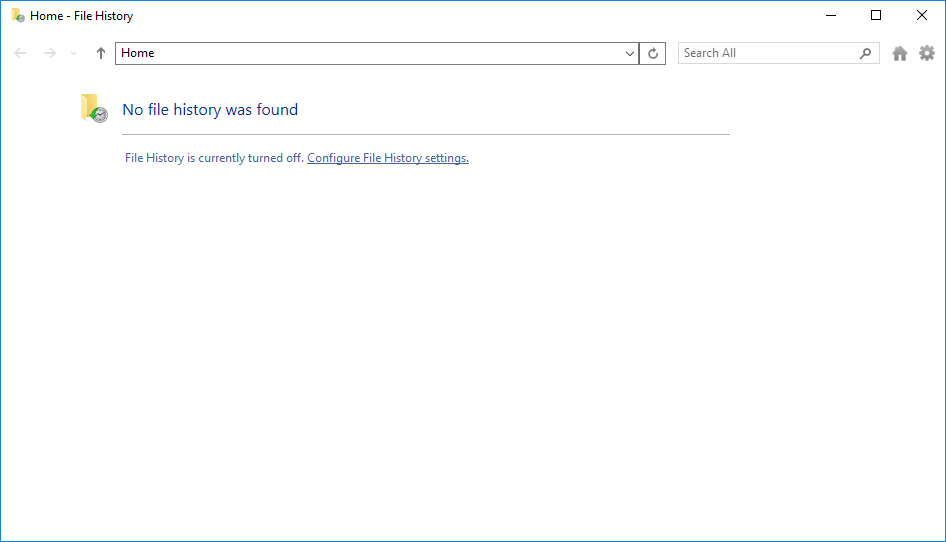
The No file history Was Found message is normal.
The first stumbling block
To continue, click Configure File History to bring up the File History screen shown in Figure B. This screen is where folks make two of the most common mistakes.
Figure B

The first screen is where two common mistakes occur.
To begin with, the main message on this screen is that File History is off. So it might seem logical that the first thing that you should do is click the Turn On button. However, that is a mistake. When you do so, File History will immediately begin creating a new backup and you’ll never get an opportunity to restore your existing backup.
The second mistake people make is assuming that selecting the check box titled I Want To Use A Previous Backup On This File History Drive will immediately initiate a restore operation. You select the check box, choose your existing backup, and click the Turn On button. You’ll then be prompted to click Run Now. But instead of beginning a restore operation, File History will immediately begin creating a new backup. Thinking that is not what is supposed to happen , many users panic and click the Stop button. If you do that, you’ll never get an opportunity to restore your existing backup.
In both of these cases, you won’t get an opportunity to restore your existing backup because the I Want To Use A Previous Backup On This File History Drive check box will never appear again once File History has made a new backup.
The correct way
The correct set of steps starting with the screen shown in Figure B above is to select the I Want To Use A Previous Backup On This File History Drive check box, then choose your backup from the Select An Existing Backup panel, as shown in Figure C.
Figure C
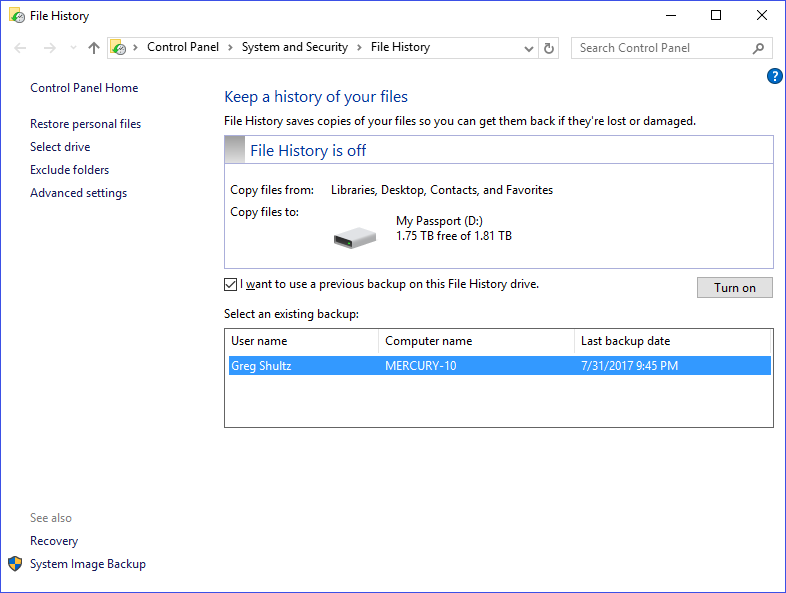
Select your existing backup and then click the Turn On button.
Next, click the Turn On button. When you do, File History will prompt you to click Run Now, as shown in Figure D.
Figure D
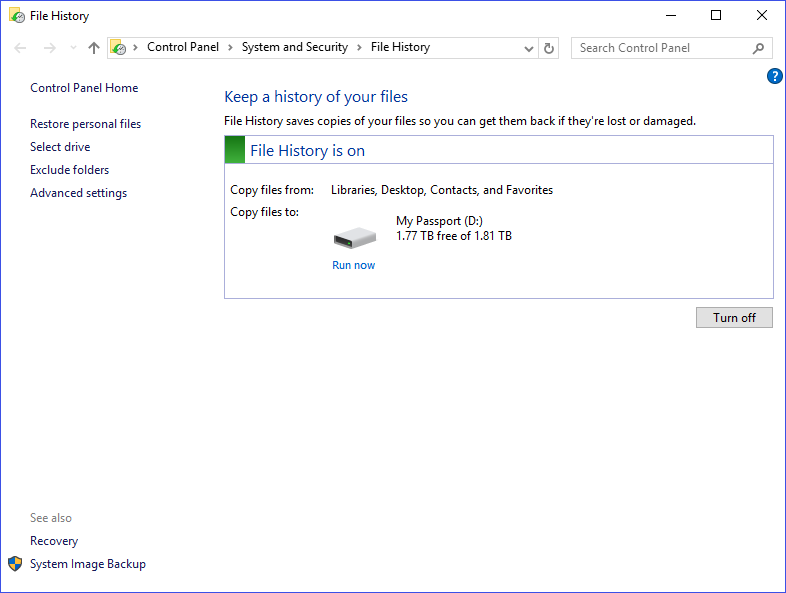
Click Run Now to initiate a backup operation.
When you Click Run Now, File History will begin making a backup of the data on your new Windows 10 installation, as shown in Figure E. This is normal and the operation will be pretty quick since there is really isn’t much data to back up.
Figure E
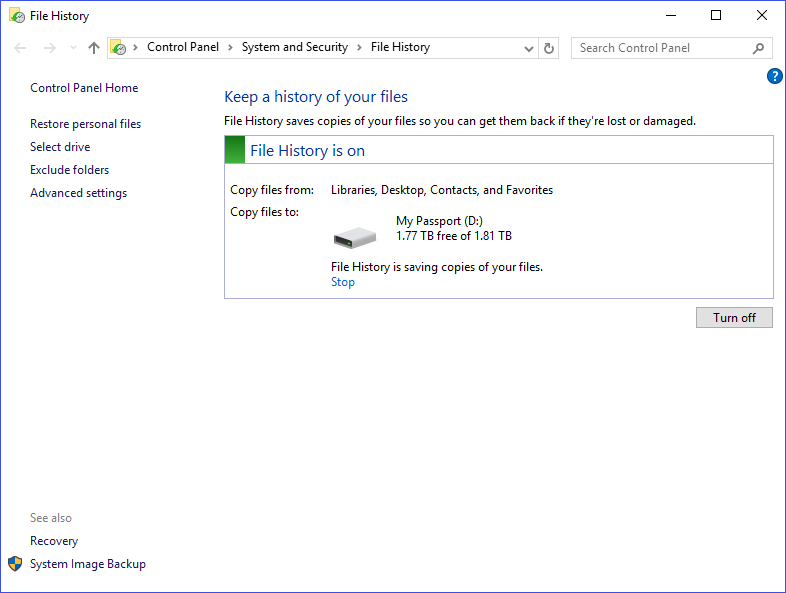
Making a backup of the data on your new Windows 10 installation is a normal part of the procedure.
When the backup completes, you’ll see a message that lets you know that files have been backed up, as shown in Figure F.
Figure F
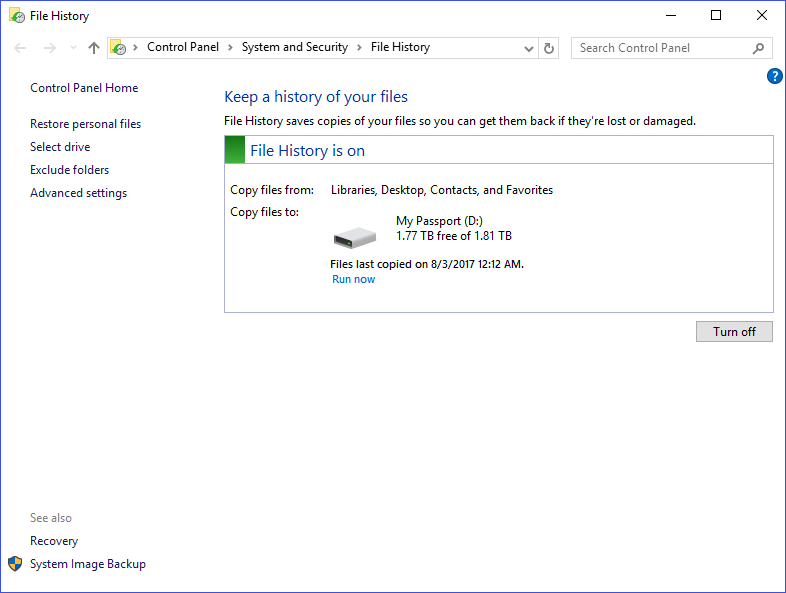
Since there is really isn’t much data to back up, the operation will be pretty quick.
The second stumbling block
At this point, you’re probably wondering how the operation that you just performed is going to help you restore the data from your previous Windows 10 installation into your new Windows 10 installation. There isn’t any outward indication that you will now be able to do so. No success dialog appears with a message telling you that you can now perform a restore operation. There’s no prompt that says something along the lines of Are you ready to restore your previous backup from this File History drive? Nothing.
You may even be inclined to fire up File Explorer, access your File History drive, and look for the backup you just made. However, you won’t see it in the normal place and in fact, all you’ll see is your previous backup. As such, it’s easy to be confused. Most people assume that the operation failed and that File History doesn’t work. They curse Microsoft and just give up.
It’s a mistake to assume that the operation failed due to the lack of any outward indication of success or prompt to begin a restore operation. If you followed the set of steps listed above, File History will have done its job correctly. More specifically, the operation that occurred in the background indeed prepared File History to restore the backup from your previous Windows 10 installation.
SEE: Windows 10 tip: Create a full image backup using this hidden tool (ZDNet)
What happens in the background
Without getting too technical, when you run File History, it basically creates a database of the files, their locations, and when they were backed up. This database is then linked to your specific computer name and your user name. It is also assigned a unique code that is keyed to your computer. This coding system is what prevents you from being able to just take a File History backup from one PC and restore it on another PC.
However, when you select the I Want To Use A Previous Backup On This File History Drive check box and allow File History to make a backup, it essentially incorporates the existing database, from your previous backup, into the new database it is creating for your new Windows 10 installation. As it does so, it combines both computer names and user names along with a new code that is keyed to your new computer. This combining operation is what allows you to restore your previous File History backup in your new Windows 10 installation.
Restoring the backup in your new Windows 10 installation
I recommend closing and relaunching File History before beginning the restore operation, just to be on the safe side.
Once you relaunch File History, you’ll see a screen similar to the one shown above in Figure F. To continue, locate and click Restore Personal Files on the left side of the screen. When you do, you’ll see the File History restore screen showing the most current backup, which is from your new Windows 10 installation. Click the left arrow once and you should find the backup from your previous Windows 10 installation, as shown in Figure G.
Figure G
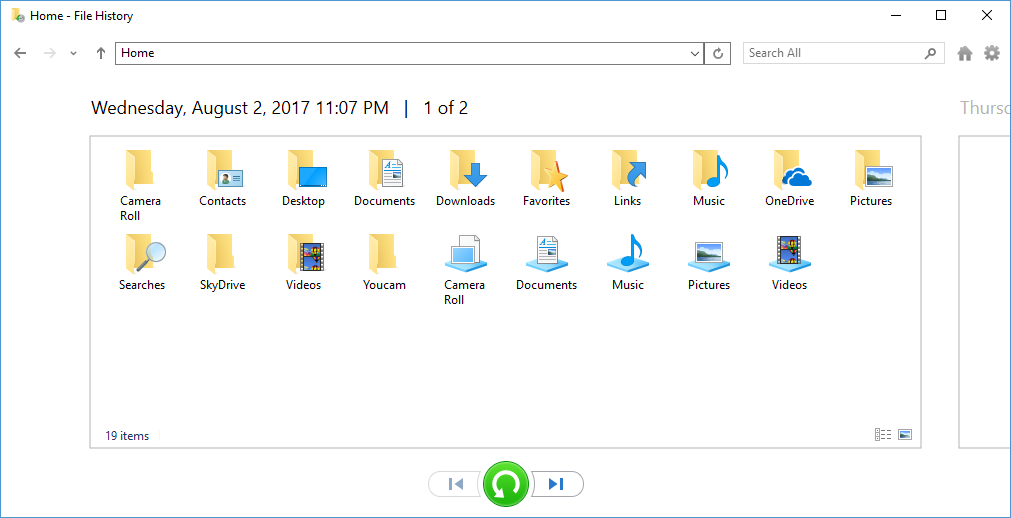
Clicking the left arrow should reveal the backup from your previous Windows 10 installation.
If you are unsure, you can always open a folder and look for files you know should be on the previous backup. When you are ready, make sure that no folders are selected. You can then initiate a full restore of your previous backup by clicking the Green restore button. The restore operation will commence, as shown in Figure H.
Figure H
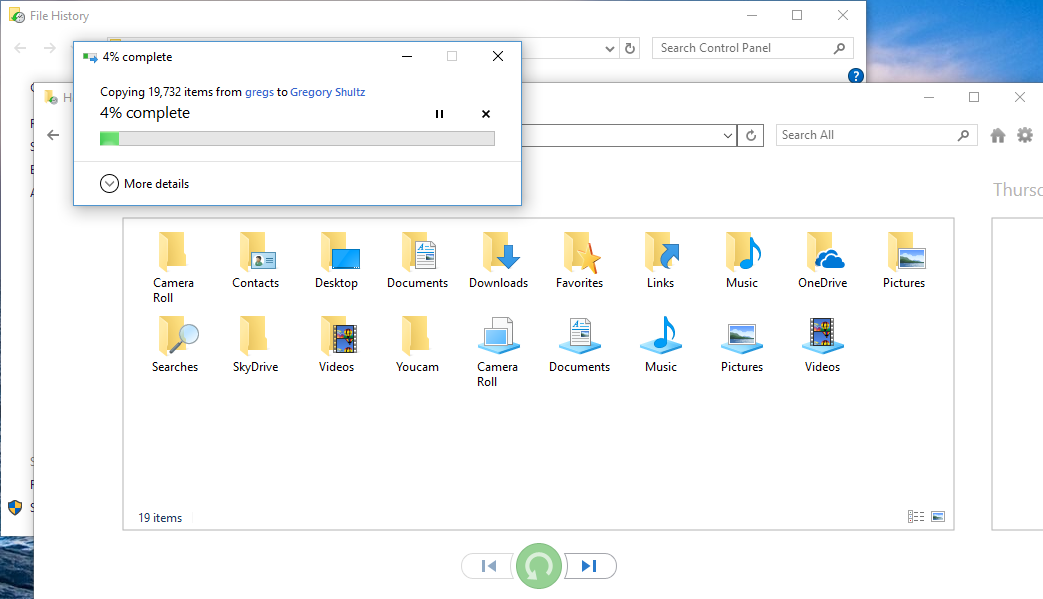
The restore operation will begin when you click the Green restore button.
During the restore operation, you may see a Replace Or Skip Files dialog, like the one shown in Figure I. You should select Replace The Files In The Destination. File History will overwrite all the duplicates of the standard files that were created in your new installation.
Figure I
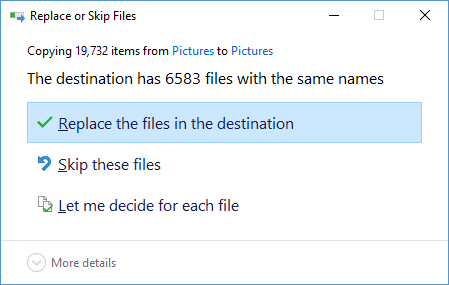
You should select Replace The Files In The Destination.
The workaround
As I mentioned, if you have already fallen prey to the one of the first two stumbling blocks, you won’t get an opportunity to restore your existing backup because the I Want To Use A Previous Backup On This File History Drive check box will never appear again once File History has made a new backup. The workaround to this problem involves deleting the File History backup you inadvertently made and re-creating your user account on your new system. Then you’ll be able to use File History the correct way. In next week’s follow-up article, I’ll explain these steps in detail.
Also read…
- How to use System Information in Windows 10 to create configuration data sets for troubleshooting (TechRepublic)
- Microsoft Universal Windows Platform Expert Bundle (TechRepublic Academy)
- Windows 10 Creators Update: The smart person’s guide (TechRepublic)
- Best practices for collaborative backup and recovery (ZDNet)
- How to bypass the Windows 10 Start menu with virtual program groups (TechRepublic)
What’s your take?
Have you been unable to use File History to transfer your data from one Windows 10 installation to another? Do these stumbling blocks sound familiar? Share your thoughts with fellow TechRepublic members.