While the embrace of big data, machine learning, and IoT by business enterprises everywhere may seem to be a recent development, some of the most prominent tools for processing all of the data created by those technologies is more than 40 years old. For example, the relational database management system (RDBMS), one of the tried-and-true database structures, was first developed in the 1960s, and it is still in widespread use today.
Cloud: Must-read coverage
- CrowdStrike Outage Disrupts Microsoft Systems Worldwide
- Quick Glossary: Cloud Platform Services
- Achieving Cost Efficiency in Cloud Storage: The Role of Western Digital’s Hard Drive Portfolio
- Still Not Backing Up Microsoft 365 Data? Here’s Why That’s a Risky Move
- Verito vs. Rightworks: Which IT Provider Is Best for Your Firm?
Generally, depending on the database in question, extracting useful information from a RDBMS requires the use of a Structured Query Language (SQL). The SQL database has become a standard element of enterprise data collection and processing and is battle-tested and reliable for many situations. However, creating an SQL database requires a dedicated server to serve as host, which can be expensive to maintain for many small businesses.
Cloud services, like Microsoft Azure, can provide the server and the necessary database infrastructure without the need to supply, maintain, and secure physical hardware. Small businesses can create and access an SQL database of their creation for as little as $4.99/month.
This tutorial shows you how to use the Azure Portal to create a cloud-based SQL database with just a few mouse clicks.
SEE: Top cloud providers 2019: A leader’s guide to the major players (Tech Pro Research)
Azure SQL database
To start, log in to Microsoft Azure using your administrative credentials. From the Home or Dashboard screen, click the Create a resource (+) link. From the resulting list of resources, select Databases | SQL database. You should see a screen similar to Figure A.
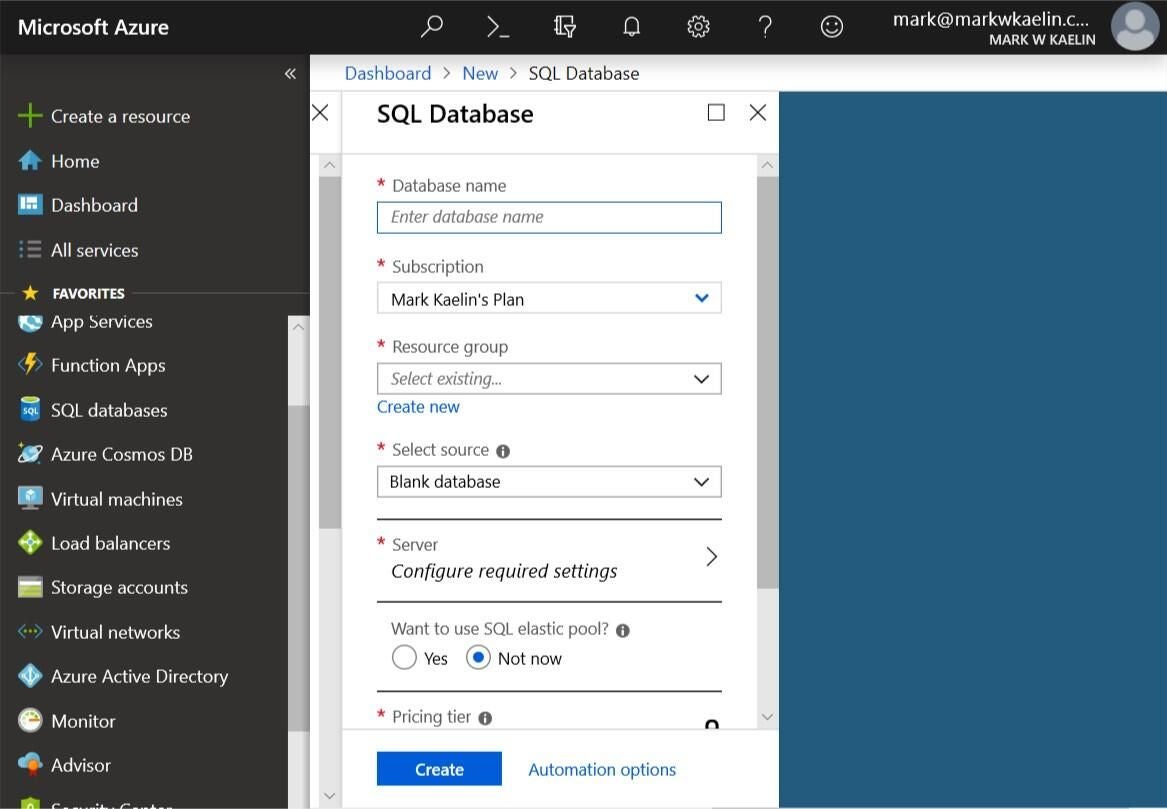
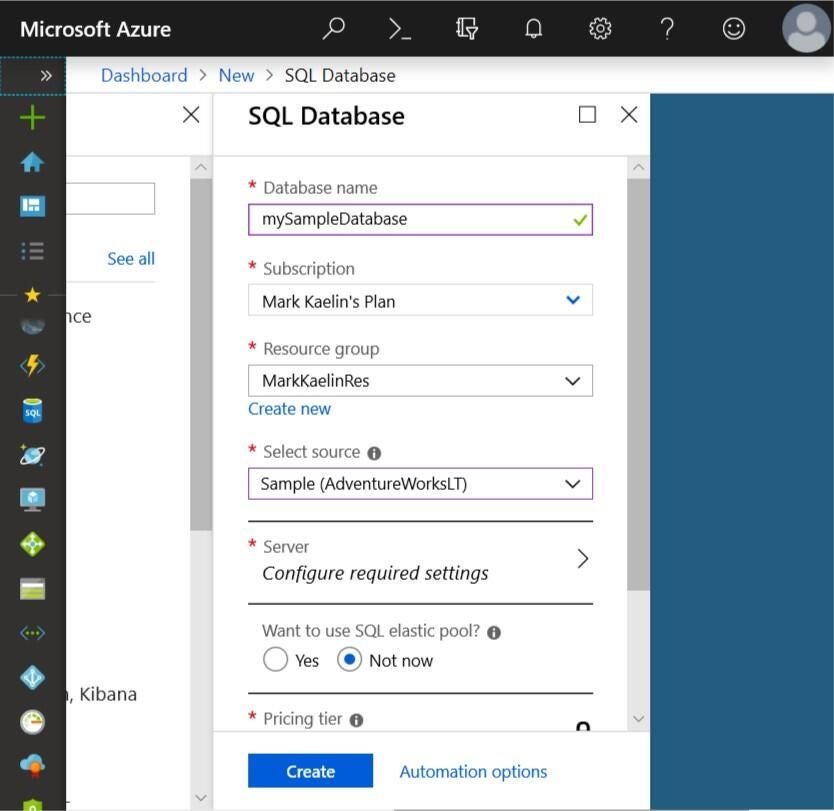
Now, begin to fill out the form. Give your database a name (mySampleDatabase), pick a subscription plan, create a new resource group (myResourceGroup) or choose an existing one, and then select a source. For this example, I’m choosing the AdventureWorksLT sample database as the source (Figure B).
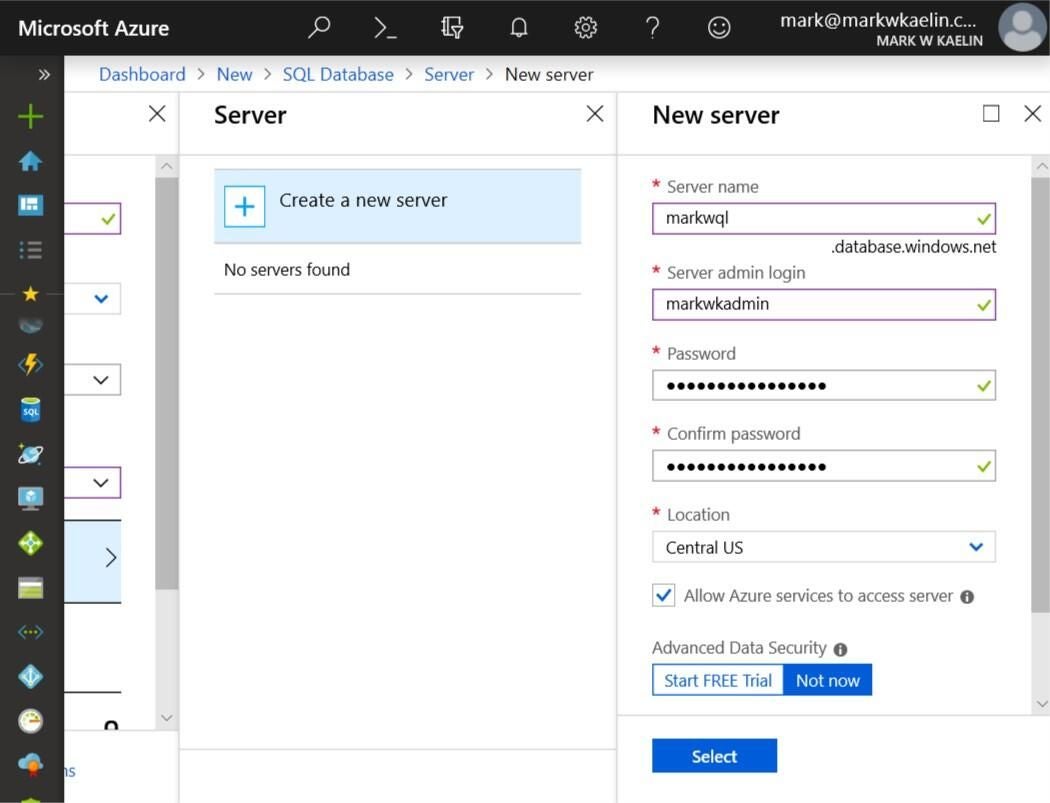
The next step is to create a server to host your SQL database. In the Server section, click the button to Create a new Server. On the creation screen (Figure C), give the server a name, pick a username and password, and then choose a region. When you are finished, click the Select button.
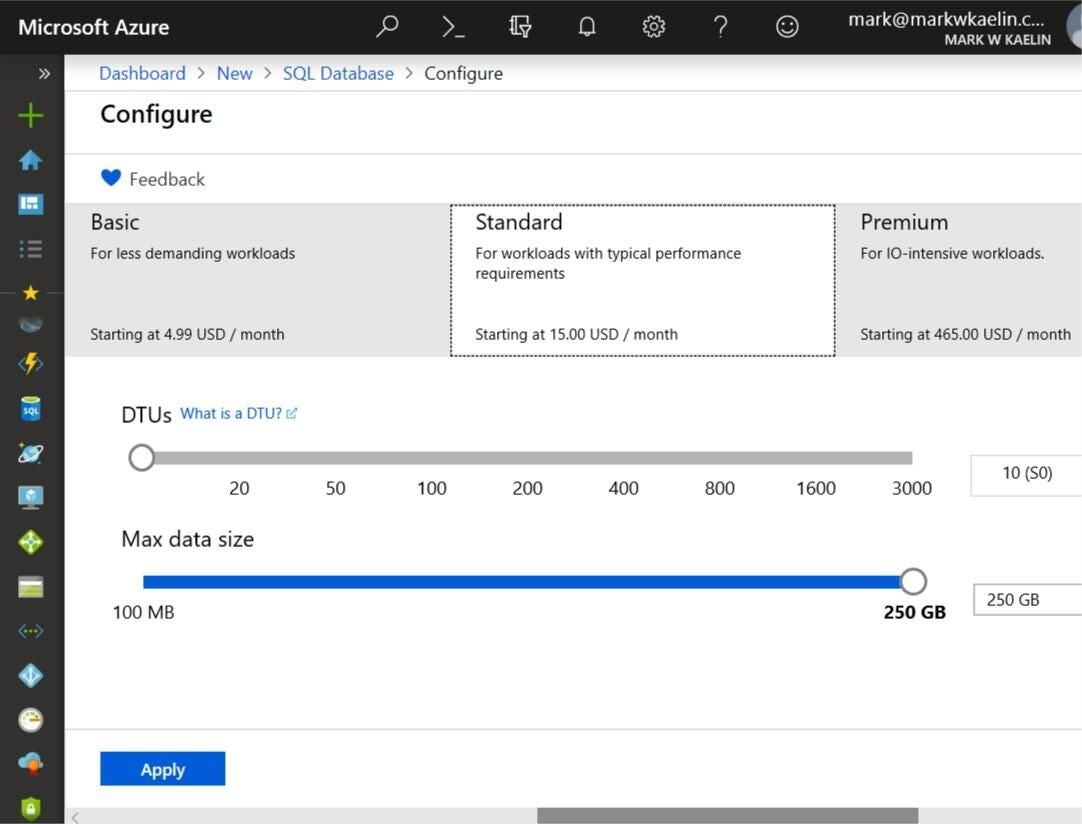
Azure will default to the Standard pricing tier, but if you want to consider adding a higher-performance server for your SQL database, click the arrow to reveal Figure D. The basic pricing tier starts at $4.99/month for storage of up to 2GB. The Standard tier starts at $15/month for 250GB, and the Premium tier starts at $465/month for 500GB. Select Apply when you have made your decision.
When you made all of your selections and are happy with your SQL database configuration, click the Create button and wait for the resources, and the server to be deployed.
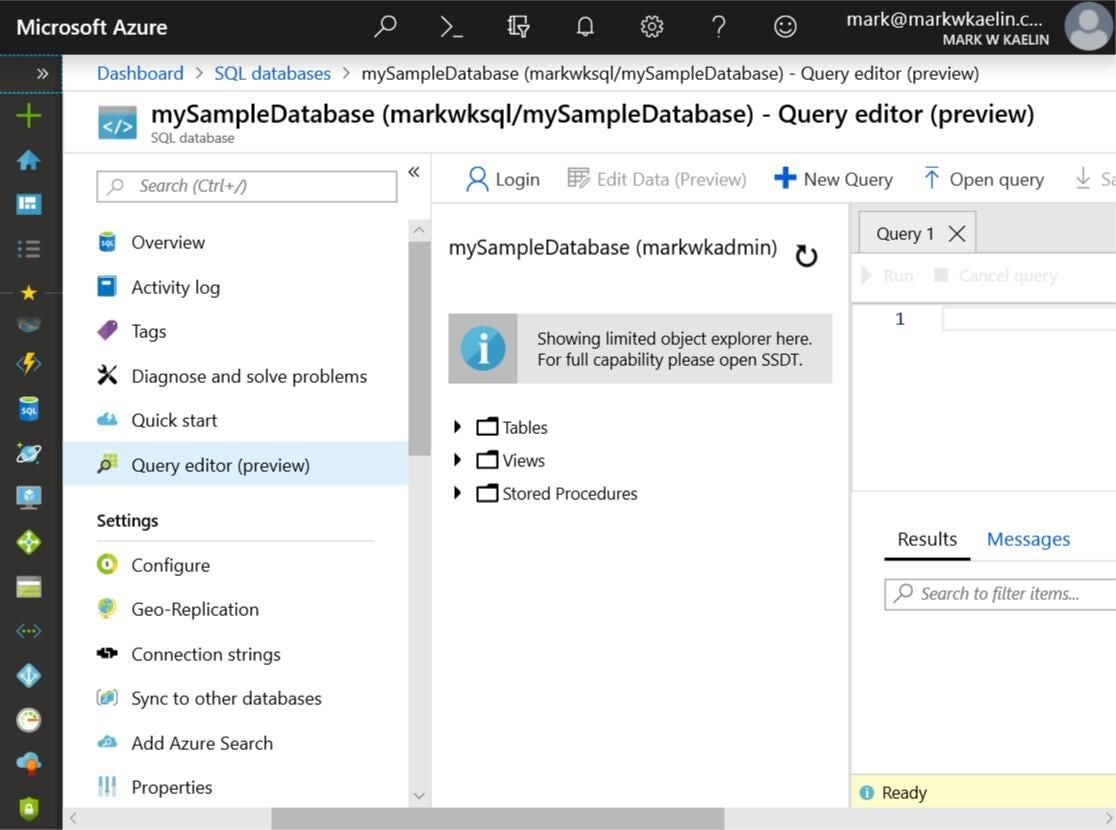
Once the deployment is complete, you can access your new SQL database by navigating to the SQL databases section of your Azure Portal Dashboard and clicking the appropriate database from the list. Click the Query editor link, log in, and start making queries, as shown in Figure E.