


The ability to take screenshots on your iPhone or iPad is a handy one for any professional who writes tutorials, creates documentation or designs mobile websites, but there are several ways to create a screenshot, both hands-on and hands-free. After you create a screenshot, you can crop it, mark it up, save it and share it. Here’s how to take a screenshot and edit or share it afterwards.
What you’ll need to create and edit screenshots
First, make sure you’re running the latest version of iOS or iPadOS. Go to Settings and then General and select Software Update. You’ll be told that the OS is up to date, or you’ll be prompted to download and install the latest update.
How to take a screenshot by pressing buttons
Next, navigate to the screen or app for which you want to take a screenshot. One way to take a screenshot is to press certain buttons on your iPhone or iPad, a process that varies based on your model.
SEE: iCloud vs. OneDrive: Which is best for Mac, iPad and iPhone users? (free PDF) (TechRepublic)
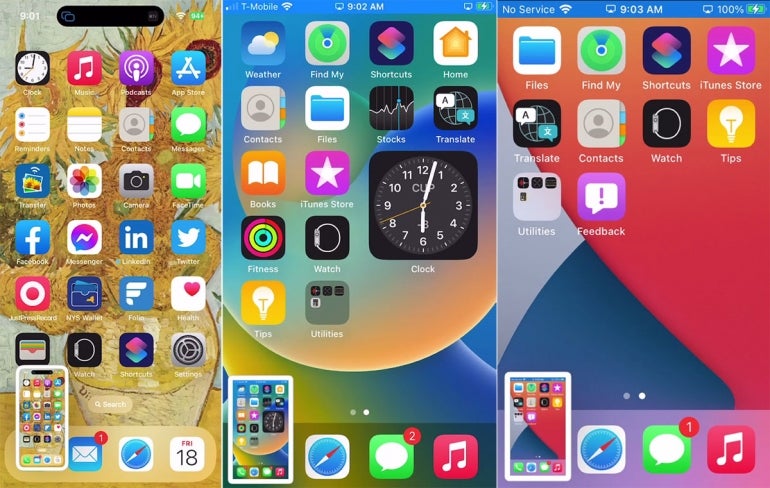
For iPhone 13 and higher models with Face ID, press the side button and the volume up button at the same time. For older iPhone models with Touch ID and a side button, press the side button and Home button at the same time. For iPhone models with a top button, press the top button and Home button at the same time (Figure A).
Figure A
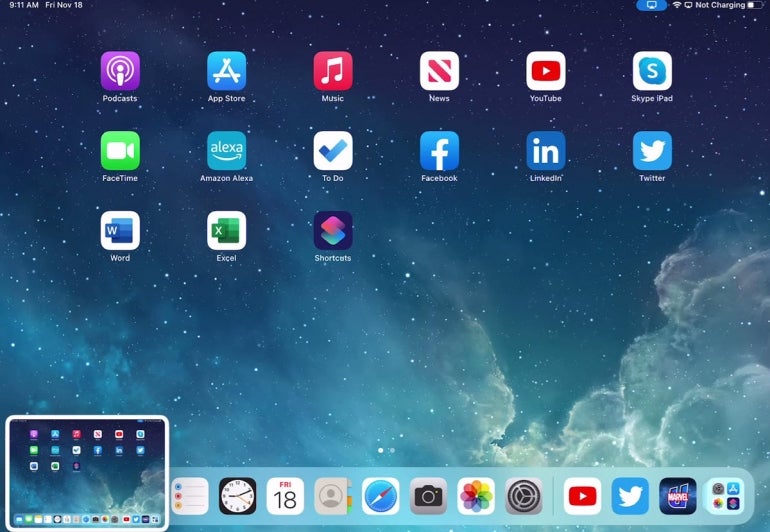
For iPad models without a Home button, press the top button and the volume up or volume down button at the same time. For iPad models with a Home button, press the Home button and the top button at the same time (Figure B).
Figure B
Another way to take a screenshot on any iPhone regardless of model is through the Back Tap feature.
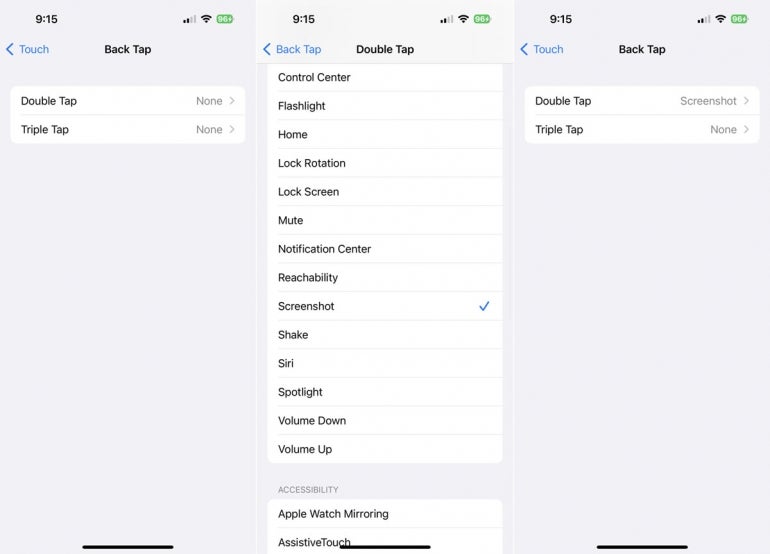
To set this up, go to Settings and then Accessibility and then Touch. Select Back Tap. Select either Double Tap or Triple Tap. From the menu of actions, select the one for Screenshot (Figure C).
Figure C
Navigate to the screen for which you want to take a screenshot. Then double-tap or triple-tap the back of the iPhone to take the screenshot (Figure D).
Figure D
A third way to take a screenshot on any iPhone or iPad is to enlist the aid of Siri. Navigate to a screen to snap a screenshot. Then say: “Hey Siri, take a screenshot.” Siri accommodates your request (Figure E).
Figure E
Image: Lance Whitney/TechRepublic
How to take a screenshot through screen recording
Yet one more way to create a screenshot is through the screen recording feature available on any iPhone and iPad. This feature lets you record your screen activity and save it as a video file. During the playback of the screen recording, you can take continuous screenshots to capture specific moments.
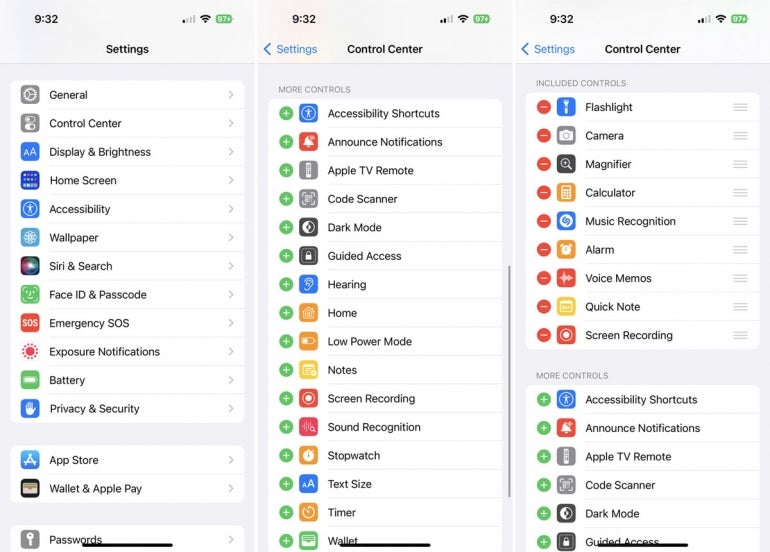
To set this up, go to Settings and select Control Center. If Screen Recording is not already in the section for Included Controls, swipe down to the section for More Controls and tap the plus button for Screen Recording (Figure F).
Figure F
Set up the screen activity you want to record. Swipe up or down on the screen to display the Control Center and then tap the button for Screen Recording — the one with a white dot inside a larger circle. Allow the recording to run. Press the Recording button to stop it.
The video of the recording is automatically saved to your Photos app. Play the recording and then use any of the standard methods to take a screenshot when you need to capture one (Figure G).
Figure G
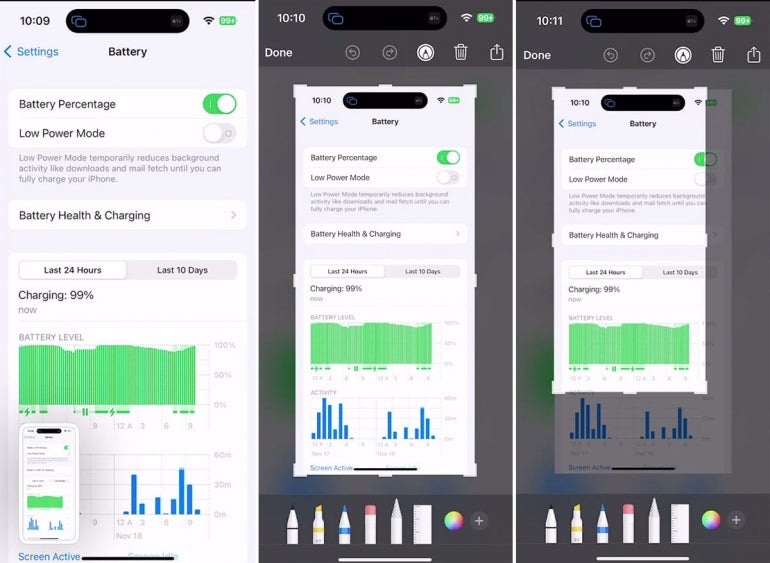
You can easily edit a screenshot right after you’ve snapped it. To do this, tap the thumbnail of the screenshot that appears in the lower left corner.
The editing screen offers a variety of options for modifying or adjusting the image. Drag one of the crop handles at a specific corner or side of the image to crop it. Release your finger, and the screenshot will automatically resize based on your cropping (Figure H).
Figure H
To undo your last action, tap the Undo button at the top. To repeat your last action, tap the Redo button.
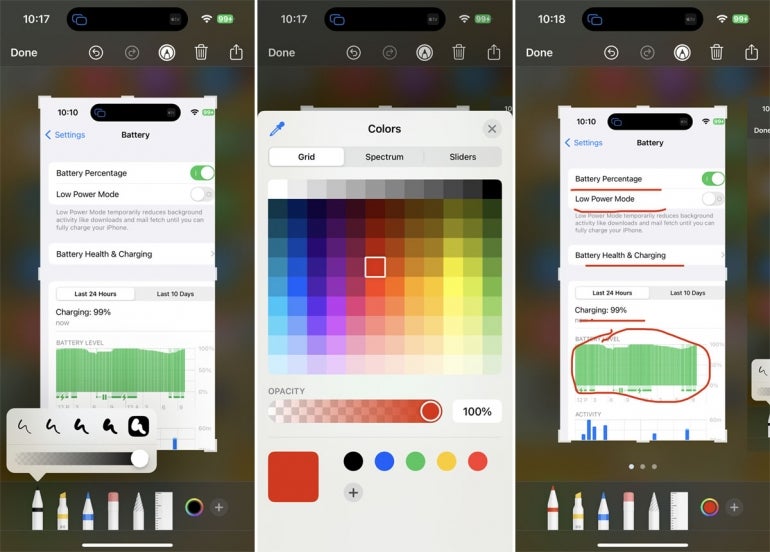
To mark up the image, tap the pencil icon on the top toolbar to display a palette at the bottom. Press down on the pen or highlighter tool you wish to use and adjust the style and thickness of the tip. Tap the color icon at the right of the palette to choose a specific color. Then draw on the image (Figure I).
Figure I
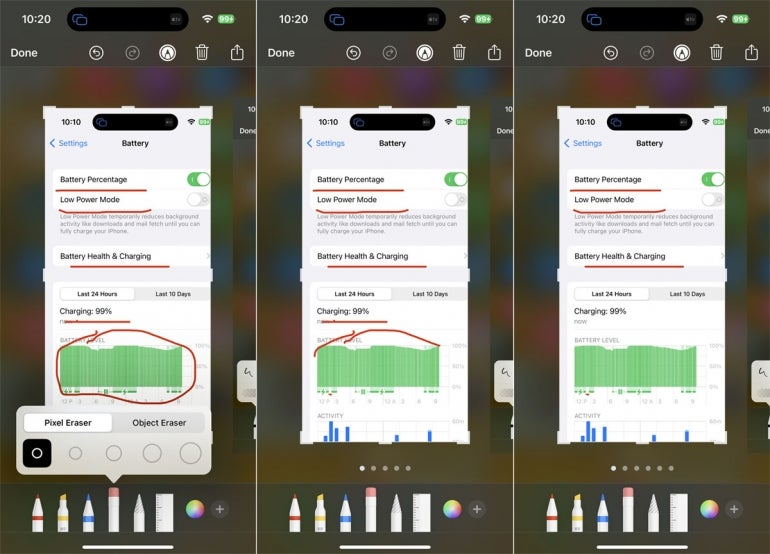
Tap the Eraser tool to erase any markups you want to remove (Figure J).
Figure J
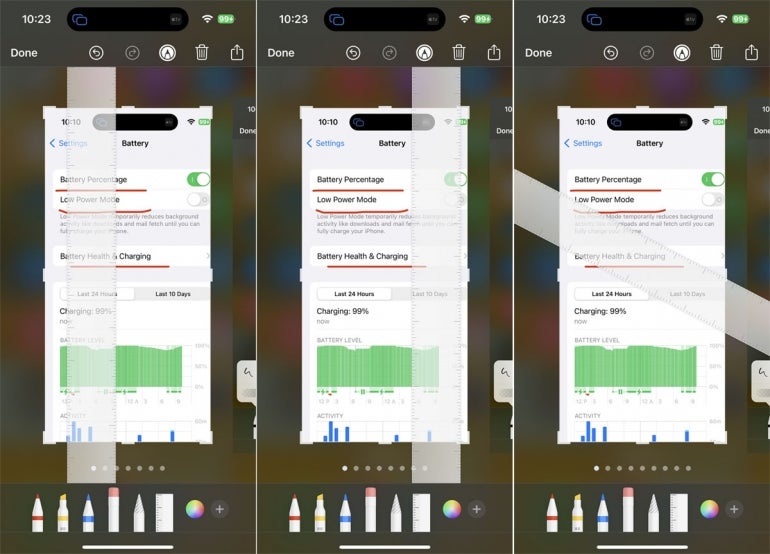
Tap the Ruler icon to display a ruler on the screen. You can move the ruler with one finger and rotate it with two fingers (Figure K).
Figure K
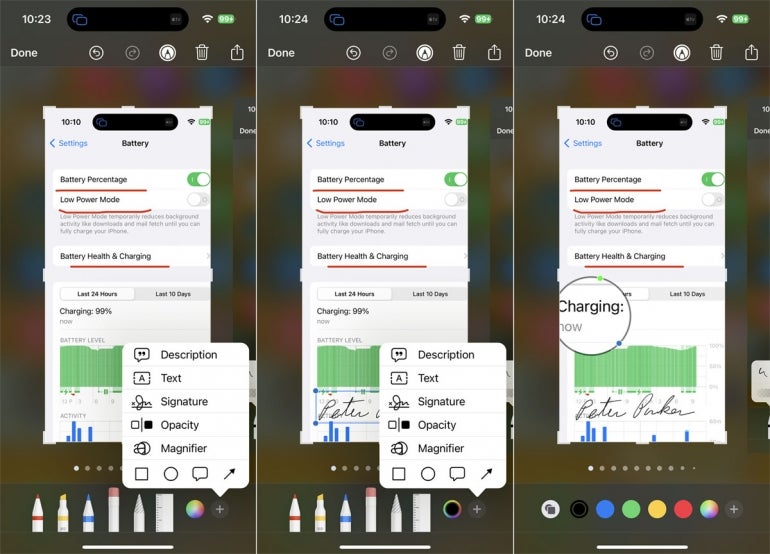
For more tools, tap the plus icon at the right of the palette. From the menu, you’re able to add a description to the image, add text anywhere on the image, insert your signature, change the opacity and magnify a specific part of the image. You can also choose a specific object to draw, such as a square, circle, dialog balloon or arrow (Figure L).
Figure L
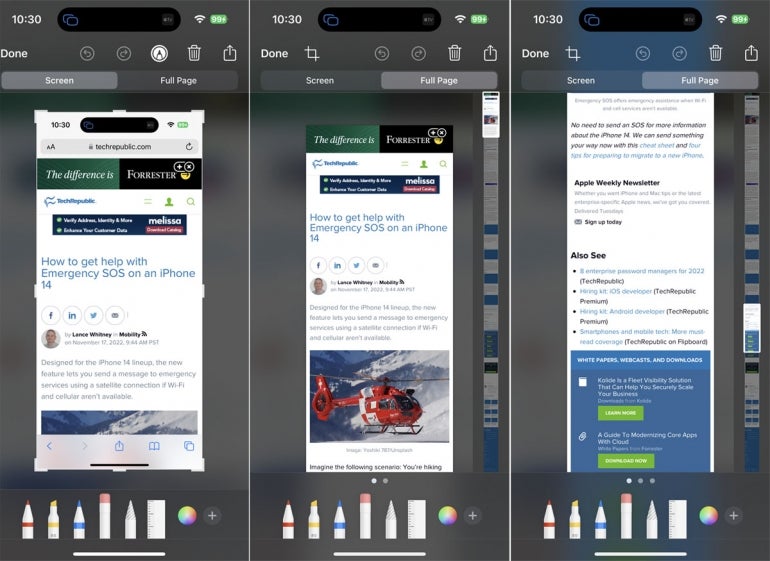
If you take a screenshot of a webpage or another long page that stretches below the visible screen, an option is available to capture the entire page.
Tap the heading for Full Page. You can then swipe up and down the screenshot using the slider on the right. All the other editing and palette controls are accessible (Figure M).
Figure M
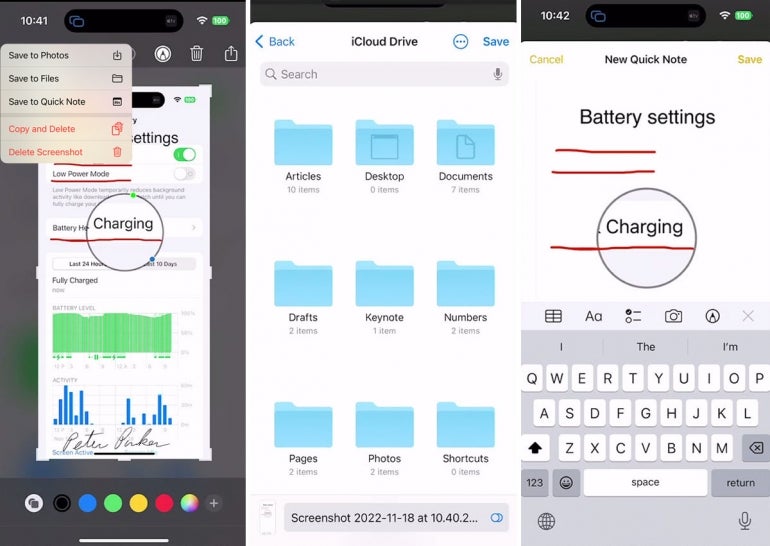
When you’re finished modifying the screenshot, tap Done in the upper left corner. Here, you can opt to save the image to your Photos app or to the Files app. You can save it as a Quick Note, copy and delete the screenshot, or delete it entirely. Depending on the image, you may also be able to save it as a PDF (Figure N).
Figure N
If you found this guide helpful, have a look at Lance Whitney’s other recent articles with how to get help with Emergency SOS on an iPhone 14 and how to edit or unsend text messages on your Mac with macOS Ventura.