


Many web applications and services depend upon databases. Chances are, your business depends on web applications and services. If you don’t want to set up a dedicated server to host a remote database, you can always go with a containerized solution. Although this might not be the best option for apps that scale to enterprise levels, for medium sized and smaller instances, this could be a real boon, especially for those without the hardware available to use as a dedicated database server.
To alleviate this headache, I’m going to walk you through the process of deploying a MySQL Docker container, such that you can then connect to it from other containers or applications. I will assume you already have Docker up and running. Although I will be demonstrating this on the Ubuntu 16.10 Server platform, the steps will be the same, regardless of operating system (so long as Docker is running).
And now, let’s deploy.
Pulling the image
The first thing you must do is pull down the correct image. I’m going to go with the latest release of MySQL. Do note, if you have a need for a specific release, you can swap out the latest tag with the likes of 5.5, 5.6, 5.7, 8.0.
In order to pull the MySQL Docker image down, issue the command:
docker pull mysql/mysql-server:latest
NOTE: The above command must be issued by a user that is a member of the docker group. If you do not have a user in that group, issue the command sudo usermod -a -G docker USERNAME (Where USERNAME is the name of the user to add). Once the command completes, logout and log back in and you should be good to go.
Deploying the container
With the MySQL image on your machine, it’s time to deploy the container. This is completed with the command:
docker run --name=mysql01 -d mysql/mysql-server:latest
In the above command, I’ve named my container mysql01. You can name your container whatever you like.
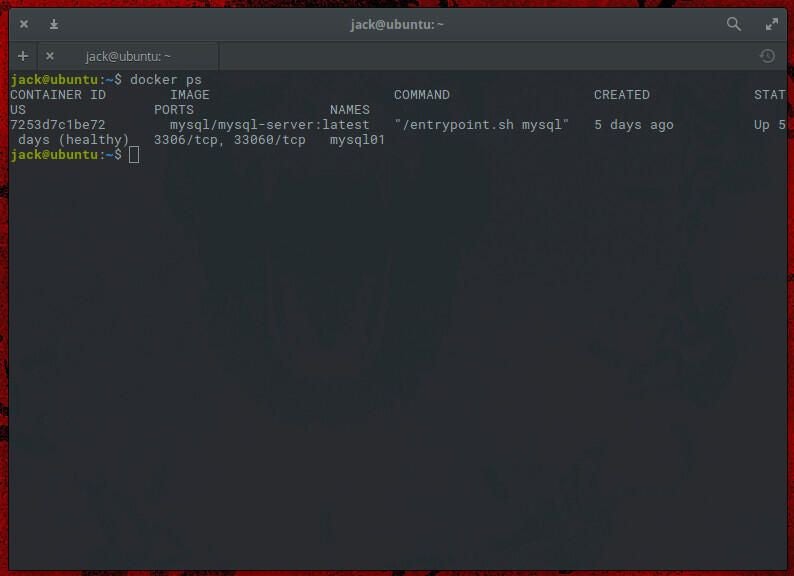
At this point, you can issue the command docker ps to see your MySQL container running (Figure A).
Figure A
SEE: Special report: The cloud v. data center decision (free PDF) (TechRepublic)
The MySQL password
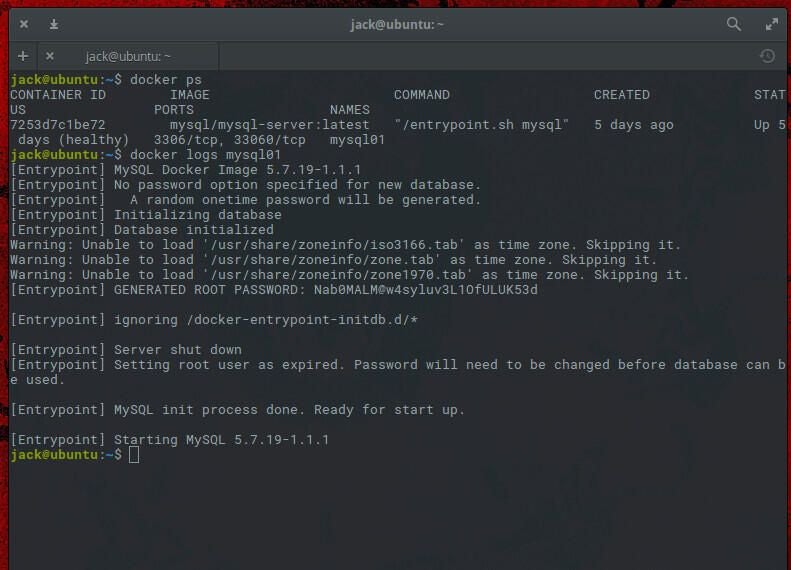
When you install MySQL on a Linux machine, you will either be prompted to create a database admin password during or after installation. However, we have just deployed a Docker container that already has the database installed and running. How do we make use of that database without having set a password? Fortunately, it’s actually quite easy. During the deployment, a random password will have been generated for you to use. To see that password, issue the command:
docker logs mysql01
From within the output of that command, you will see the root user password for MySQL (Figure B).
Figure B
Logging into the MySQL Server
The next thing you will need to do is log into the containerized server. This can be done with the command:
docker exec -it mysql01 mysql -uroot -p
You will be prompted for the root user’s password. Use the password revealed by the docker logs mysql01 command. Once within the MySQL server, you can then change the password with the command:
ALTER USER 'root'@'localhost' IDENTIFIED BY 'newpassword';
Where newpassword is the new password to be used. Exit from the MySQL shell with the command exit and you’re ready to use your containerized MySQL database.
Welcome to the simplicity of containers
And that’s all there is to setting up a MySQL container. If you don’t have the spare hardware to set up a dedicated database server, or you simply need a database server for testing purposes, Docker makes the deployment of a containerized database server incredibly simple. Give this a go and see if it doesn’t perfectly suit your needs.