Image: Docker
aaPanel is an outstanding tool for the management of websites, databases, FTP servers, cron jobs and more. One other feature that aaPanel is quite adept at is the deployment of Docker containers.
I want to show you how this feature can be added to aaPanel and then how to deploy your first container with the tool. I’ll be demonstrating on Ubuntu Server 20.04, so you’ll need to have aaPanel already deployed–find out how in my previous piece: How to install aaPanel. Once you have aaPanel deployed, you’re ready to add Docker container support.
SEE: Top cloud providers in 2020: AWS, Microsoft Azure, and Google Cloud, hybrid, SaaS players (TechRepublic)
What you’ll need
- A running instance
- A user with sudo privileges
How to install Docker
To be able to deploy containers, you must first add Docker support. For that, we must install Docker. Log in to your Ubuntu server instance and issue the command:
sudo apt-get install docker.io -y
Once the installation completes, let’s add our user to the docker group with the command:
sudo usermod -aG docker $USER
Log out and log back in to your Ubuntu Server.
Finally, start and enable the Docker service with the commands:
sudo systemctl start docker

sudo systemctl enable docker
You’re now ready to add Docker support to aaPanel.
How to add Docker container support to aaPanel
With Docker installed, we can now add the Docker app to aaPanel. Log in to aaPanel with an admin account and click on Apps–in the left sidebar. In the resulting window, type docker in the search and hit Enter. You should then see the Docker app listed (Figure A).
Figure A

Click Install and then, when prompted, click Confirm. Allow the installation to complete–it can take anywhere between 10-90 minutes, as most of the internal aaPanel installations tend to be drawn-out processes. Unfortunately, this is one of the big downfalls of aaPanel. When you want or need to install something, know that the task is going to take quite some time to complete. Go about your admin business and return later. In fact, I wrote another piece of content and ate lunch during the time it took for aaPanel to install the Docker app.
Once the installation is complete, you need to enable the app to display on your Dashboard. Click the On/Off slider (Figure B) until it’s in the On position.
Figure B

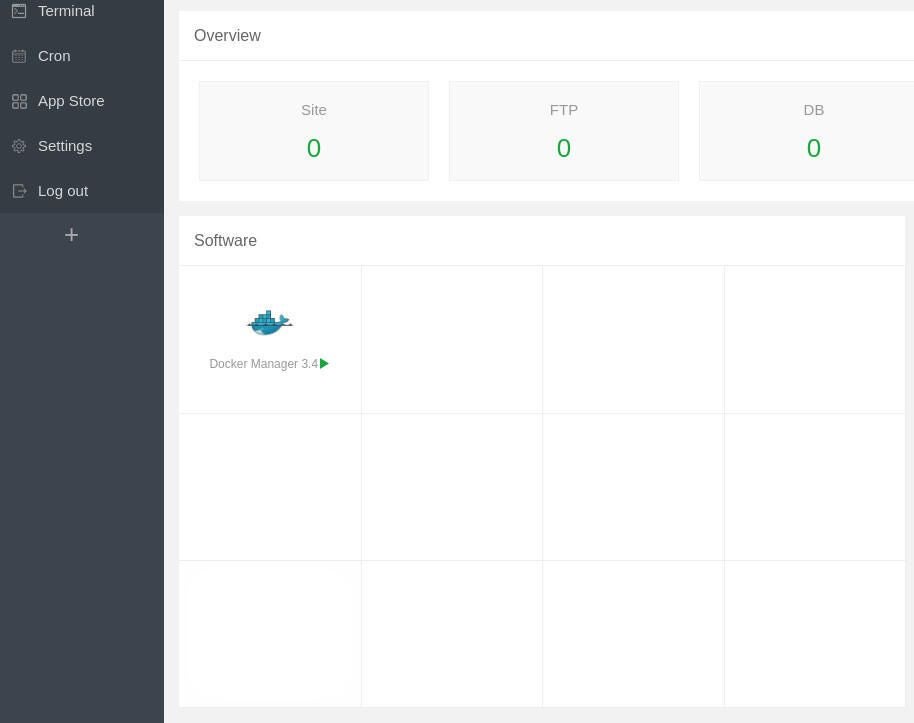
With the app enabled on the Dashboard, click Home and you’ll see a new Docker Widget available (Figure C).
Figure C

How to deploy a container with aaPanel
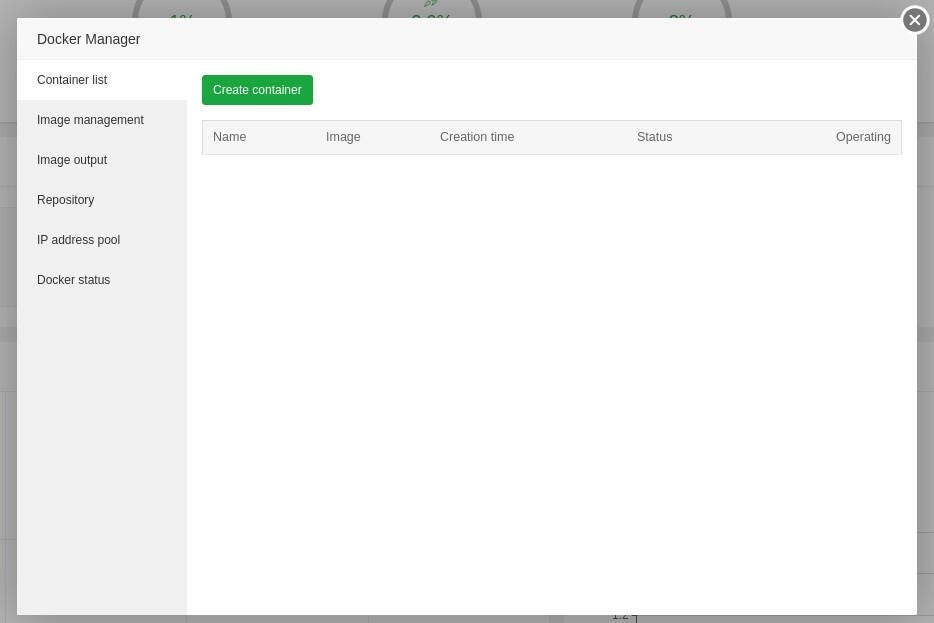
With all of this taken care of, you can now deploy your first container. Click the Docker widget and a popup window will appear (Figure D).
Figure D

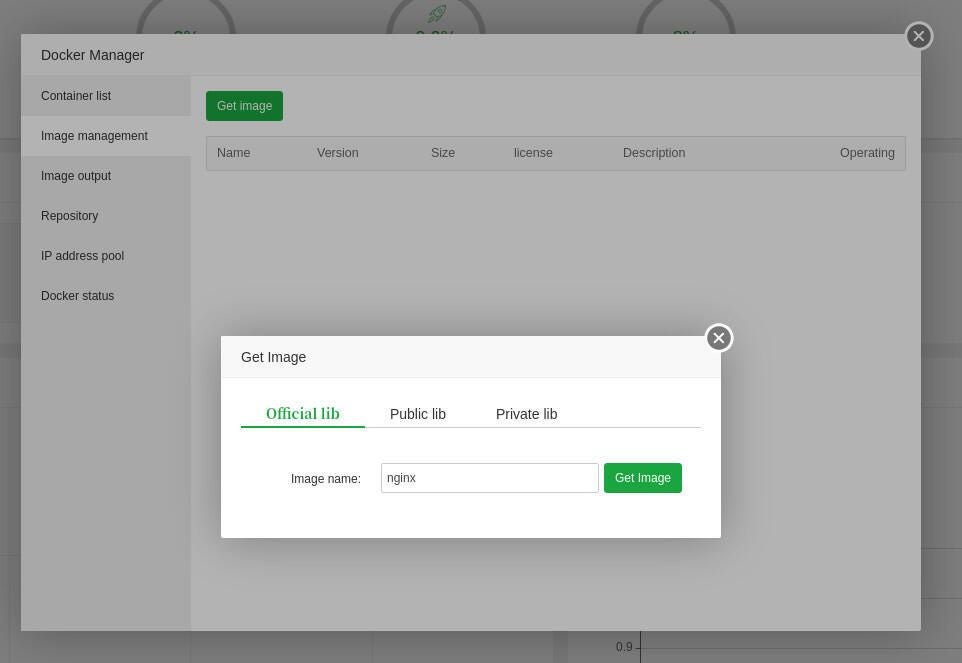
Before you can create a new container, you first must download an image for it. Click the Image Management tab and then click Get Image. Type the name of the image you want (for example nginx) and click Get Image (Figure E).
Figure E

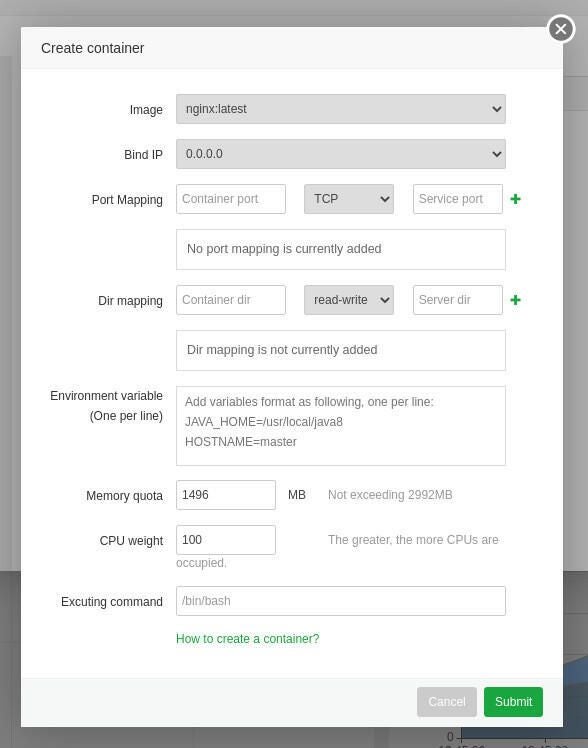
Once the image has been downloaded, click the Container List tab and then click Create Container. Fill out the necessary information for your container and then click Submit (Figure F).
Figure F

And that’s it. Your container has been deployed, using the web-based server manager, aaPanel. There’s much more that you can do with this tool (such as creating and pushing images), which we’ll deal with at a later time.
Subscribe to TechRepublic’s How To Make Tech Work on YouTube for all the latest tech advice for business pros from Jack Wallen.
