


Cloud: Must-read coverage
- CrowdStrike Outage Disrupts Microsoft Systems Worldwide
- Quick Glossary: Cloud Platform Services
- Achieving Cost Efficiency in Cloud Storage: The Role of Western Digital’s Hard Drive Portfolio
- Still Not Backing Up Microsoft 365 Data? Here’s Why That’s a Risky Move
- Verito vs. Rightworks: Which IT Provider Is Best for Your Firm?
One of the more challenging aspects of Kubernetes is deploying to a cluster while making the apps and services you’ve deployed accessible from the LAN. This is something I struggled mightily with, until I discovered the hostNetwork setting. This particular option applies to Kubernetes pods and makes it possible to access deployed pods from outside of the cluster.
By using this particular setting, applications within the pod are able to access the network interfaces on the node hosting the pod. That means, in theory, you can actually access those pods from your LAN.
I want to show you how to make this work. Believe it or not, it’s quite easy.
SEE: Top cloud providers in 2020: AWS, Microsoft Azure, and Google Cloud, hybrid, SaaS players (TechRepublic download)
What you’ll need
The only thing you’ll need to make this work is a running Kubernetes cluster. This cluster could be housed on AWS, Google Cloud, your own on-premises hardware, or any other host. If you don’t yet have a cluster, you could always deploy one on your data center. For this, check out my article, How to deploy a Kubernetes cluster on Ubuntu server.
Once you have access to a Kubernetes cluster, you’re ready to deploy a pod that is accessible to the outside world–or at least your LAN.
How to create your YAML file
The first thing we’re going to do is create a very basic YAML file to demonstrate how the hostNetworking setting is used. This YAML will deploy an influxdb pod to a Kubernetes cluster, which we’ll then be able to reach from outside the cluster.
On your Kubernetes controller, create the new YAML file with the command:
nano influxdb.yml
In that new file, paste the following contents:
apiVersion: v1

kind: Pod

metadata:

  name: influxdb

spec:

  hostNetwork: true

  containers:

    - name: influxdb

      image: influxdb
The important bit here is:
hostNetwork: true
The above setting gives the pod the necessary access to the host’s network interfaces. Without that setting, the pod would still deploy, but would only be accessible from within the cluster. The YAML file creates a Pod named influxdb with a single container, also named influxdb, that uses the influxdb image.
Save and close the file.
How to deploy the pod
Now we’ll deploy our new pod. This is done with the command:
kubectl create -f influxdb.yml
The pod will deploy to the cluster, but it will take a short bit of time for the deployment to complete.
How to test outside access
Next, we’ll test the outside access of the newly-deployed pod. To do that, we must find out which node the pod was deployed to, which will also show us the IP address of the node. To do that, issue the command:
kubectl describe pods influxdb
The above command will print out quite a bit of information about your newly-deployed pod. The important bit we want is found under the IPs section. You should see a line like:
IP: 192.168.1.112
The IP: line will list out the IP address of the node your pod has been deployed to. With that bit of information in hand, you can test the connection with a command like:
curl -v http://IP:8086/ping
Where IP is the IP address of the node hosting the influxdb pod. The response you receive should include HTTP/1.1 204 No Content (Figure A).
Figure A
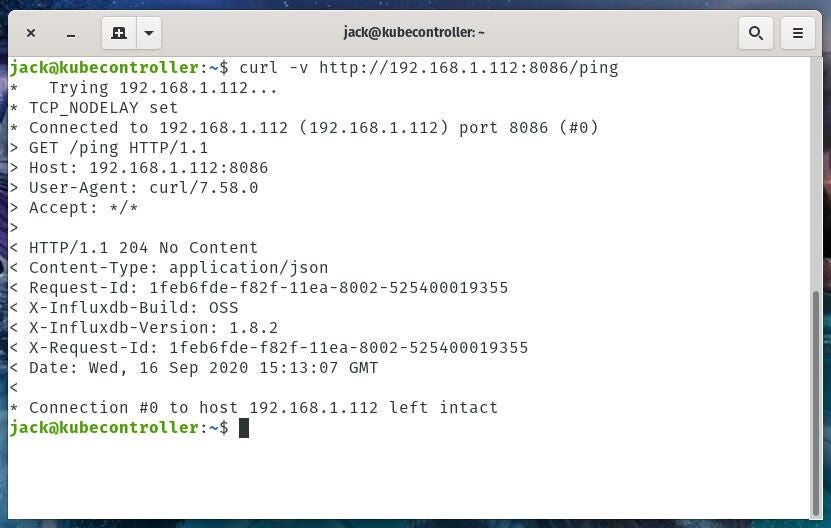
Congratulations, you’ve just deployed a pod to a Kubernetes cluster that is accessible from your LAN.
See? That wasn’t nearly as hard as you thought.
Subscribe to TechRepublic’s How To Make Tech Work on YouTube for all the latest tech advice for business pros from Jack Wallen.
Image: Jack Wallen