


Windows 10 includes a built-in administrator account that, by default, is hidden and disabled for security reasons. Whether you need to perform a bit of Windows management, improve shared computer settings, troubleshoot your system or make changes, this guide presents simple step-by-step methods to enable and disable the administrator account on Windows 10.
Jump to:
- Using the command line vs. the user management tool
- How to enable the Windows 10 Administrator account
- How to disable the Windows 10 Administrator account
- Should I disable or enable the Administrator account?
Using the command prompt vs. the user management tool
When enabling and disabling Windows’ administrator account, users can either use the command prompt or the user management tool.
Must-read security coverage
- UK Police Convicts Pair in £5.5 Billion Bitcoin Launder Case
- Blackpoint Cyber vs. Arctic Wolf: Which MDR Solution is Right for You?
- How GitHub Is Securing the Software Supply Chain
- 8 Best Enterprise Password Managers
While the command prompt is a valuable and powerful resource, the user management tool is popular among those who need to manage user accounts. It is also more user-friendly and therefore easier to use for beginners, as it provides a more graphical and interactive interface.
PREMIUM: These Windows 10 power tips reveal secret shortcuts to your favorite settings.
On the other hand, those with advanced skills often prefer the command prompt because it is fast and efficient. The command prompt also allows script commands to automate repetitive tasks and save time. Additionally, the command prompt can be used to manage user accounts on remote systems.
In the end, the results will be the same for whichever tool you use. So for this particular task, it is just a matter of preference, comfort and experience.
How to enable the Windows 10 Administrator account
Command prompt
If you feel comfortable with commands, the command prompt should be your go-to tool to take on this task. You can enable the Windows 10 administrator account in just a few, quick steps:
- Open a command prompt as an administrator by typing
cmdin the search field. - From the results, right-click the entry for Command Prompt, and select Run as Administrator.
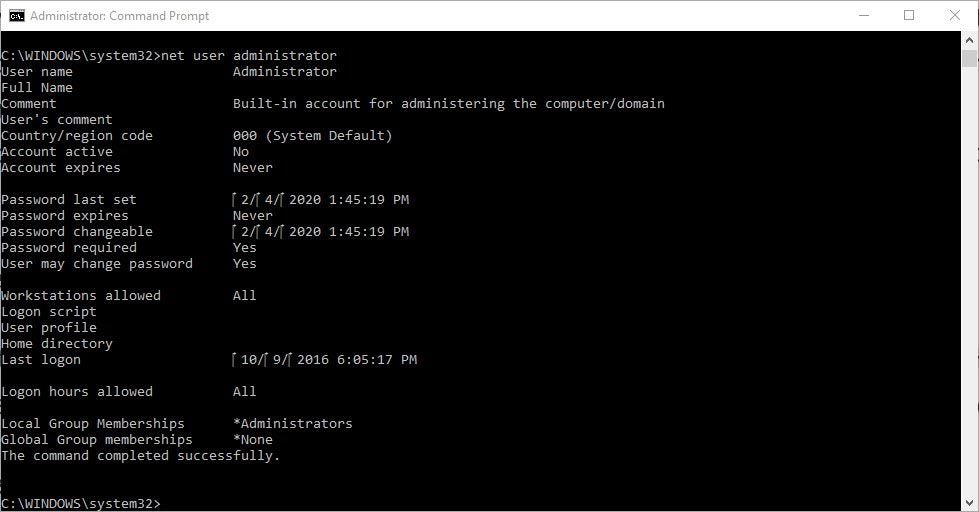
- At the command prompt, type
net user administrator. The value for Account Active should say No (Figure A).
Figure A
- Type
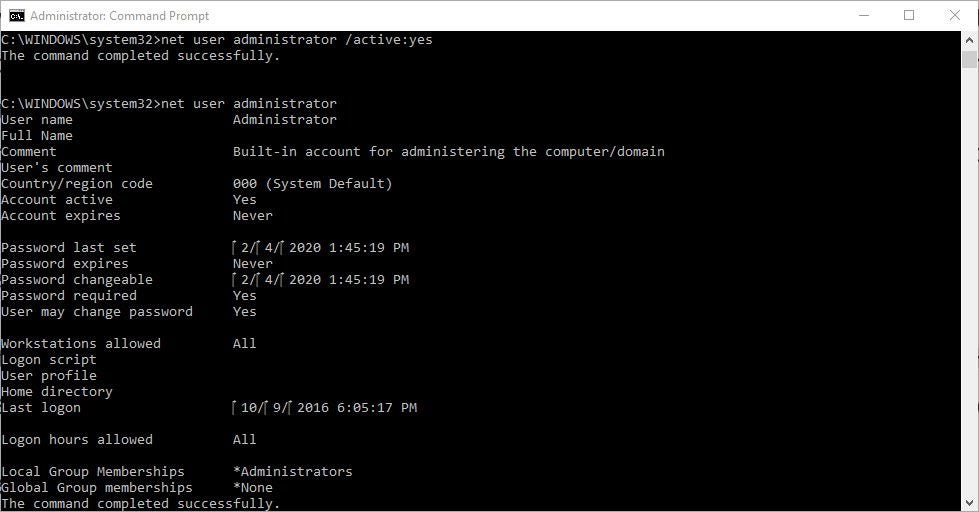
net user administrator /active:yes. You should receive a response that the command was completed successfully. - Type
net user administrator. The value for Account Active should now say Yes (Figure B).
Figure B
SEE: Explore these simple ways to find your Windows 10 product key.
User management tool
Now, let’s look at how to do the same using the user management tool. Note that the user management tool is not as strict as the command prompt, and it offers a graphic interface that can help you throughout the process.
To enable the Windows 10 Administrator account using the user management tool:
- Open Administrative Tools, either through the Start menu or through the Control Panel.
- Select the entry for Computer Management, and open the folder for Local Users And Groups. A quicker way to get here is to type
lusrmgr.mscin the Search field. - Open the folder for Users, and double-click the Administrator account.
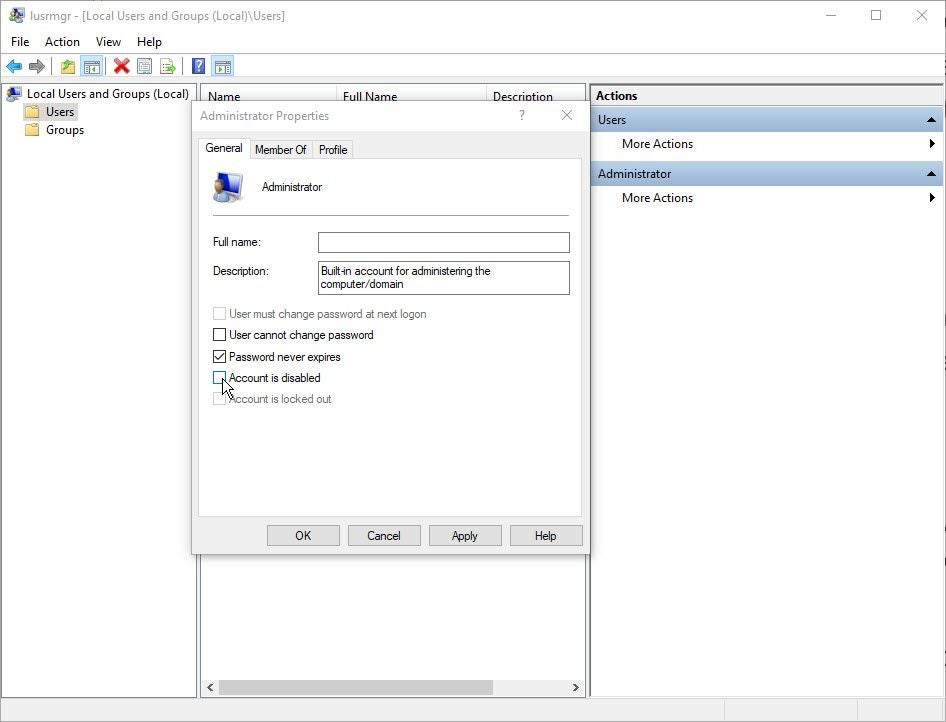
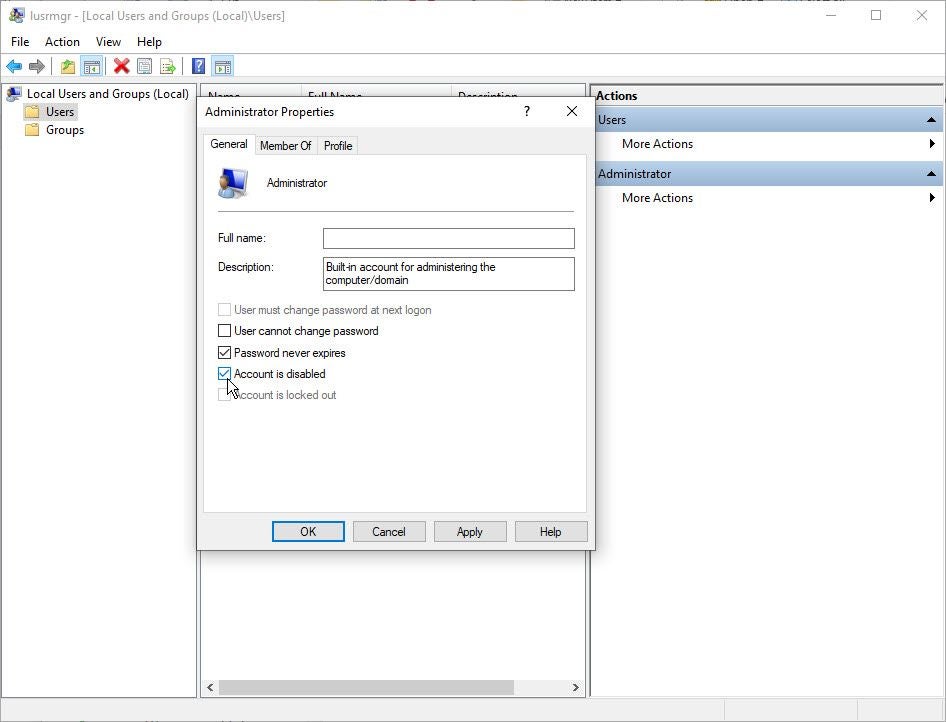
- Uncheck the option for Account Is Disabled, and click OK or Apply (Figure C).
Figure C
- Close the User Management window.
- With the account enabled, log out.
- Go past the Lock screen, and sign in using the administrator account. No password is required. You can then perform whatever management or troubleshooting you need to accomplish.
SEE: Need a more secure experience? Try Windows in S Mode.
How to disable the Windows 10 Administrator account
Command prompt
For speed, you can use the command prompt method, which will disable the administrator account in Windows 10 in just three steps:
- Log out, and then log back in using your own account.
- Open a command prompt as an administrator, and type
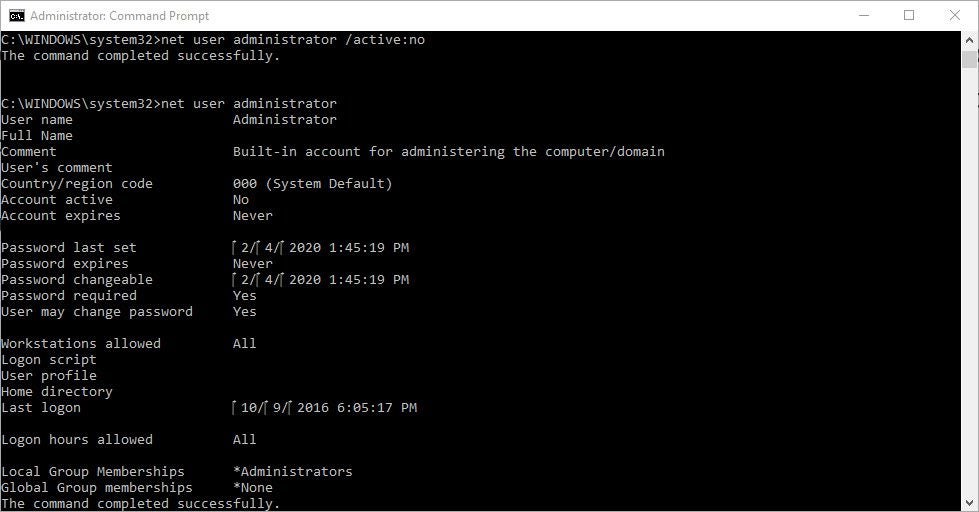
net user administratorto confirm that the account is active. - Type
net user administrator /active: no, then typenet user administratoragain to confirm that the account is now inactive (Figure D).
Figure D
User management tool
If you’re not comfortable using the command prompt, don’t worry. Here is a simple method to deactivate the Windows administrator account using the user management tool:
- Return to the Local Users And Groups window, and double-click the Administrator account.
- Check the box for Account Is Disabled.
- Click OK or Apply, and close the User Management window (Figure E).
Figure E
SEE: Here’s how to download Windows 10 ISO without Media Creation Tool.
Should I disable or enable the Administrator account?
Enabling the administrator account is useful for troubleshooting problems, making system-wide changes and managing user accounts. However, it is also a security risk, as attackers can target administrator accounts to take over a system.
But while disabling the administrator account can improve security and prevent unauthorized changes to your system settings or software, it tends to make troubleshooting more challenging.
Disabling or enabling administrator accounts is not a difficult task. That said, the changes you make to a system can impact its performance, security, functionality and reliability. Usually, it is recommended that only users who have mid to advanced technical skills make these types of changes.
In the end, whether or not you decide to enable or disable the administrator account will depend on your personal choice and your specific needs and concerns.