


Cacti is an open source web-based front end for the RRDtool that stores all the necessary information to display network and system graphics. Cacti makes use of the Simple Network Management Protocol to gather and monitor traffic from network devices, and can be installed on various Linux distributions. I’m going to walk you through the process of installing Cacti on Ubuntu 16.04 Server. The installation is quite involved and the majority of it is handled via the terminal. So log into your Ubuntu 16.04 server and prepare to type.
Configuring apt and update/upgrade
The first thing to do is to add the necessary repositories to apt. To do this create a new file with the command sudo nano /etc/apt/sources.list.d/cacti.list and add the following content:
deb http://ftp.ro.debian.org/debian/ stretch main contrib non-free

deb-src http://ftp.ro.debian.org/debian/ stretch main
deb http://security.debian.org/debian-security stretch/updates main contrib non-free
deb-src http://security.debian.org/debian-security stretch/updates main
Save and close that file, and then update and upgrade ubuntu with the commands:
sudo apt update

sudo apt upgrade
Installing dependencies
Next the necessary dependencies must be installed. This can be done with the following three commands:
sudo apt install wget patch unzip zip bash-completion

sudo apt install apache2 libapache2-mod-php7.0 php7.0 php7.0-snmp php7.0-xml php7.0-mbstring php7.0-json php7.0-gd php7.0-gmp php7.0-zip php7.0-ldap php7.0-mcrypt

sudo apt install build-essential dos2unix dh-autoreconf help2man libssl-dev libmysql++-dev librrds-perl libsnmp-dev
If you have a firewall running, you’ll need to open it up with the following command:
sudo ufw allow 80/tcp
Configure php
There are two lines to configure in /etc/php/7.0/apache2/php.ini. These two lines are:
file_uploads = On

date.timezone =
If file_uploads isn’t set to On, change it. You will also need to set your timezone. Find out your PHP-friendly timezone from the official PHP timezone listing. With those configurations in place, save and close the file and then restart Apache with the command:
sudo systemctl restart apache2
The database
Cacti stores its data in an RDBMS database. To make that happen, we’ll configure Cacti to work with MariaDB. Install this database with the command:
sudo apt install mariadb-server php7.0-mysql
Next we secure the MariaDB root account with the following commands:
mysql -h localhost

use mysql;

update user set plugin='' where user='root';

flush privileges;

exit

sudo mysql_secure_installation
The final command will prompt you to answer a few questions. The first will be to enter the current password for the root user. Since there is no password, hit Enter on your keyboard and then type y to change the root password. Type and verify the new password, and then answer the remainder of the questions with the default answers.
Now we have to create the new database. This is done first by logging into the database with the command:
mysql -h localhost -u root -p
After you authenticate, issue the following commands to create the new database:
create database cacti;

grant all on cacti.* to 'cacti_user'@'localhost' identified by 'cacti_pass';

flush privileges;

exit
Next it is required to set permissions to the new database user according to the correct time zone. To do this, issue the following commands:
mysql -u root -p mysql < /usr/share/mysql/mysql_test_data_timezone.sql

mysql -u root -p -e 'grant select on mysql.time_zone_name to root@localhost'
The next step is to append the following lines to the /etc/mysql/mariadb.conf.d/50-server.cnf file:
max_heap_table_size = 98M

tmp_table_size = 64M

join_buffer_size = 64M

innodb_buffer_pool_size = 485M

innodb_doublewrite = off

innodb_additional_mem_pool_size = 80M

innodb_flush_log_at_timeout = 3

innodb_read_io_threads = 32

innodb_write_io_threads = 16
Restart Apache and MySQL with the following command:
systemctl restart mysql apache2
Configure SNMP
Now it’s time to install and configure the SNMP service. The installation is taken care of with the following command:
sudo apt install snmp snmpd snmp-mibs-downloader
Since Cacti depends upon RRDtool, it must be installed with the following command:
sudo apt install rrdtool
Open the /etc/snmp/snmp.conf file and comment out the line mibs : by adding a # like so:
#mibs :
Save and close that file.
To configure SNMP, open the file /etc/snmp/snmpd.conf. The first thing that must be done is to comment out the line:
agentAddress udp:127.0.0.1:161
Now uncomment the line (by removing the #):
agentAddress udp:161,udp6:[::1]:161
Scroll down and locate the line:
rocommunity6 public default -V systemonly
Below that line, add the following:
rocommunity snmp_string localhost

rocommunity snmp_string 192.168.1.0/25
Save and close that file.
Restart the SNMP service with the command:
sudo systemctl restart snmpd.service
If you have a firewall running, open up the proper port with the command:
sudo ufw allow 161/udp
Install Cacti-Spine
It’s time to install Cacti-Spine–a tool that replaces the default cmd.php poller. This is done with the following commands:
sudo -s

wget https://www.cacti.net/downloads/spine/cacti-spine-latest.tar.gz

tar xfz cacti-spine-latest.tar.gz

cd cacti-spine*

./bootstrap

./configure

make

make install

chown root:root /usr/local/spine/bin/spine

chmod +s /usr/local/spine/bin/spine
Next we configure Cacti-Spine to use our new database. Open the file /usr/local/spine/etc/spine.conf and edit the database credentials according to what you setup during the database installation/configuration. You’ll need to change DB_User and DB_Pass.
Install Cacti
We finally get to the installation of Cacti. This is done with the following commands:
wget https://www.cacti.net/downloads/cacti-latest.tar.gz

tar xfz cacti-latest.tar.gz

cp -rf cacti*/* /var/www/html/
In similar fashion to Cacti-Spine, the Cacti configuration must be setup to connect to the database. Open the file /var/www/html/include/config.php and change the credentials as per the database install/configuration. You’ll need to change database_username and database_password. In that same file, the line:
$url_path = "/cacti";
must be changed to:
$url_path = "/";
Save and close that file.
Populate the cacti database with the command:
mysql -u cacti_user cacti -p < /var/www/html/cacti.sql
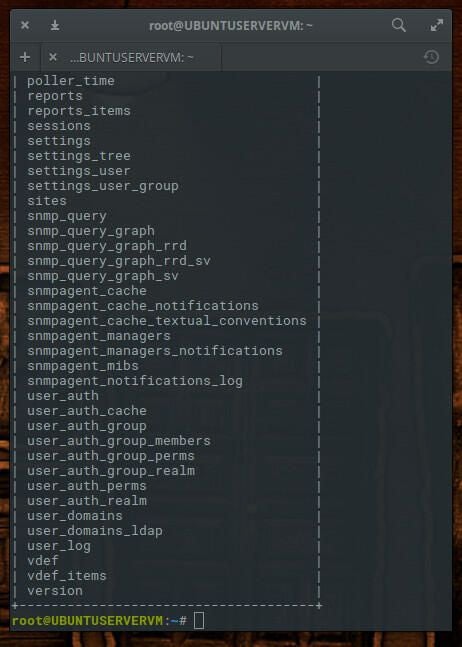
Issue the command mysql -u cacti_user cacti -p -e ‘show tables’ and you should see the newly populated data (Figure A).
Figure A
Before moving on to the web installation, issue the following commands:
rm /var/www/html/index.html

touch /var/www/html/log/cacti.log

chown -R www-data:www-data /var/www/html/
Web installation
The last phase is to point your browser to http://SERVER_IP/install (Where SERVER_IP is the address of the server housing Cacti) and walk through the installation steps. Since we’ve already configured everything, this should require little more than clicking next a few times.
However, I did find one problem that took a bit of finagling to solve. The installer won’t be able to find the spine executable. Out of the box, that executable is found in /usr/local/spine/bin. However, the installer wants it to be in /usr/local/spine/bin/spine/. To solve this, do the following:
cd /usr/local/spine/bin

mv spine ../

mkdir spine

mv ../spine spine/
It’s an odd issue, but the above will take care of it.
After clicking Finish in the web installer, you’ll be prompted to login. The default credentials are admin/admin. Once you enter those, you’ll be prompted to set a new admin password (it must contain a mixture of upper/lowercase and at least one number). After that, you’ll find yourself in the Cacti web interface where you can get busy working with your new installation of Cacti.
Happy graphing!