Whether you’re a software developer or working in DevSecOps, there may come a time when you need to work with Git and the only device you have is your Android smartphone. When that’s the case, what do you do? Thanks to a handy tool called Termux, you can install the command-line Git tool on a mobile device.
I’m going to walk you through the process of getting this up and running. I’ll demonstrate on Android 12, running on a Motorola Moto G51 5G.
Once installed, you’ll have the full complement of tools found in the command-line version of Git.
What you need
The only things you need are a device running version 5.0 or newer of the Android platform and a GitHub account. That’s it.
Let’s make this happen.
SEE: For more information on Git, check out our Git guide for IT pros.
Step 1: Install F-Droid
Because the Play Store hasn’t updated to a version of Termux that will work on the most recent Android versions, you need to use a third-party website to install Termux.
In this guide, we’ll use F-Droid. It works similar to an App Store, so any level user should feel comfortable downloading Termux using this app. You can also download Termux through GitHub. However, GitHub downloads require some technical knowledge, as assets are downloaded individually.
To download and install F-Droid on your Android follow these steps:
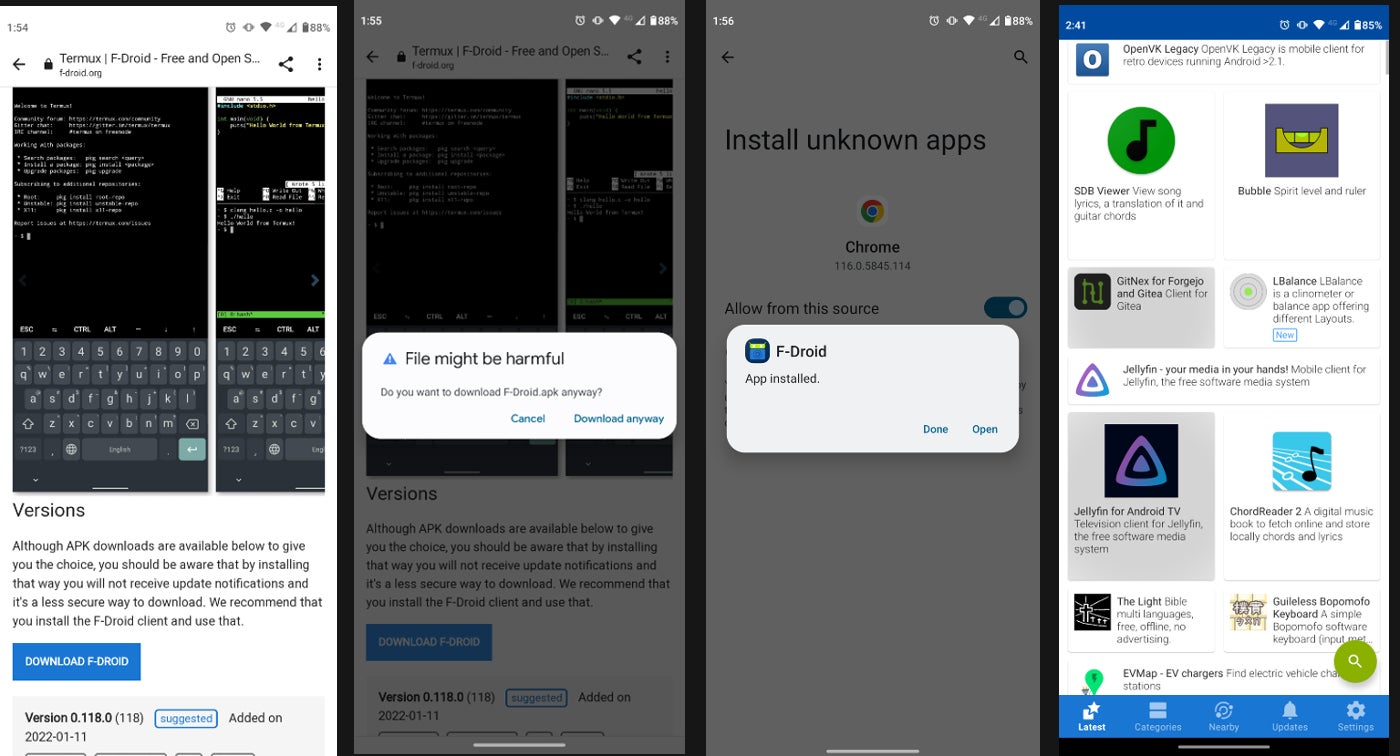
- Download F-Droid using this link.
- You will most likely get a “harmful file” warning on your phone because you’re not downloading the app from the Play Store. Tap on Download anyway.
- Open the file, and install it.
- Once the install is complete, you can tap Open to run F-Droid (Figure A).
Figure A

Step 2: Install Termux
Now that you have F-Droid on your phone, you need to download and install Termux. There are several versions of Termux on F-Droid, so remember that the one you are looking for is called Termux Emulator with packages.
To install Termux using F-Droid, follow these steps:
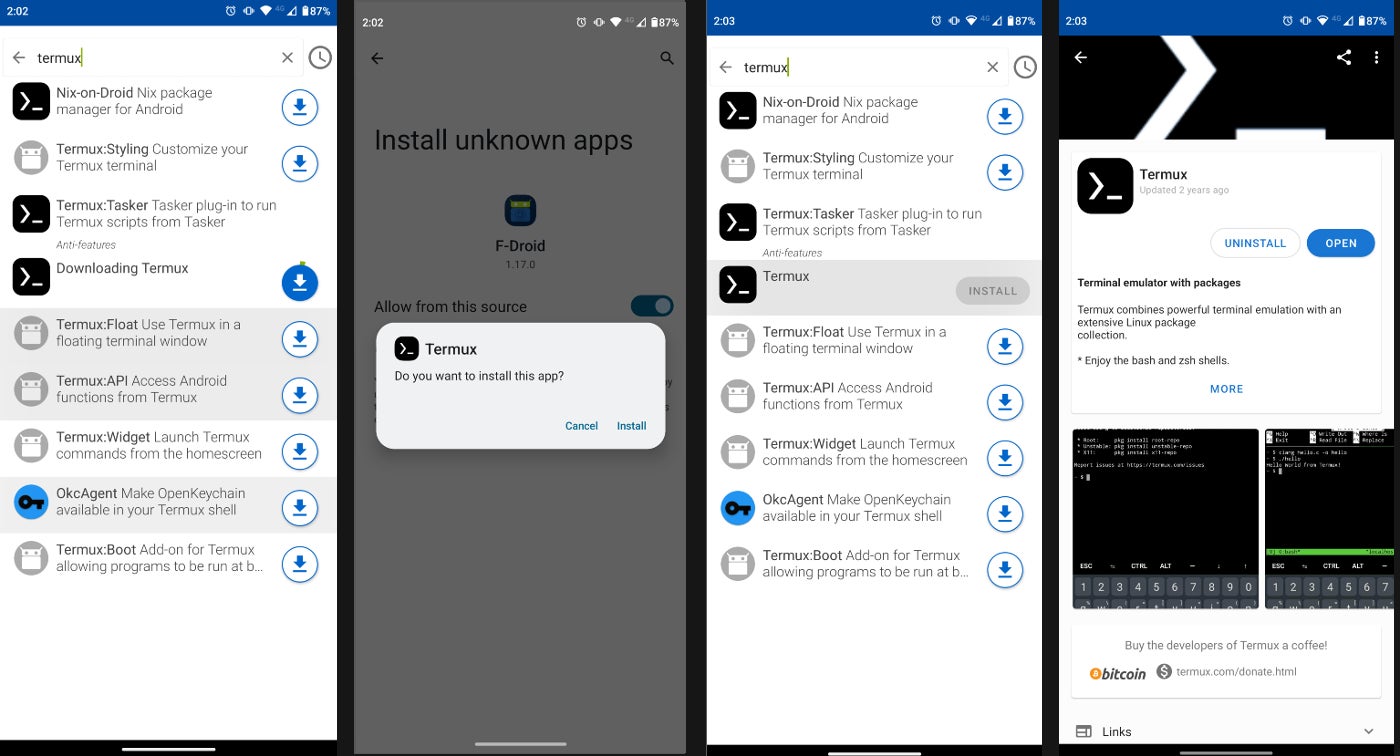
- Open F-Droid (if necessary); you should have an icon on your screen after installing it.
- In the F-Droid app, use the search tool on the bottom right to look for the Termux Emulator with packages app.
- You will get a list of apps. Find the one you’re looking for, and tap on Install.
- When prompted, give F-Droid permission to download unknown apps.
- Once downloaded and installed, tap on Termux and then Open (Figure B):
Figure B
-

Installation of Termux on Android 12, step by step.
Step 3: Install packages and Git
Once you have Termux up and running on your phone, you should see the command-line interface. It’s time to update packages and install Git.
To do this, follow these steps:
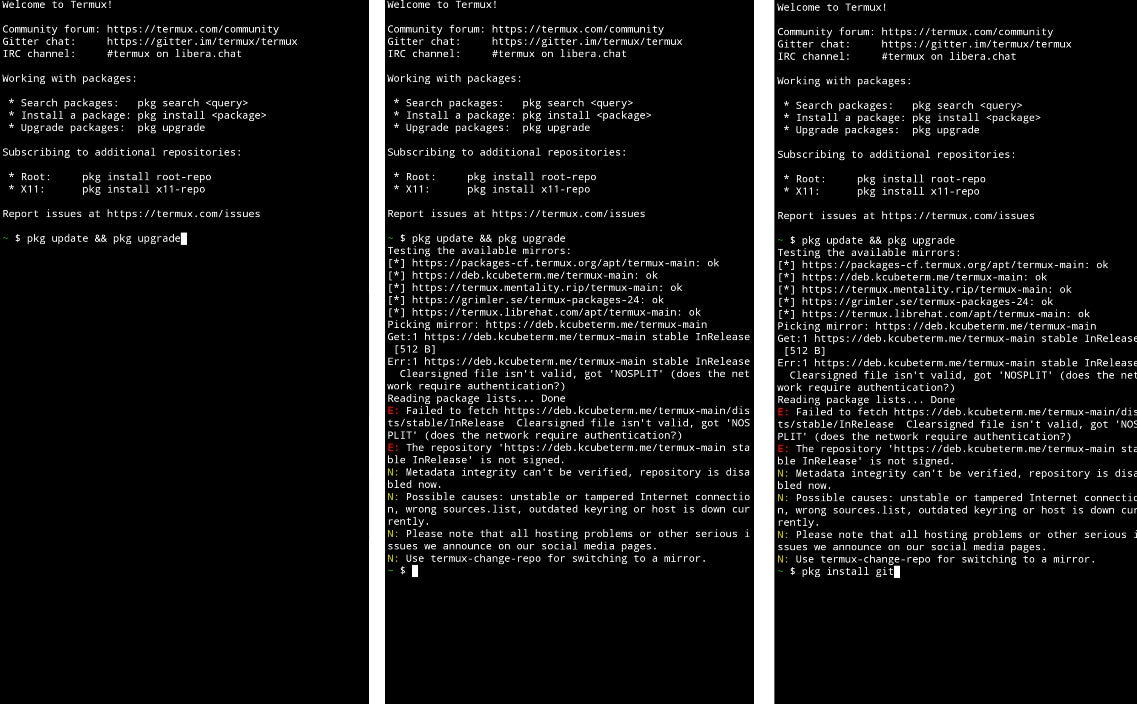
- Update packages by running the command:
pkg update && pkg upgrade
- Let the command run until it is finished.
- Now, you can run the following command to install Git:
pkg install git
- Let the command run until it’s finished (Figure C).
Figure C
-

Installing packages and Git on Termux, step by step.
Step 4: Authenticate GitHub
Github no longer accepts account passwords when authenticating Git operations; therefore, you must run a command to get past this.
To push your code in Github using Termux, run this command:
pkg install gh
Step 5: Set up Git storage
It’s now time to set up Termux Storage. This is done with the command (from the Termux terminal):
termux-setup-storage
After you run this command, tap Allow to allow Termux to access photos, media and files on your device.
Step 6: Connect to GitHub
The final step is to connect your GitHub account. To do so, follow these steps:
- Run this command to Login your GitHub account:
gh auth login
- Once you log in to your Github account, set up your Git with these commands:
git config --global user.name "name"
git config --global user.email "email"
That’s it! You are all set to run Git on your Android phone.
SEE: Here’s how to set up a Git repository in minutes on Linux.
If you are looking to install Git on your Mac watch our video tutorial: How to Install Git on macOS.


