


Image: iStockphoto/Igor Kutyaev
Must-read security coverage
- UK Police Convicts Pair in £5.5 Billion Bitcoin Launder Case
- Blackpoint Cyber vs. Arctic Wolf: Which MDR Solution is Right for You?
- How GitHub Is Securing the Software Supply Chain
- 8 Best Enterprise Password Managers
At this point in the game, you probably have several employees that will be working from home permanently. That being the case, you might need to deploy a VPN or two, to virtualize your private networks. There are several tools available to make this possible. One such VPN is the open source Pritunl VPN Server. One of the reasons why I like Pritunl for this task is that it includes a very user-friendly, web-based GUI for the management of the VPN.
I want to walk you through the process of installing Pritunl on Ubuntu Server 20.04. The process is fairly easy and should allow you to start configuring your VPN to perfectly meet your needs within minutes.
SEE: Identity theft protection policy (TechRepublic Premium)
What you’ll need
To get Pritunl up and running, you’ll need a running instance of Ubuntu Server 20.04 and a user with sudo privileges. You will also need to install the Pritunl Client, which can be installed on Linux, macOS and Windows (we’ll focus on the client in a later how-to).
How to install the dependencies
The first thing we must do is install the necessary dependencies for the server. Log in to your Ubuntu instance and install the necessary packages with the command:
sudo apt-get install curl gnupg2 wget unzip -y
Pritunl also requires MongoDB installed. For that we’ll first add the MongoDB GPG key with the command:
curl -fsSL https://www.mongodb.org/static/pgp/server-4.4.asc | apt-key add -
Next, we’ll sudo to the root user with the command:
sudo -s
Add the MongoDB repository with the command:
echo "deb [ arch=amd64,arm64 ] https://repo.mongodb.org/apt/ubuntu focal/mongodb-org/4.4 multiverse" | tee /etc/apt/sources.list.d/mongodb-org-4.4.list
Update apt and install MongoDB with the commands:
apt-get update

apt-get install mongodb-server -y
Start and enable the database server with the commands:
sudo systemctl start mongodb

sudo systemctl enable mongodb
How to install the Pritunl Server
Time to install Pritunl. First, add the necessary GPG keys with the commands:
apt-key adv --keyserver hkp://keyserver.ubuntu.com --recv E162F504A20CDF15827F718D4B7C549A058F8B6B

apt-key adv --keyserver hkp://keyserver.ubuntu.com --recv 7568D9BB55FF9E5287D586017AE645C0CF8E292A
Add the Pritunl repository with the command:
echo "deb http://repo.pritunl.com/stable/apt focal main" | tee /etc/apt/sources.list.d/pritunl.list
Update apt and install Pritunl with the commands:
apt-get update

apt-get install pritunl -y
Once the installation completes, exit out of the sudo root user with the command:
exit
How to access the web-based interface
Open a web browser and point it to https://SERVER (where SERVER is the IP address of the hosting server). You will be greeted by a window requiring a setup key (Figure A).
Figure A
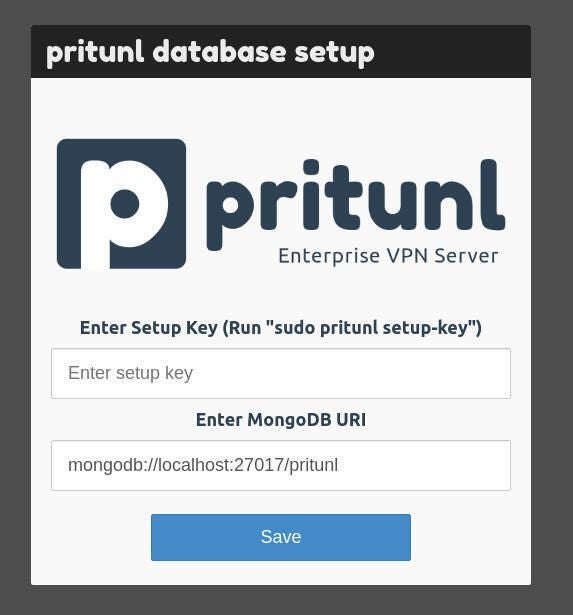
To generate a setup key, go back to the terminal window and issue the command:
sudo pritunl setup-key
Copy the key that prints out in the terminal and paste it in the Setup Key text area in the web interface. Click Save and then you’ll be prompted for the login credentials. You now have to generate a default password for the pritunl admin user. Go back to the terminal and issue the command:
pritunl default-password
Copy the generated key and paste it in the password text area. Make sure to use pritunl as the username. Click Sign In and you’ll then be prompted for the initial setup (Figure B).
Figure B
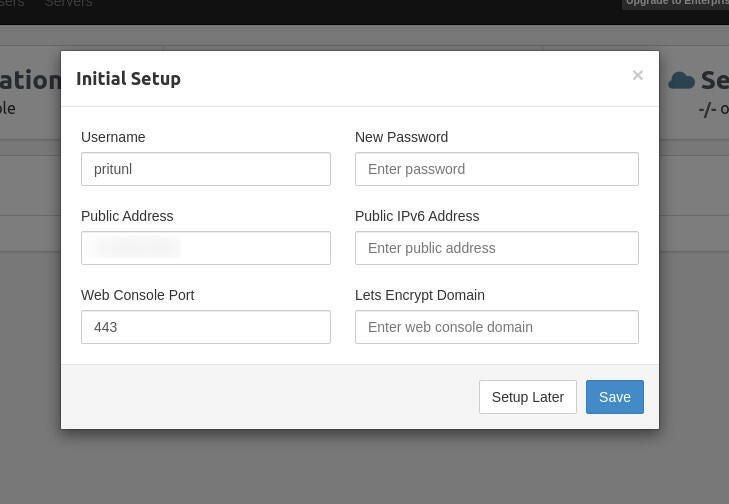
If you want to change the default password for the pritunl admin user, type a new password in the window and click Save. You should now see the Pritunl default window.
How to create an organization
Before you can do anything, you must first create an organization. Click the Users tab (directly to the right of Dashboard at the top) and then click Add Organization (Figure C).
Figure C

When prompted, give the new organization a name and click Add.
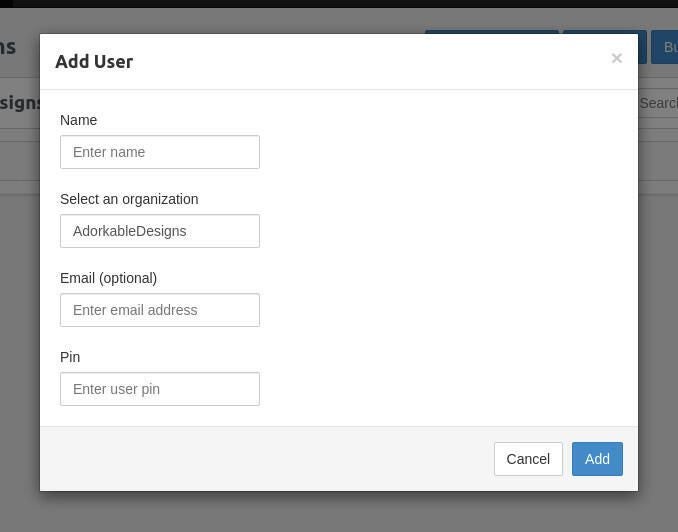
Once your organization has been added, click Add User. In the resulting window, type all of the necessary information and click Add (Figure D).
Figure D
How to add a server
You now have to add a Pritunl server. Click on the Servers tab and then click Add Server. In the resulting window, enter all of the necessary information for the new server and click Add (Figure E).
Figure E
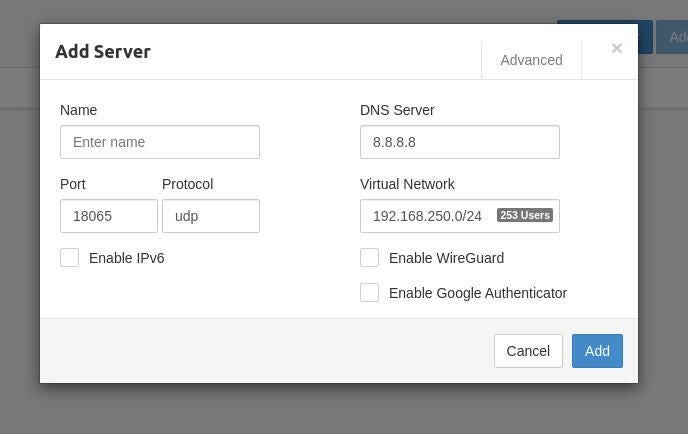
Remember, the Virtual Network cannot conflict with the network the Pritunl is connected to, so make sure the network is not the same as that of the hosting server. If you want to enable two-factor authentication, make sure to check Enable Google Authenticator. When finished, click Add.
Click Attach Organization to associate the organization you created earlier with the new server (Figure F).
Figure F

Finally, click Start Server and your Printul VPN server is up and running. Congratulations, you now have a VPN service up and running in your data center. Next time around, we’ll install the Pritunl client and connect it to the server.
Subscribe to TechRepublic’s How To Make Tech Work on YouTube for all the latest tech advice for business pros from Jack Wallen.