


For better or worse, Microsoft has been releasing updated versions of the Windows 10 operating system on a schedule that runs at an approximate rate of twice a year. If you are the system administrator for dozens, hundreds, perhaps even thousands of computer workstations, determining which version of Windows 10 is running on each machine can be time-consuming even in the best of conditions.
Must-read Windows coverage
- CrowdStrike Outage Disrupts Microsoft Systems Worldwide
- 10 Best Project Management Software for Windows in 2024
- Windows 10 Extended Security Updates Promised for Small Businesses and Home Users
- Securing Windows Policy
Of course, when troubleshooting computers, determining the version of Windows 10 running on a machine is a fairly simple matter of opening the right System configuration screen. However, doing that over and over again could become frustrating even for the most patient of troubleshooters. With a simple tweak of the Windows 10 Registry file, users and system admins can both see exactly which version of the operating system is installed on a particular PC just by looking at the desktop.
This how-to tutorial shows you how to tweak the Registry file to display the current version information about Windows 10 on the desktop at all times.
SEE: System update policy template download (Tech Pro Research)
Disclaimer: Editing the Windows Registry file is a serious undertaking. A corrupted Windows Registry file could render your computer inoperable, requiring a reinstallation of the Windows 10 operating system and potential loss of data. Back up the Windows 10 Registry file and create a valid restore point before you proceed.
Display Windows 10 version on desktop
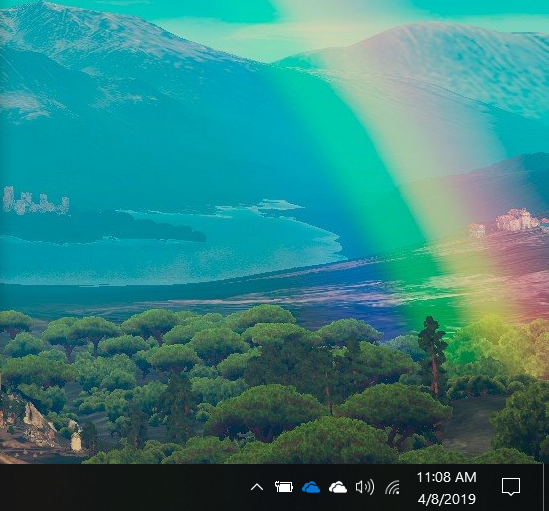
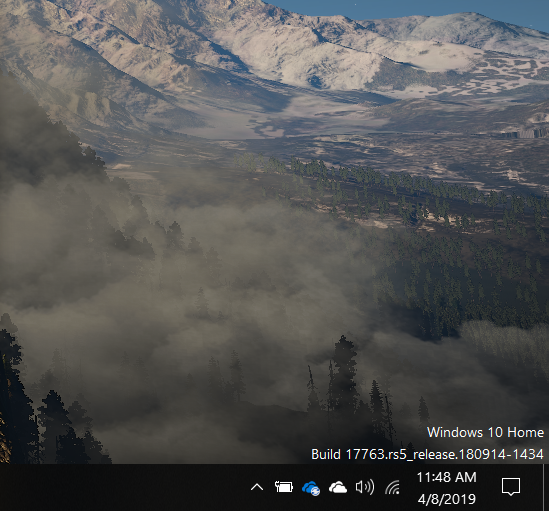
Figure A shows what the bottom right-hand corner of a typical Microsoft Windows 10 desktop looks like–no version information is displayed. This tweak of the Registry file will change that.
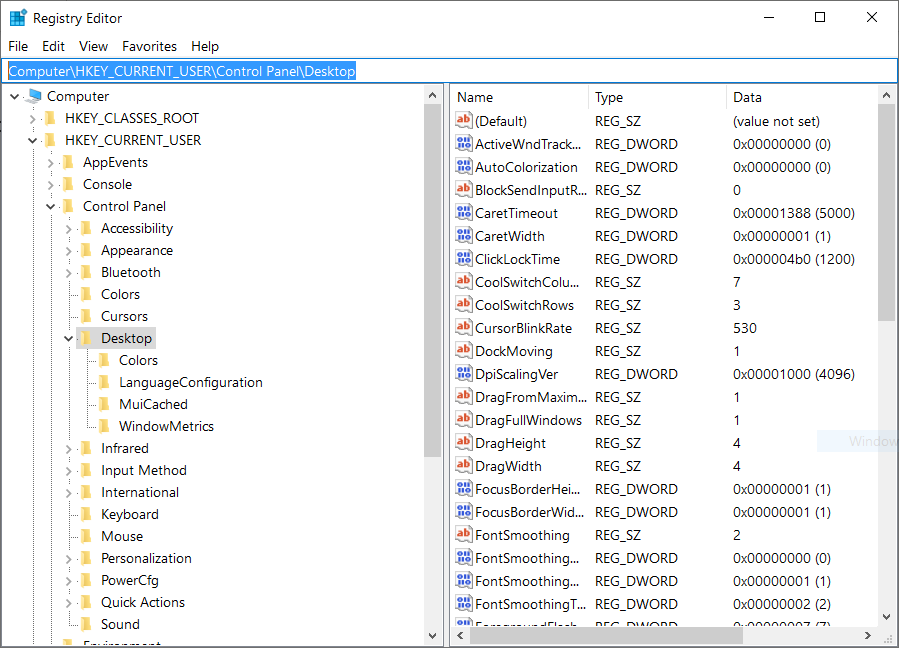
As is the case for any Registry tweak, start by typing “regedit” into the Cortana search box on the Windows 10 desktop. Click the entry in the search results, which refers to the Registry Editor program (regedit.exe). With the app open, navigate to this specific key (Figure B):
Computer\HKEY_CURRENT_USER\Control Panel\Desktop
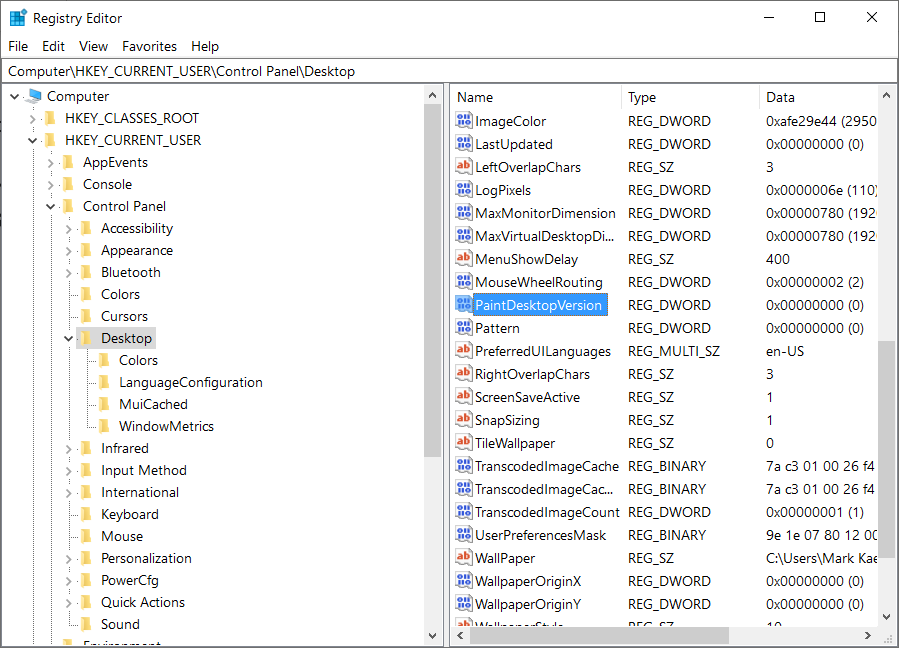
Click on the Desktop key and scroll down the list of keys displayed in the right-hand window until you find an entry labeled “PaintDesktopVersion,” as shown in Figure C.
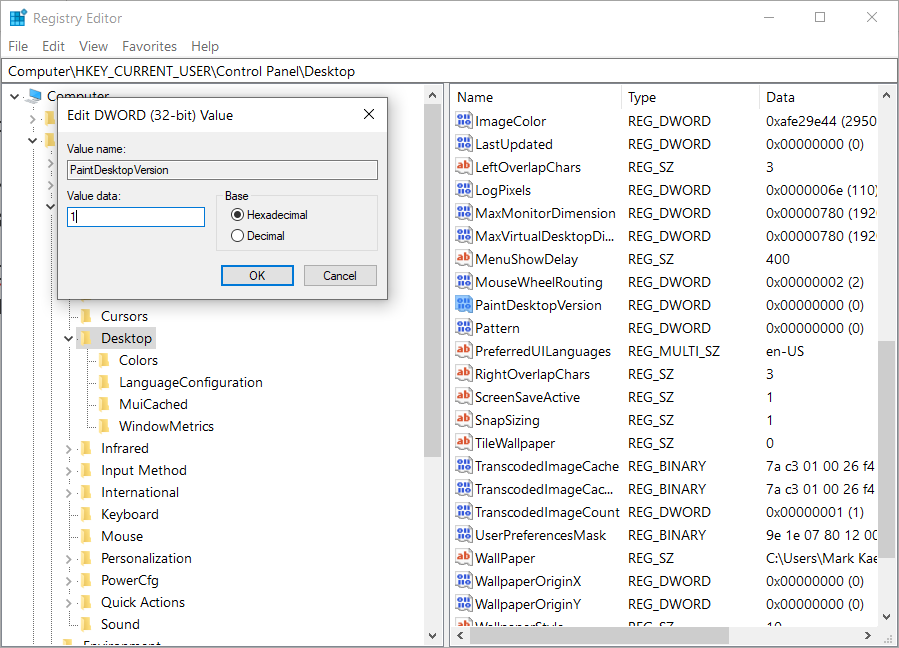
Double-click the PaintDesktopVersion key and change the Default value from “zero” to “1”, as shown in Figure D. Click OK to complete the process.
Click the File menu item of the Registry Editor and Exit the application. For the new setting to take full effect, you may have to restart your Windows 10 computer. From this point on you should see version information displayed in the bottom right-hand corner of your desktop, as shown in Figure E.
To remove the version display from the Windows 10 desktop, change the PaintDesktopVersion key value back to “zero.”