Let’s say you’re in a Zoom meeting. Someone says something profound or important about the topic at hand, but the moment passes without any record of what was said. Hopefully someone wrote it down, but if not, there could be an important piece of institutional knowledge lost the moment it was uttered.
Luckily, Zoom has the option to record meetings, both in audio and video format. There are a lot of reasons why someone would want to do so—creating a permanent record, easing the work of whoever is taking meeting minutes, giving participants or other employees the chance to watch it at another time or any number of additional cases.
SEE: Zoom vs. Microsoft Teams, Google Meet, Cisco WebEx and Skype: Choosing the right video-conferencing apps for you (free PDF) (TechRepublic)
Recording meetings often means editing them to condense or clarify the important bits, and in that case, there’s another feature that Zoom has included that can help videographers find the most important parts: separate audio files for each participant. In addition to recording each person separately, Zoom also offers an option to optimize audio file formats for third-party video editors, which is important to enable if you plan to do editing of any kind.
Note: The steps in this tutorial are for local recordings, which are available for free and paid Zoom users. Recording meetings in the cloud is a paid feature and steps to enable them are not covered here.
How to enable a separate audio file recording for each participant in Zoom
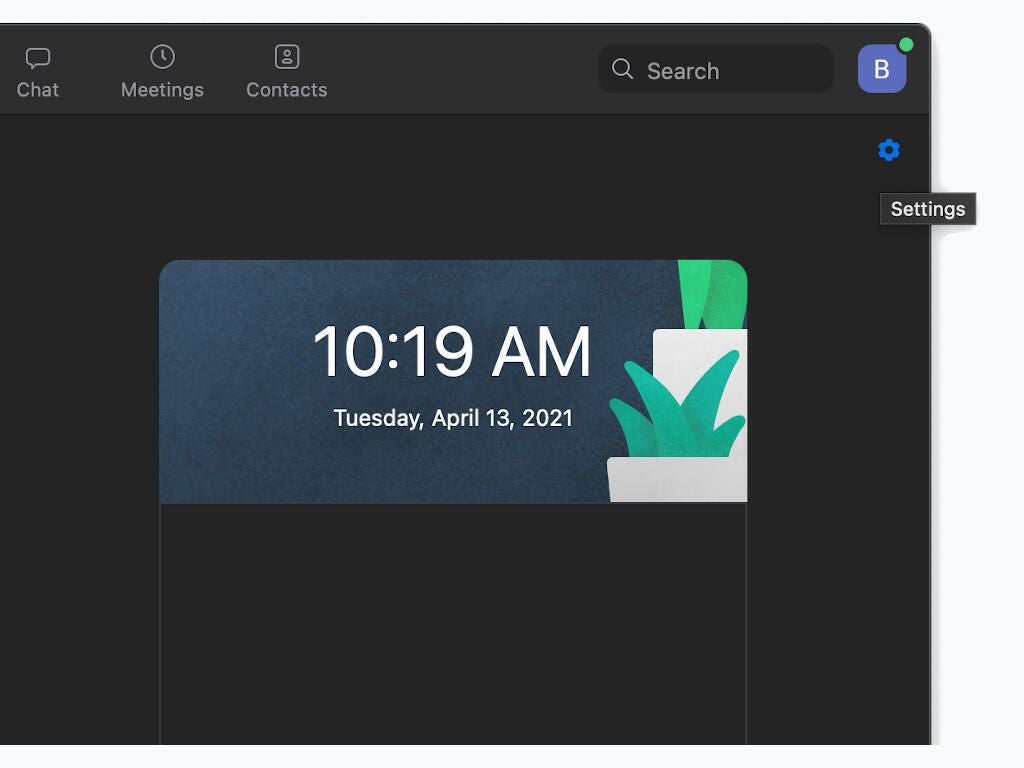
With Zoom open, look to the right-side of the main screen for the gear icon located beneath your name (Figure A). Clicking on it will open the Settings screen.
Figure A

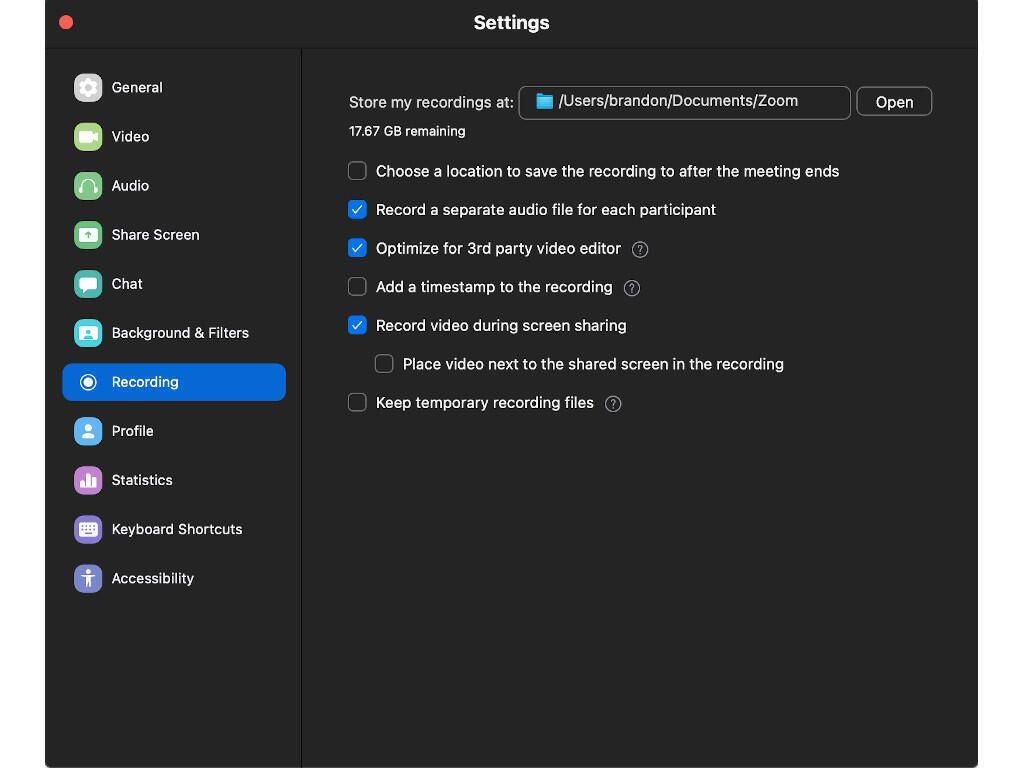
With settings open, click on Recording to open the screen shown (Figure B). You’ll see several options here, including the two we’re looking for.
Figure B

Check the boxes in front of Record A Separate Audio File For Each Participant And Optimize For 3rd Party Video Editor, also shown in Figure B. You can close out of the Settings menu now, but we’re not done—meeting recordings don’t happen automatically.
How to start a Zoom recording and find the files afterwards
While in a meeting, you should see a Record button on the bottom bar (Figure C). Clicking on that will start a recording and the Record button will change to a pair of buttons labeled Pause/Stop.
Figure C

SEE: Wellness at work: How to support your team’s mental health (free PDF) (TechRepublic)
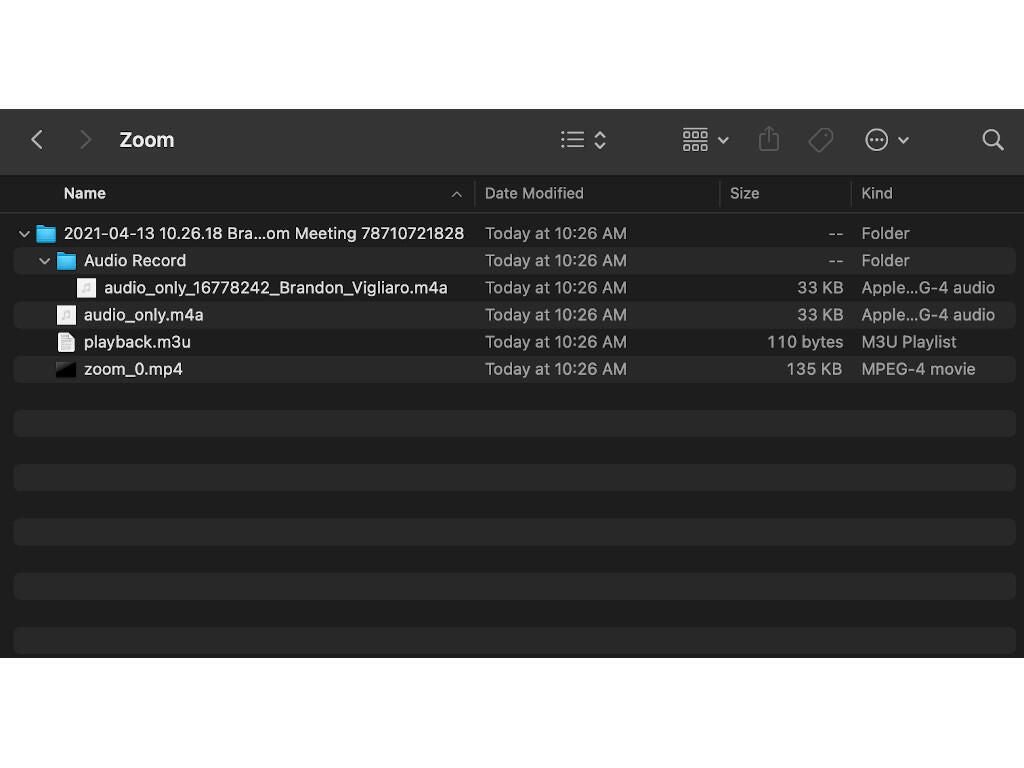
When the meeting is over, Zoom will automatically turn the video recording into an MP4 file, create a separate M4A file of everyone’s combined audio, and place all the audio files for individual participants in a subfolder, all of which can be found in the recording storage directory that was shown above in Figure B (Figure D).
Figure D


Image: iStock/AndreyPopov