Image: CNET
Beyond cooking up a Zoom meeting from the Zoom app or website, you can sometimes more easily and conveniently set it up directly from Microsoft Outlook. Scheduling a meeting from Outlook can save time as the meeting invitation is automatically generated in an email.
SEE: Zoom 101: A guidebook for beginners and business pros (TechRepublic Premium)
You can set up a meeting with either the Outlook client version or the web app. To create a meeting using the client version of Outlook, you must be running Exchange on the backend. If you’re an administrator, you can install the Zoom add-in for your Microsoft 365 users.
If you use an IMAP or POP3 email account, you can use the Outlook web app to schedule your meeting instead. Let’s check out all the options.
How to install the Zoom add-in for Microsoft Outlook
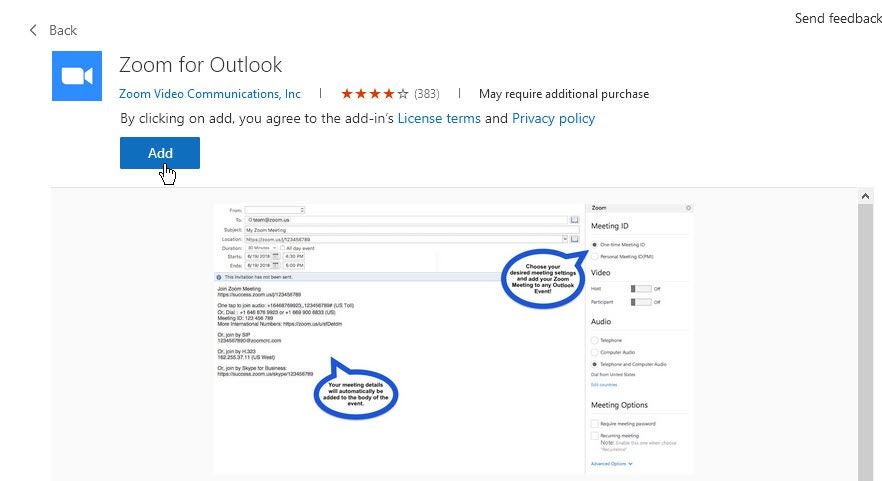
You first need to install the Zoom add-in for Outlook. To do this for your own account, open Outlook and click the icon or menu for Add-ins. In the Search Add-Ins field, type zoom. From the search results, click the Add button for Zoom for Outlook. Click Continue to install the Zoom add-in. The add-in will now appear when you attempt to schedule a meeting (Figure A).
Figure A

If you’re an administrator who wants to make the Zoom add-in available for all your users, sign into your Office 365 Admin Portal. Select Settings and then go to Add-Ins. At the Add-Ins screen, click the icon to Deploy Add-In (Figure B).
Figure B

At the pane to Deploy a new add-in, click Next. Then click the button to Choose from the Store (Figure C).
Figure C

In the Search field, type zoom. From the search results, click the Add button for Zoom for Outlook (Figure D).
Figure D

At the pane to Configure Add-In, you’ll need to make a few choices. In the first section for Assign users, determine whether you want to install the add-in for everyone, just for specific users or groups, or just for yourself.
In the second section, decide on the deployment method. You can opt for 1) Fixed to automatically deploy the add-in so that users can’t remove it; 2) Available to give users the option of installing the add-in; or 3) Optional to deploy the add-in but give users the ability to remove it. When done, click the Deploy button (Figure E).
Figure E

You can then close the Office 365 Admin portal. Note that it could take up to 12 hours for the add-in to be deployed to your users depending on the size of your organization. But it should appear more quickly than that.
How to install the Zoom add-in for the Outlook web app
If you don’t use Exchange to manage your email and you do use the Outlook web app, you can set up the Zoom plug-in that way. First, browse to the Zoom for Outlook download page at the Microsoft app store. Click the button to Get it now (Figure F).
Figure F

Sign in with the account you use for Outlook on the web. Continue from there, and the Outlook web app will open. At the Zoom for Outlook window, click the Add button (Figure G). When done, close the Zoom windows in Outlook.
Figure G

How to create a Zoom meeting in Outlook
To set up a Zoom meeting in the Outlook desktop client, click the icon for New Items and select Meetings. At the Meeting invitation, click the toolbar icon for Add a Zoom Meeting. Sign in with your Zoom account. Notice that the email is automatically populated with the link, ID, password, and other details for your meeting. Fill out the remaining details and then send the invitation (Figure H).
Figure H

To set up your meeting in the Outlook web app, click the Calendar icon at the bottom of the left pane. Click the button for New Event. At the invitation window, click the link for More options. Then at the full invitation window, click the Zoom icon at the top and select Add a Zoom Meeting. Add the necessary details and send the invitation (Figure I).
Figure I
