


Image: Aajan Getty Images/iStockphoto
There are lots of ways to move around a sheet or from sheet to sheet in an Excel workbook; however, you can anticipate users’ needs by including shortcuts for viewers who are unfamiliar with Excel. Or, in a busy file, you might include shortcuts to make things easier. In this article, I’ll show you how to use named ranges and hyperlinks as shortcuts to important data.
I’m using Office 365 on a Windows 10 64-bit system, but you can use older versions. You can work with your own Excel data or download the demonstration file.
How to create a named range in Excel
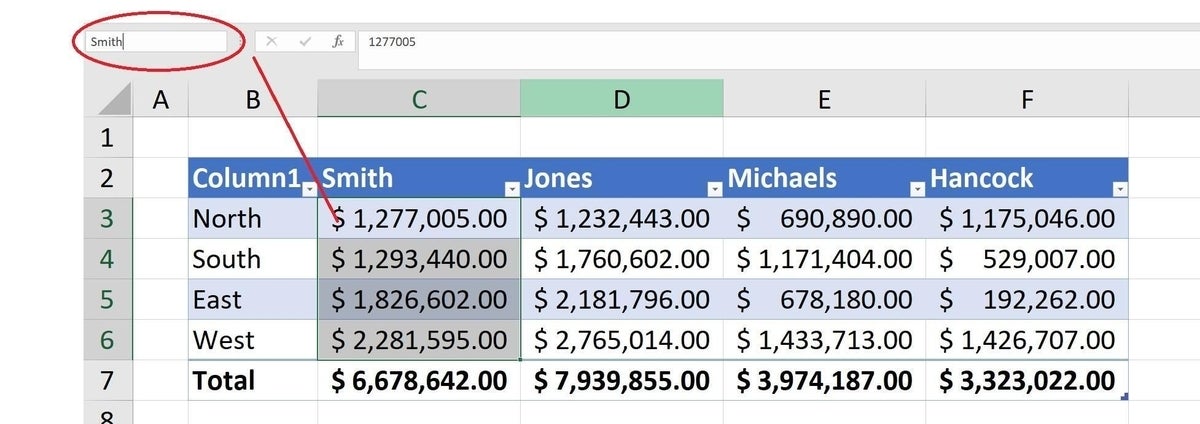
Most users learn about named ranges early on–it’s a name applied to a cell or a range of cells. Most of us use them in expressions, but you can also navigate using them. Before you can use a named range to navigate, you need to create one. To do so, select the cell or range and then type the name in the Name Box control to the left of the formula bar. To illustrate, let’s name the Smith data (Figure A) Smith as follows:
- Select C3: C6. (You can also apply a name to a single cell.)
- Click inside the Name Box control, type Smith, and click Enter. A name must begin with an alpha character, an underscore (_), or a backslash (). It can’t begin with a number. Nor can names contain space characters or most punctuation characters, or conflict with a cell reference. Names aren’t case-sensitive.
Figure A
There are other ways to create a named range, but this is one of the simplest. You can’t create a named range in the browser edition.
How to navigate to a named range using the Name Box control
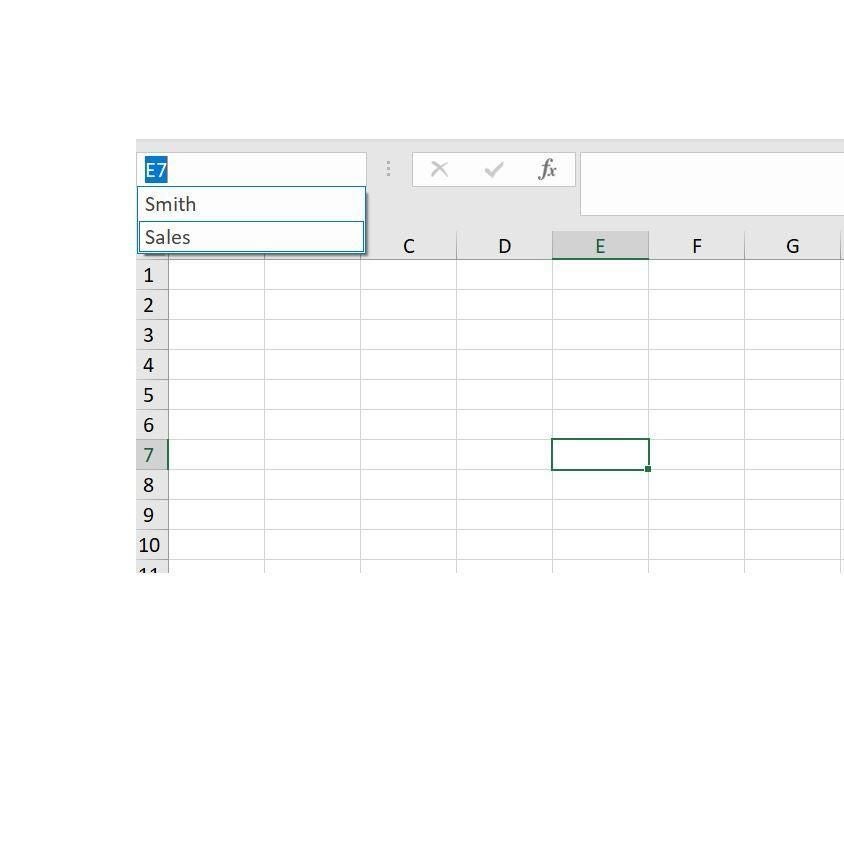
The Name Box control is also the quickest way to navigate. Click the Name Box dropdown and select a named range to move to that range. For example, move to a sheet other than the one that contains the data. Then, from the dropdown (Figure B), select Smith. Excel will quickly select Smith’s data on the sheet. This also works in the browser. Alternatively, you can press F5 and select a named range.
Figure B
This is one of the simplest ways to quickly move from one area of an Excel workbook to another. However, when you create a named range using Define Name in the Defined Names group on the Formulas tab, you can confine the scope to the current worksheet. When you do so, the name appears only on the dropdown when the named range is part of the active sheet.
You need to know about the Name Box to use it, so it won’t always be the best route. To create a more intuitive shortcut, you can supply hyperlinks.
How to navigate to a named range using a hyperlink
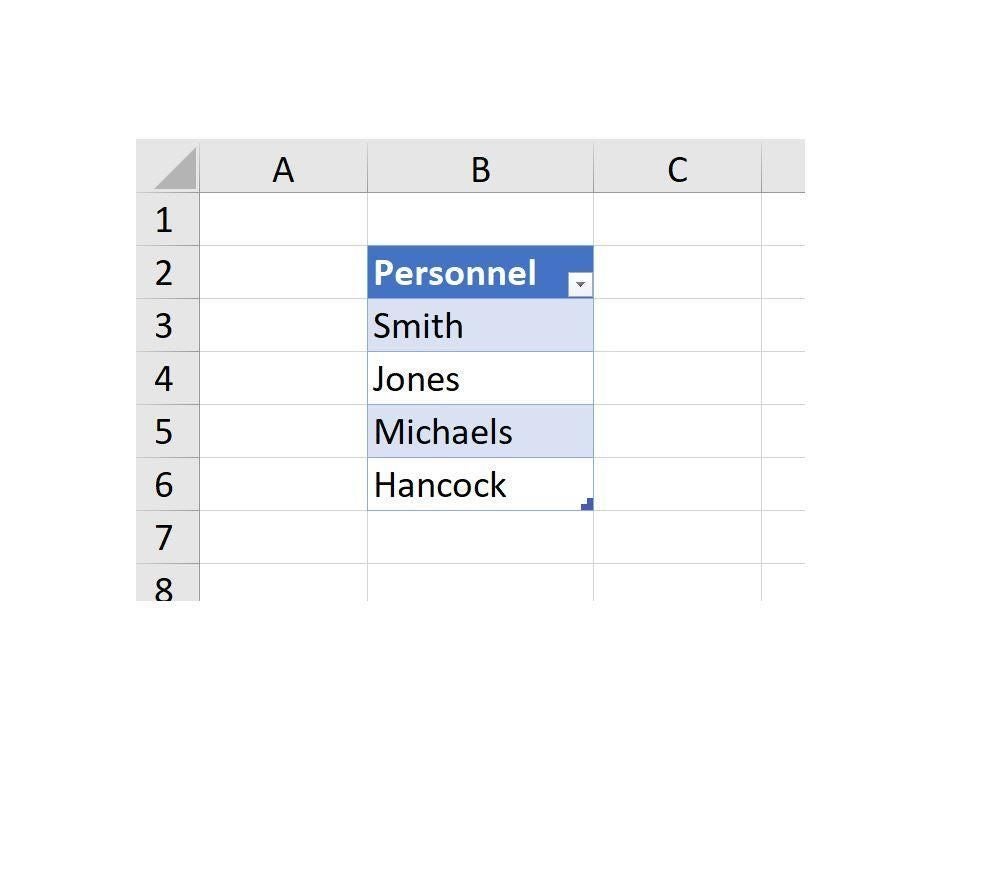
The Name Box control requires knowledge that your users might not have. In addition, in a dashboard situation, you’ll want to provide intuitive tools for navigating, such as hyperlinks. For instance, you might include a table of contents, of sorts, that includes a hyperlink to the sales data for all personnel. The simple Table in Figure C illustrates this concept simply but well.
Figure C
Let’s create a hyperlink that will select the Smith data, using the named range created in the last section. Follow these steps.
- Right-click B3 (the cell that contains the text value Smith) and choose Link from the resulting submenu.
- In the resulting dialog, click Place In This Document in the left pane.
- Select Smith in the Defined Names list (Figure D) and click OK.
Figure D
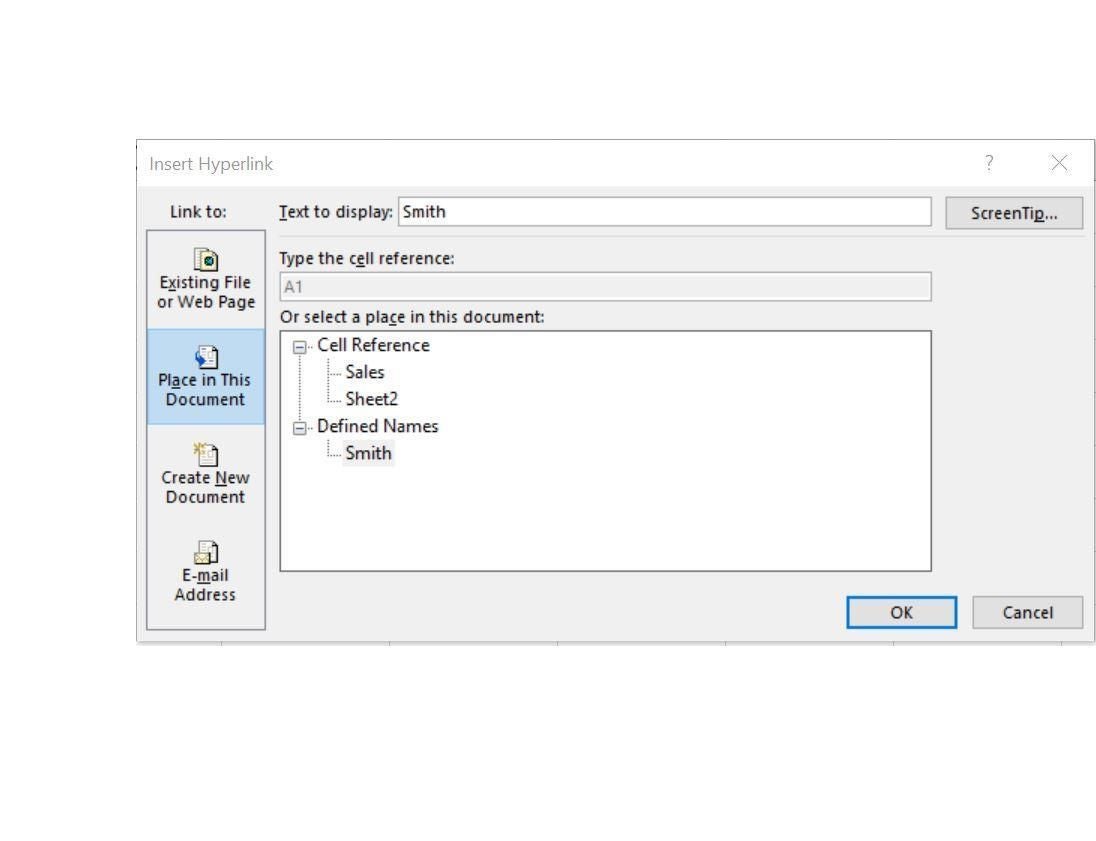
Figure E shows the resulting hyperlink. To access the sales data for Smith, click Smith in cell B3.
Figure E
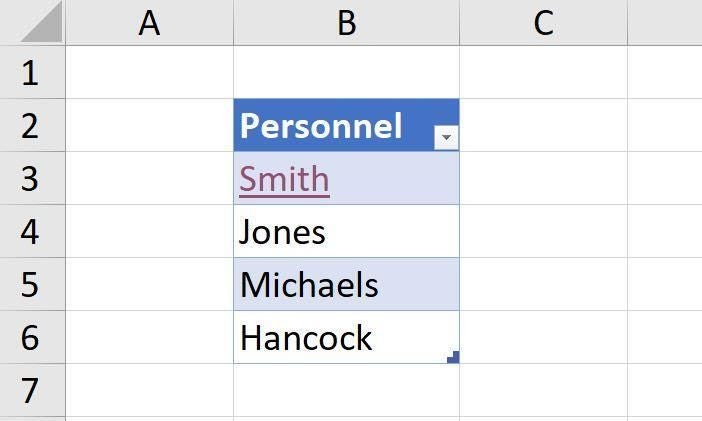
That was extremely easy, and users and viewers alike will find the hyperlinks easy to use—we’ve become accustomed to their format and we know what they’re for. You can also assign a hyperlink to a graphic. To remove a link, right-click it and choose Remove Hyperlink from the resulting submenu.
Shortcuts
It’s easy to create named ranges and turn them into navigational shortcuts–your users will appreciate you for it.
Do you use named ranges in other shortcuts? If so, please share your method in the article discussion.
Send me your question about Office
I answer readers’ questions when I can, but there’s no guarantee. Don’t send files unless requested; initial requests for help that arrive with attached files will be deleted unread. You can send screenshots of your data to help clarify your question. When contacting me, be as specific as possible. For example, “Please troubleshoot my workbook and fix what’s wrong” probably won’t get a response, but “Can you tell me why this formula isn’t returning the expected results?” might. Please mention the app and version that you’re using. I’m not reimbursed by TechRepublic for my time or expertise when helping readers, nor do I ask for a fee from readers I help. You can contact me at susansalesharkins@gmail.com.