


Inserting a table in Microsoft Word is simple, but the default won’t always work exactly how you want it to. For instance, the default alignment is offset from the left margin. What if you want the table centered or flush to the right margin? The good news is realigning a table is easy.
SEE: There are multiple ways to create an em dash in Microsoft Word.
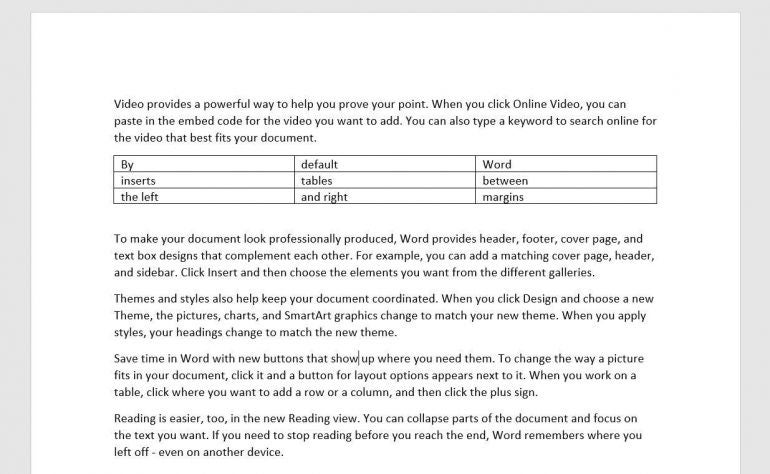
The default table aligns left
When you insert a table or convert text into a table, Word positions it between the left and right margins. You can easily change this. There are several ways to align a table across the horizontal plane between the left and right margins.
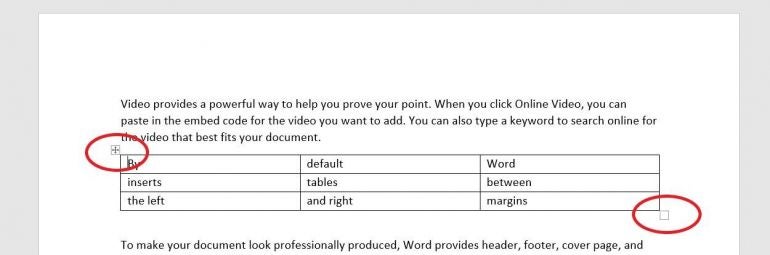
The first thing you might want to change is the width. There’s not enough text to fill the cells and it may look odd. In addition, the readability is low. Your eyes try to take in the entire table at once instead of reading the content. Fortunately, changing the width is easy.
- Click the table to select it. Doing so will display two handles: one in the top-left corner and one in the bottom-right corner.
- Hover the mouse over the handle at the bottom-right corner and your mouse will turn into a double-arrow.
- Simply drag up and to the left to reduce the width of the table and the width of each cell.
The resized table is a better fit, and you could easily stop here if you don’t want it aligned differently.
SEE: Learn how to create tables using HTML. (TechRepublic)
How to align table margins in Word
When you have a table that doesn’t spread from the left to the right margin, you might want to align it. You can apply specific alignments or indent the table.
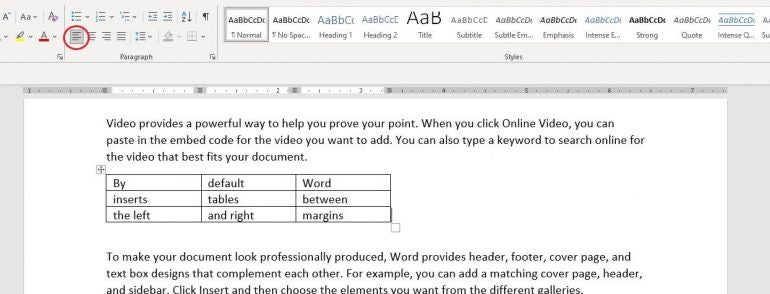
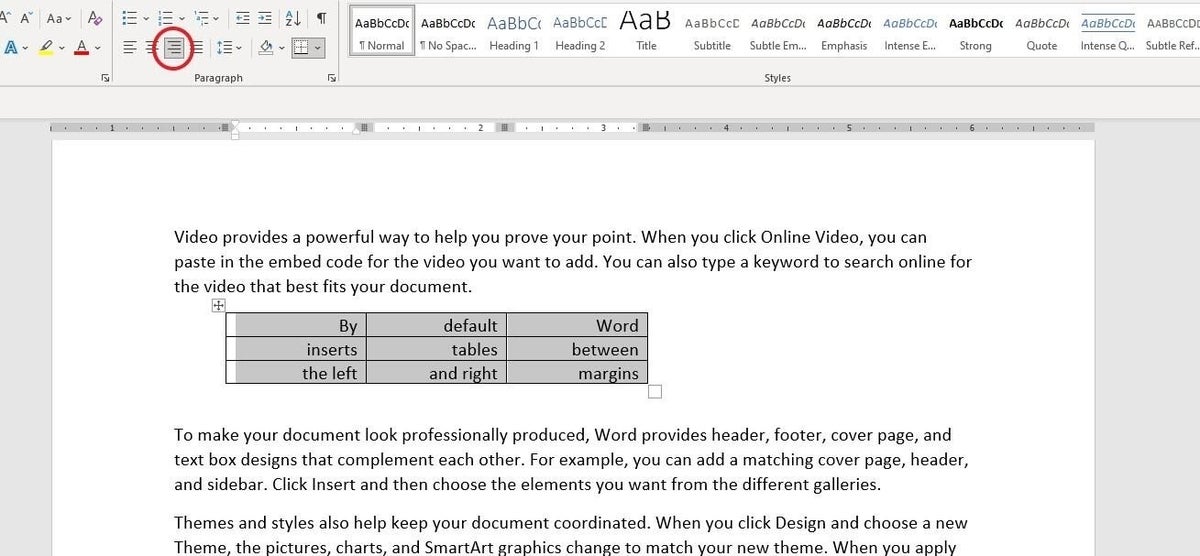
You have three alignments: left, center, and right. The default table is aligned to the left margin. You can easily check by selecting the entire table (not a cell) and viewing the alignment options in the Paragraph group on the Home tab. The image above shows the Align Left option selected. To align the table, select the table and click one of the other options: Center or Left Align. Using these three options you can quickly and easily align your table to the left, center, or right.
You can also use the Table Properties option to align a table. To access these options, right-click anywhere in the table and choose Table Properties from the resulting submenu. In the Table tab, choose an option from the Alignment section, and click OK. There are many property options, but we’re concerned with only those in the Alignment section. You might want to return later and review all the other options.
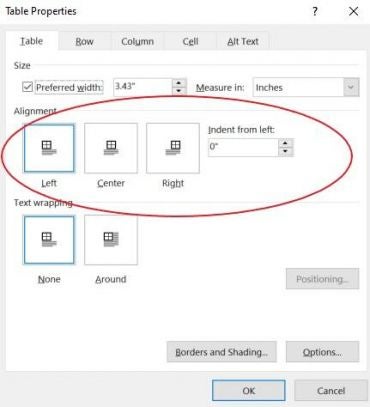
The final alignment option is Indent From Left. This allows you to easily indent the table from the left margin. Indent From Left is the option to use if you need to be precise. You can do the same thing by dragging the table and using the ruler to snap the table into position. Or use the Increase Indent option in the Paragraph group to move the table a half-inch at a time.

Aligning the content within each cell is just as easy using the Table Properties. On the Table tab, click the Options button to open the Table Options.
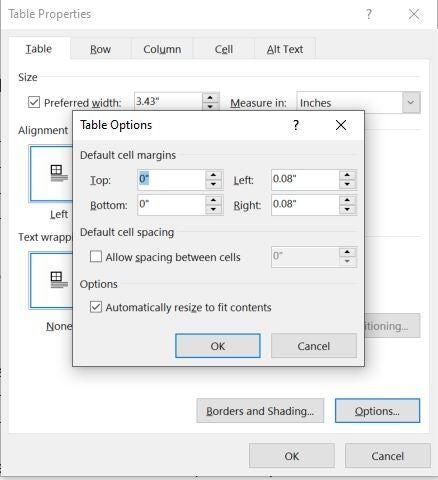
The Default Cell Margins section lets you change the size of all four margins. By default, the Automatically Resize To Fit Contents option is selected. To center or right-align content in the cell, use the alignment options in the Paragraph group. However, you must select the text rather than the entire table; otherwise, clicking an option will align the table, not the content within the cells.
SEE: Windows 10: Lists of vocal commands for speech recognition and dictation (free PDF) (TechRepublic)
How to align tables in Word Online
Aligning is a bit different in Word Online, but is still simple. With the table selected, right-click the table and choose Paragraph Options. Use the Alignment dropdown in the General section. Using the Align options on the menu will align the text within the cells rather than the table. So far, everything we’ve done has been clear-cut, but you might have noticed the text is positioned as a paragraph. The text doesn’t flow around the table.
Best business software
- Blackpoint Cyber vs. Arctic Wolf: Which MDR Solution is Right for You?
- SS&C Intralinks DealCentre AI vs. Datasite: Which platform is built for the future of dealmaking?
- Unified by Design: The Smart Stack Advantage of NinjaOne and Microsoft Intune
- Still Not Backing Up Microsoft 365 Data? Here’s Why That’s a Risky Move
- Verito vs. Rightworks: Which IT Provider Is Best for Your Firm?
How to wrap text around tables
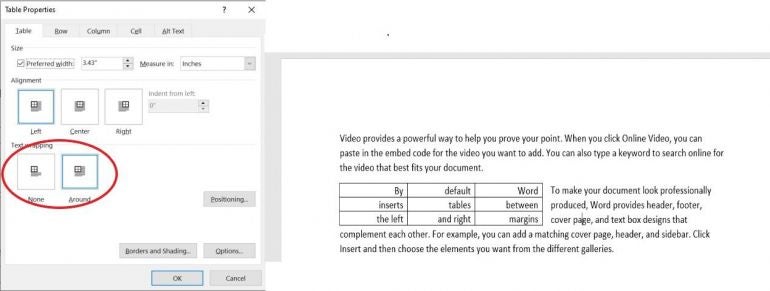
If you want text to wrap around the table, you must change another default option. Go back to the Table Properties dialog. Below the alignment options, you’ll see the text wrapping options. The default is no wrapping. Simply click the Around option and click OK. This option pulls up the text below and wraps it around the table. I clicked Backspace twice to pull the text up to align it with the top of the table. Pulling the text up this way may cause the paragraph to adopt some of the table’s properties. Simply click Normal to fix it.
Aligning Word tables as a whole is a simple task, and there are several ways to get the alignment you want.
Megan Crouse updated this article.