


Image: Getty Images/iStockphoto
For Windows 10, Microsoft offers two separate tools that you can use to connect to a remote workstation or server. There’s the built-in legacy Remote Desktop Connection tool, and there’s a Windows 10 universal app for Remote Desktop available at the Windows Store. The two tools provide similar functionality, but they look and work differently. Whether or not you’ve already used the legacy version, you may want to check out the universal app.
SEE: How to work from home: IT pro’s guidebook to telecommuting and remote work (TechRepublic Premium)
To get started, download the Remote Desktop app from the Windows Store. After it’s installed, click the Start button, scroll down the list of apps, and select the shortcut for Remote Desktop. At the Connect To Apps And Desktops window, click the Add button in the upper right. Here, you have two choices. If your organization offers a feed of remote PCs already set up, click the Remote Resources option, and proceed from there. If not, click the Desktop option (Figure A).
Figure A

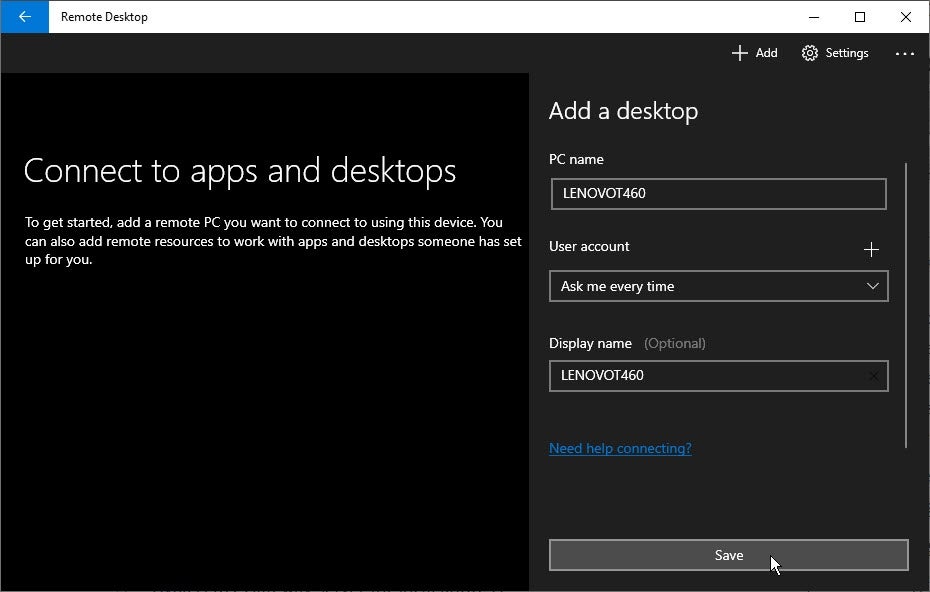
At the Add A Desktop window, enter the name or IP address of the PC to which you want to connect. Under User Account, click the drop-down menu, and either select your username or keep the option set to Ask Me Every Time if you prefer the latter for security reasons. In the Display Name field, type a name for this connection, if you wish, and click Save (Figure B).
Figure B
The connection then appears as a tile in the app’s home screen. Click the tile to connect to the PC (Figure C).
Figure C

Enter your username and password, and click the Connect button. A window appears asking if you want to accept the certificate and connect. If you’re sure about the identify of the remote PC, check the box for Don’t Ask About This Certificate Again, and click Connect (Figure D).
Figure D

You’re now connected to the remote PC where a few options are available on the Remote Desktop screen. At the top of the screen, click the Zoom button to zoom in and out of the screen. Click the ellipsis button to display a thin pane on the right. From there, click the Full Screen icon to toggle between a full screen and a smaller, resizable window. Click the Disconnect icon when you wish to end the remote connection (Figure E).
Figure E

You can minimize the window to shrink it to a Taskbar icon, click the Maximize icon to make the window full screen or the Restore icon to restore it to a smaller, resizable window, and click the X to close the remote session. Click the X to disconnect.
At the home screen, click the ellipsis icon for the connection you created. You can edit the connection to change the name, IP address, or credentials. You can also remove the connection. Select the option to Start In This Window to start the remote connection. You can also pin it to the Start menu for quicker access (Figure F).
Figure F

Click the Edit option. At the connection’s settings, click the Show More link. Scroll down the pane to see additional settings. Here, you can save the connection to a group, set up a Remote Desktop Gateway if your organization uses one for remote connections outside the firewall, swap mouse buttons, tweak the display settings, and determine which local resources you want to use through the remote computer (Figure G).
Figure G

Finally, you can adjust certain settings for all remote connections. At the home screen, click the Settings icon at the top. Here, you can choose a user account for all connections, add a Remote Desktop Gateway, create groups in which to save connections, determine whether to start each connection full screen and in a new window, establish if the screen should be stretched based on the size of the window, set when and where to use keyboard shortcuts, and prevent the screen from timing out (Figure H).
Figure H
