


Image: Deni_M/Shutterstock
Whether you are preparing for the infamous worst-case scenario or just want to have a backup on hand for testing purposes, creating a Windows 10 ISO file is a must. This basic operating principle is particularly true for those of us operating in the unpredictable world of information technology and business systems. No matter how careful you are, no matter how prepared, you will need a Windows 10 ISO file someday.
SEE: Checklist: Securing Windows 10 systems (TechRepublic Premium)
Must-read Windows coverage
- CrowdStrike Outage Disrupts Microsoft Systems Worldwide
- 10 Best Project Management Software for Windows in 2024
- Windows 10 Extended Security Updates Promised for Small Businesses and Home Users
- Securing Windows Policy
Microsoft has provided us a tool for creating a Windows 10 ISO file, but as is typical, it is not exactly simple to use. The Windows Media Creation Tool is freely available, but it is not included with a typical Windows 10 installation. You will also have to meet a few non-negotiable conditions before you can even start your ISO creation process.
This how-to tutorial shows you how to use the Windows Media Creation Tool to create a reusable Windows 10 ISO file.
How to download the Windows Media Creation Tool
The Windows Media Creation Tool is located on the same page as the Windows Update Assistant. Click the download button and save the tool to your hard drive.
Before you run the tool, you should first check that you have met all the prerequisites and considered all the parameters necessary for creating a Windows 10 ISO file:
- If you plan to store your ISO file on a USB drive, you will need one with at least 8GB of storage. (Note, any data on the USB drive will be deleted and lost.)
- The ISO file will be a 64-bit or a 32-bit version of Windows 10 depending on the PC you use to do the creating.
- To use the Windows 10 ISO file, you must have a valid Product Key, so pick a version and edition accordingly.
- You cannot make a Windows 10 Enterprise ISO from a Windows Home or Windows Pro PC. The editions should match.
- You must have administrative access to run the Windows Media Creation Tool.
Assuming you have met the prerequisites and are ready to proceed, you can start the tool.
How to create a Windows 10 ISO file
After agreeing to license terms you will reach a screen (Figure A) asking how you wish to proceed.
Figure A
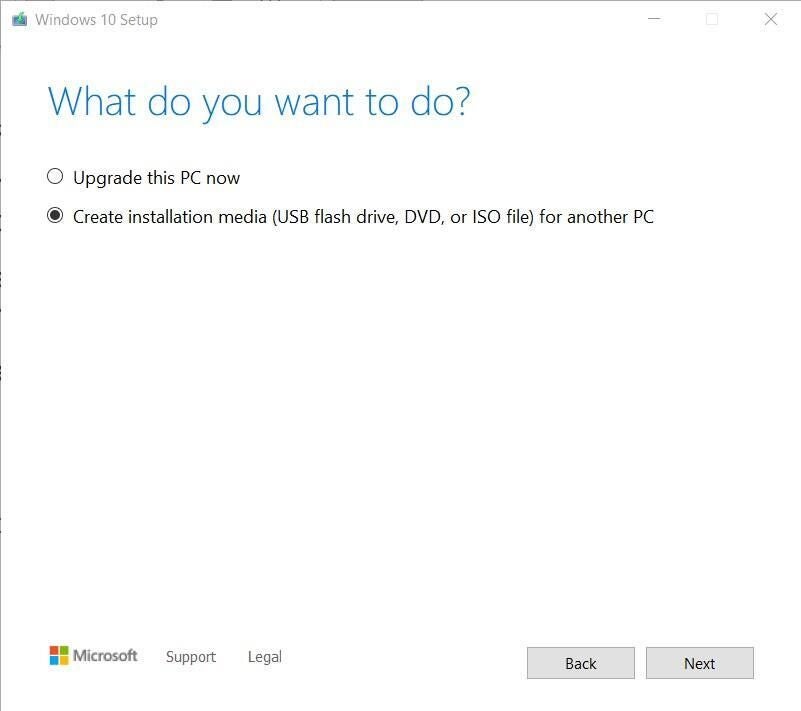
Answer that you are creating an ISO file and click the Next button.
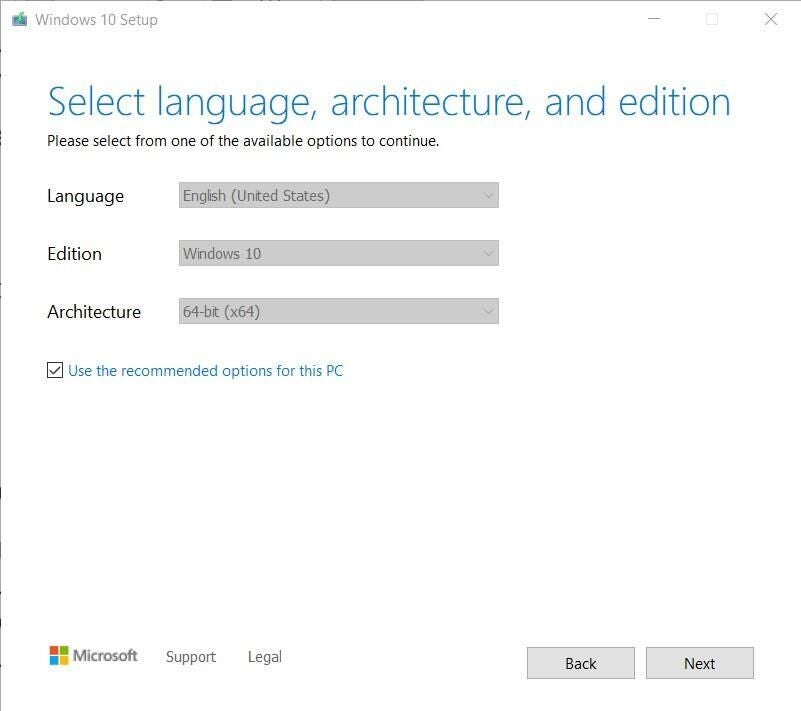
On the next screen, as shown in Figure B, the tool shows you its recommended settings. Although not generally good policy, if you want to change the recommended settings uncheck the box next to the phrase “Use the recommended options for this PC.” When you are satisfied with the options, click the Next button.
Figure B
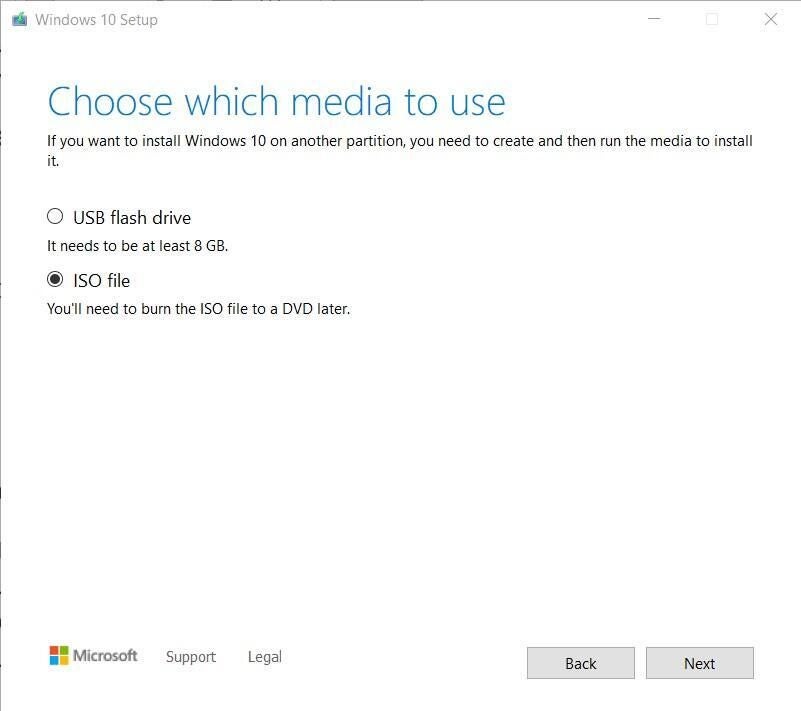
The next screen (Figure C) asks what kind of media will store your ISO file. I am creating an ISO file for a special use later, but if you want to store your Windows 10 ISO on a bootable USB drive then make that choice. A USB drive made in this fashion is a great way to get a clean install of Windows 10.
Figure C
When you have made your choice, click the Next button. You will then be asked where to save your ISO file. Remember, you will need at least 8GB of free space no matter where you store the file.
The process will take a few minutes even on the fastest computers with the best internet connections, so be patient. Click the Finish button to close the tool when it is complete.
As far as I know, there is no way to directly create a Windows 11 ISO file through the Windows Media Creation Tool. However, I plan to install Windows 10 onto a virtual machine using my newly created ISO file and then upgrade that VM to Windows 11. It should be an interesting experiment.