AlmaLinux is an outstanding option for companies looking for a server-based operating system that can host a never-ending stream of services and applications. But for those who want to use AlmaLinux as a container deployment platform, you’ll have to migrate from Docker to Podman, as the container runtime supported by RHEL-based operating systems has switched, and getting Docker up and running on the OS is a serious challenge.
SEE: Hiring kit: Back-end Developer (TechRepublic Premium)
Fortunately, you don’t have to worry so much about learning a completely different set of commands, as Podman is almost a 1:1 drop-in replacement for Docker. Another reason is that you can add Podman support to Cockpit, for a web-based GUI to manage your containers.
Cockpit is the default web admin control panel for all things RHEL, and AlmaLinux benefits from the tool as well.
I want to show you how to add Podman support to AlmaLinux and then how to access it from within Cockpit.
What you’ll need
The only things you’ll need to add Podman support to Cockpit are a running instance of AlmaLinux and a user with sudo privileges. That’s it, let’s get to work.
How to add Podman support
First off, Podman should already be installed on AlmaLinux by default. If you’re unsure, log into your AlmaLinux instance and run the command:
podman -v
The output should include the version of Podman currently installed on AlmaLinux.
To add Podman support to Cockpit, issue the following command:
sudo dnf install cockpit-podman -y
That’s all there is for the installation.
How to enable Cockpit
For whatever reason, Cockpit is installed but not enabled by default (this really needs to be changed). The good news is enabling Cockpit is very simple. From the terminal window, issue the command:
sudo systemctl enable --now cockpit.socket
How to access Cockpit
Now that Cockpit has been successfully enabled, open a web browser and point it to https://SERVER:9090 (where SERVER is the IP address or domain of the hosting server.
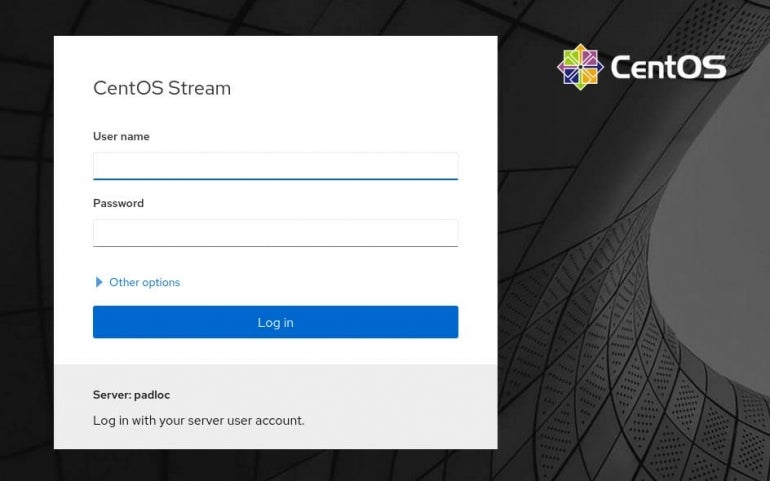
You will be greeted by the Cockpit login window, which is (oddly enough) still CentOS Stream branded (Figure A).
Figure A

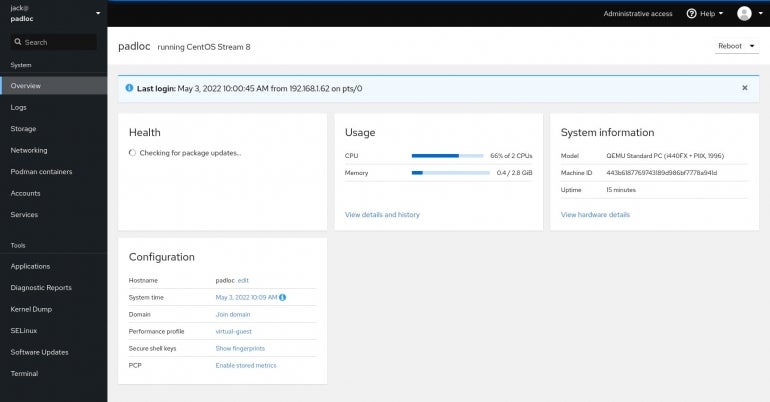
Log in with any account that has sudo privileges and you should see the Podman containers listing in the left navigation (Figure B).
Figure B

If you click Podman containers, you’ll be informed the daemon isn’t running (Figure C).
Figure C

Click Start Podman to start the daemon. Once the daemon starts, you’ll be directed back to the container management window (Figure D), where you can create your first container.
Figure D

How to create your first container
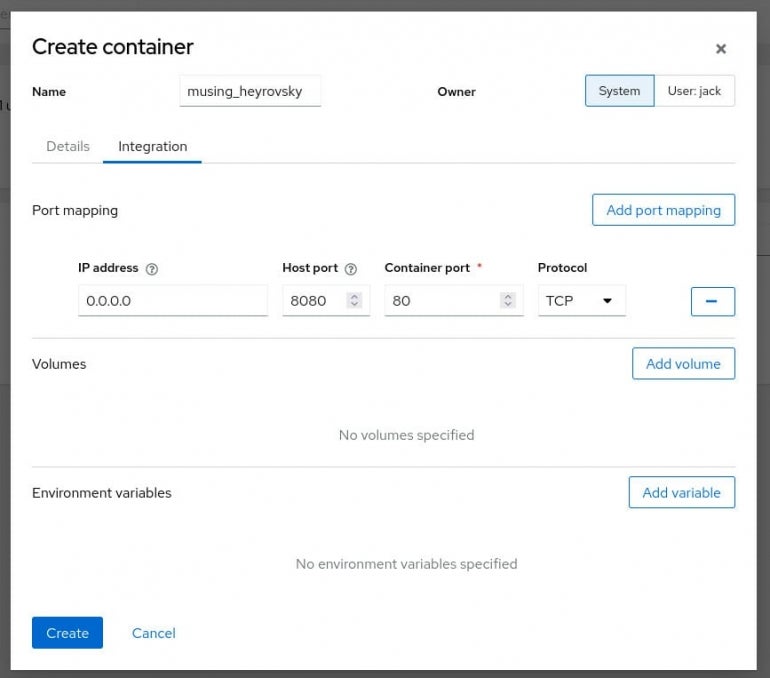
Since we’re here, let’s create our first Podman container. Click Create container and, in the resulting window, type nginx in the Image search field. Make sure to select an official build of the nginx image. Once you’ve selected the image, click on Integration and add any necessary port mapping you might want (such as point external port 8080 to internal port 80–Figure E).
Figure E

Click Create and the image will download and the container will deploy. You can then point your web browser to the IP address of your AlmaLinux server at port 8080 to view the NGINX welcome page (Figure F).
Figure F

Congratulations, you’ve just added Podman support to AlmaLinux, so you more easily manage your Podman container deployments.
Subscribe to TechRepublic’s How To Make Tech Work on YouTube for all the latest tech advice for business pros from Jack Wallen.
