 Back in 2007, Microsoft introduced a new disk caching feature called ReadyBoost that was designed to make the Windows Vista operating system a little snappier. ReadyBoost has been part of every version of Windows since then and is still part of the Windows 10 operating system. However, many people wonder if ReadyBoost is an effective tool in Windows 10.
If you’re running Windows 10 on fairly standard hardware, you will find that ReadyBoost offers a nice performance enhancement. On the other hand, if you are running Windows 10 on high-end hardware, you will discover that ReadyBoost is no longer viable. Let’s take a closer look.
How ReadyBoost works
To begin with, it is important to understand that ReadyBoost is essentially a helper tool for SuperFetch, a larger component built into the operating system. So let’s start there.
SuperFetch is a disk cache management technology designed to enhance the operating system’s responsiveness when loading and switching between the applications you use most often. Using adaptive techniques, SuperFetch constantly monitors the data and system files related to those applications and preloads them into the cache where they can be loaded into RAM quickly. To further improve performance, SuperFetch incorporates an I/O prioritization technology, in which applications are marked as either a low- or high-priority I/O application. With this system SuperFetch will temporarily sideline a low-priority I/O application when a high-priority I/O application takes precedence. Of course, this greatly improves the performance of applications marked as high-priority I/O.
While the SuperFetch cache management technology works fine while using your system’s hard disk for the cache, it does fall prey to fact that a hard disk relies on physically moving parts, which can limit the speed with which data is transferred back and forth between RAM and the cache. This is where ReadyBoost comes into play.
SEE: How to use Windows 10’s Resource Monitor to track memory usage
When you connect a flash-based memory device to your system and configure it as a ReadyBoost device, SuperFetch will copy its cache from the hard disk to the device and enlist ReadyBoost to assist in the cache management system. Since a flash memory device doesn’t rely on physically moving parts, data is transferred back and forth between RAM and the cache much more quickly and efficiently.
However, ReadyBoost doesn’t actually take over from SuperFetch; instead, they work in concert. Once ReadyBoost is enabled, it keeps tabs on hard disk operations and will only go into action reading and delivering files from its copy of the cache when doing so will boost performance. For example, during sequential read operations, ReadyBoost will allow SuperFetch to use the cache on the hard disk, since the hard disk can outperform flash-based drives for these types of read operations. During nonsequential read operations, ReadyBoost will essentially redirect SuperFetch to use the cache on the flash-based drive.
Now, there are exceptions to this system. Really fast hard disks can often perform some, but not all, nonsequential read operations faster than a flash-based drive. In such cases, ReadyBoost won’t provide as significant a performance gain as it would if your hard disk were slower. However, even if you have a fast hard disk, there are situations where ReadyBoost can make a big performance contribution. So don’t write it off.
To ensure the safety, integrity, and efficiency of the ReadyBoost system, Microsoft added several safeguards. To begin with, the data on device is automatically encrypted using the Advanced Encryption Standard–AES 128. So if you lose the device, you won’t have to worry about someone getting access to data. While the operating system will actually work from the cache on the device, all the data in the cache is mirrored on the hard disk. Therefore, if you inadvertently remove the device while it’s in use by ReadyBoost, the operating system will immediately fall back to the cache on the hard disk and pick up where it left off.
SEE: 10 quick tips to make Windows 10 work the way you want
Getting started
ReadyBoost is designed to use external USB flash drives, SD cards, or CF cards as a hard disk cache to improve disk read performance. When you insert one of these devices into a Windows 10 system, access its Properties dialog, and select the ReadyBoost tab, the operating system will begin a series of tests to determine whether the drive is compatible with ReadyBoost, as shown in Figure A.
Figure A
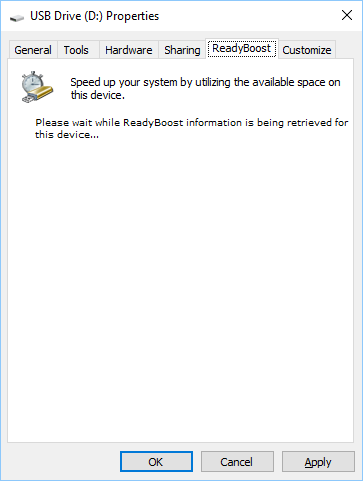
When you first access the ReadyBoost tab, the operating system will begin a series of tests to determine whether the drive is compatible with ReadyBoost.
To be ReadyBoost-compatible, the device must:
- Be at least 256 MB in size, with at least 64 KB of free space.
- Have an access time of 1 ms or less.
- Have at least a 2.5 MB/sec throughput for 4 KB random reads.
- Have at least a 1.75 MB/sec throughput for 1 MB random writes.
If the device isn’t compatible, you’ll see a message informing you that the device doesn’t have the required performance characteristics for ReadyBoost, as shown in Figure B.
Figure B
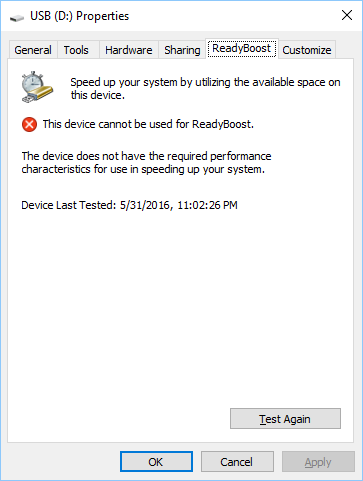
If the device doesn’t meet ReadyBoost requirements, you’ll see a message like this one.
On the flip side, if your system has an SSD hard disk in it, which is much more common than when ReadyBoost was first introduced, you may see the message shown in Figure C. This is because a system with an SSD hard disk in it is, along with SuperFetch, can outperform ReadyBoost, so using ReadyBoost isn’t necessary. (Since SSDs are more common in the Windows 10 era, this is really the only situation where ReadyBoost is no longer an effective tool for Windows 10.)
Figure C
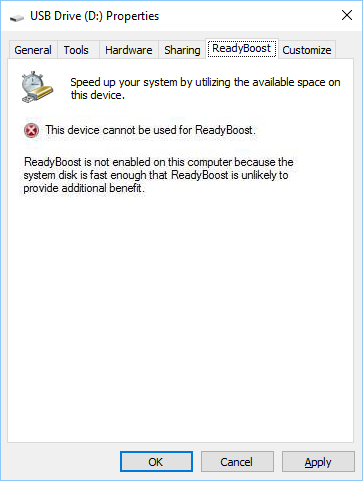
If your system has an SSD hard disk in it, chances are you won’t need ReadyBoost.
If the device is compatible, you’ll see options like those shown in Figure D, which will allow you to configure the device for ReadyBoost. Since these types of memory devices are inexpensive now, I recommend that you choose the Dedicate This Device To ReadyBoost option. However, before you do so, I recommend that you first reformat the device.
Figure D
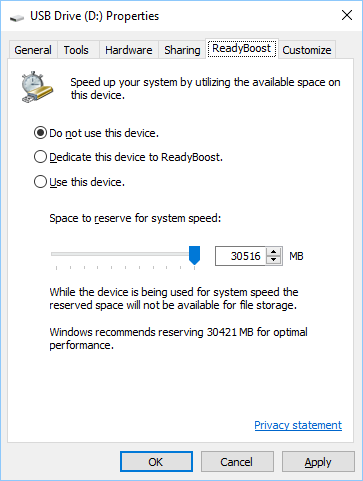
If the device is compatible with ReadyBoost, you’ll be prompted to enable the feature.
My opinion is that your best bet is to format the drive using the exFAT file system rather than NTFS. The exFAT system was originally designed for flash-based memory devices and it has a lot less overhead than NTFS. When you format the drive, as shown in Figure E, I suggest using the default Allocation Unit size.
Figure E
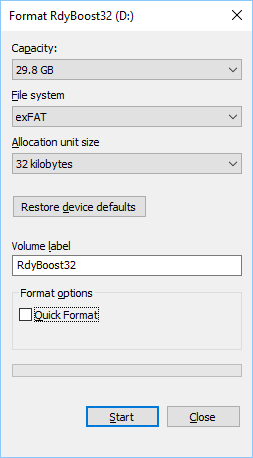
Before you enable ReadyBoost, it’s a good idea to format the drive using the exFAT file system.
Enabling ReadyBoost
As I mentioned, I advise choosing the Dedicate This Device To ReadyBoost option, as shown in Figure F.
Figure F
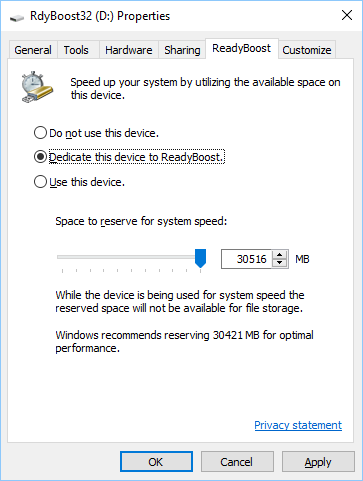
Since these types of memory devices are inexpensive, I recommend that you choose the Dedicate This Device To ReadyBoost option.
Click OK, and ReadyBoost will configure the device to use the caching system by creating a disk cache file named ReadyBoost.sfcache in the root of the flash drive, as shown in Figure G.
Figure G
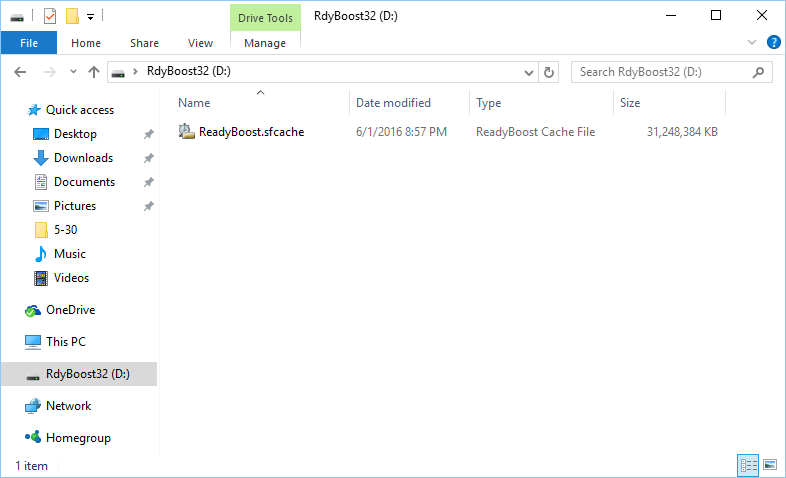
ReadyBoost will configure the device to use the caching system by creating a disk cache file named ReadyBoost.sfcache in the root of the flash drive.
What’s your take?
It’s important to understand that recognizing the performance gain provided by using ReadyBoost is pretty subjective and will depend on what kind of applications you run on your computer and what type of data you typically work with. I’ll follow up on this performance issue next week, so stay tuned.
In the meantime, share your experiences and advice regarding ReadyBoost’s effect on performance gains in Windows 10.
More helpful Windows how-to’s…
- How to revive a Windows 7 system with a clean install via the Windows 10 Media Creation Tool
- How to use custom views in Windows 10’s Event Viewer
- How to fix the missing Windows Sockets registry entries error
- How to restore files from Windows 10’s File History