


This month, Tom and I discussed ways to work more efficiently with Word tables. He uses the same formatting scheme for all tables and he’s tired of setting those same formats every time he inserts a new table. Fortunately, he can save time by changing Word’s default table style to suit his needs. In this article, I’ll show you how to reset the table default to a custom table style. I’ll also discuss Quick Tables–another quick and easy way to insert customized tables.
I’m using Word 2016 on a Windows 10 64-bit system; there’s no downloadable demonstration file. Although I don’t supply instructions for earlier versions, you can easily apply these instructions to any Ribbon version.
More about Software
- Software Installation Policy
- Five Methods to Insert a Checkmark Into Microsoft Office Products
- How to Hide and Handle Zero Values in an Excel Chart
- How to Use Section Breaks to Control Formatting in Word
Set Word’s default table to a custom style
Every time Tom inserts a new table, he has to set a number of formatting properties, which is a time-wasting nuisance. But by modifying the default table style, every new table will use his custom style rather than Word’s out-of-the box table style.
To illustrate, we’ll create a new table style. To get started, you can insert an empty table and use the contextual Design tab to access options. Or just use the Styles pane as follows:
- On the Home tab, click the Styles group’s dialog launcher to open the Styles dialog.
- Click New Style (Figure A).
- In the resulting dialog, give the new style a name and select Table from the Style Type dropdown.
- Set the necessary formats; the preview pane will update accordingly (Figure B). Click the Format dropdown to access more options if necessary.
- Click OK when you’re done.
Figure A
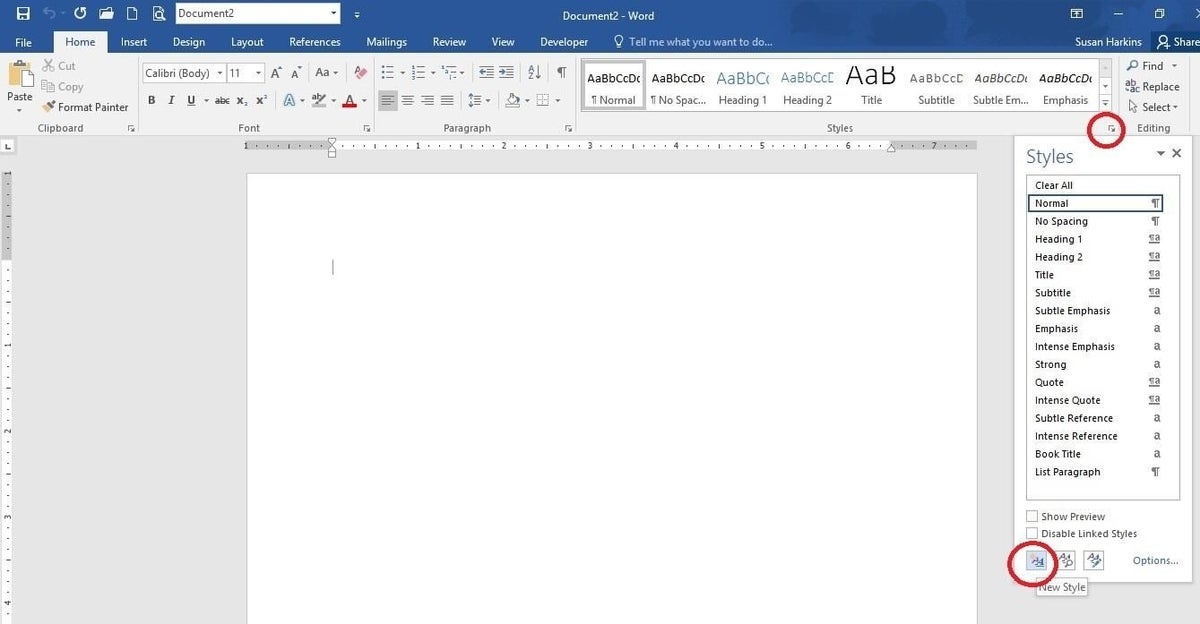
Use the Styles pane to create a new style.
Figure B
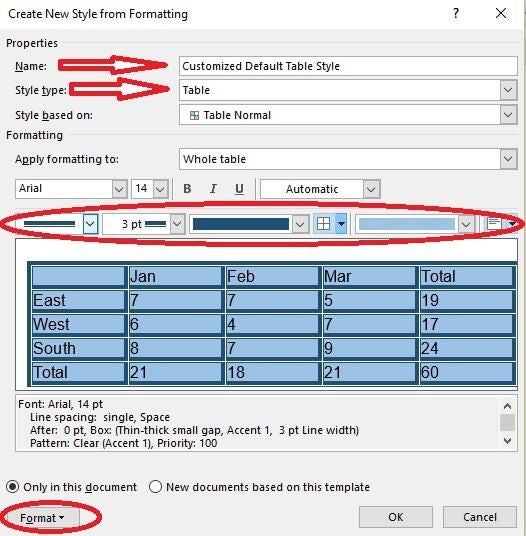
Set the formatting.
At this point, you could use this new style to format any new table. However, we want Word to automatically apply this style to all new tables. To accomplish this, you must set this new table style as Word’s default table style as follows:
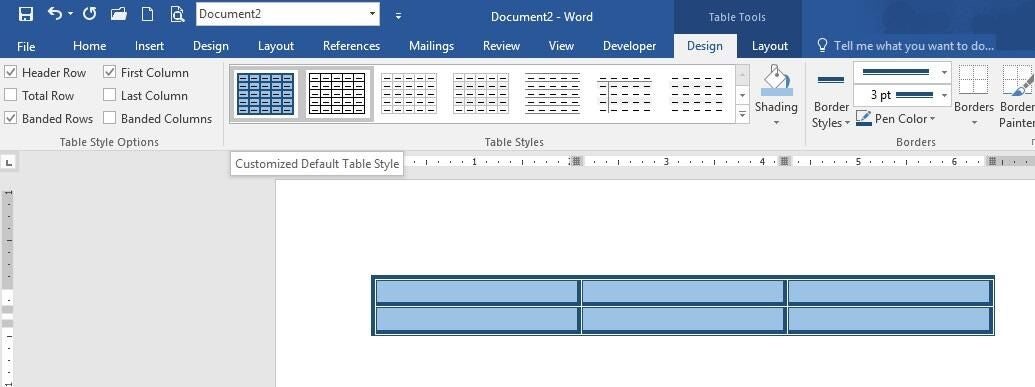
- Insert a new table as you normally would and select it to display the contextual Design tab. You could use the Styles pane to find the new style, but depending on your setup that could require several steps.
- Right-click the Customized Default Table Style icon in the gallery (Figure C). This is the new style you just created. Word’s Preview feature will display the selected table using the style’s attributes.
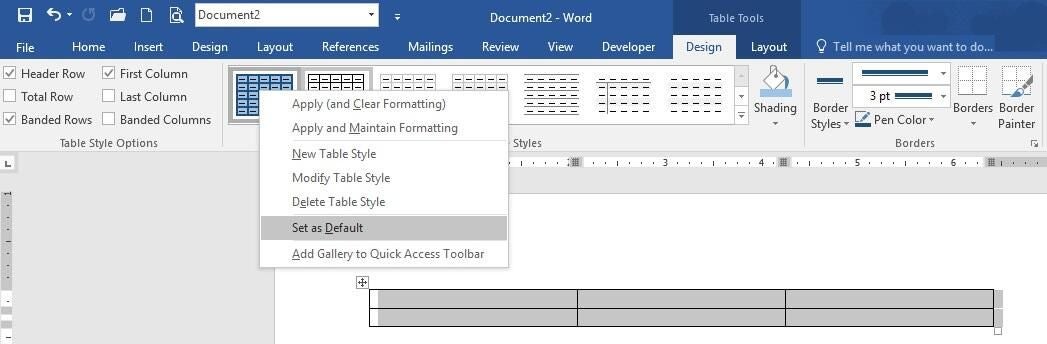
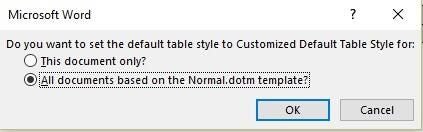
- Choose Set As Default (Figure D).
- In the resulting dialog, choose the appropriate option. For this example, choose All Documents Based On Normal.Dotm Template (Figure E). If you want to set the table style as the default for only the current document, choose the This Document Only option.
- Click OK.
Figure C
Find the new style in the gallery.
Figure D
Set the style as the new default.
Figure E
Set the default at the template level.
Once you set the new table style as the default, every new table in all new documents will use Customized Default Table Style as the table style.
SEE: Microsoft continues move to the cloud with new online-only Office features
Quick Tables
Setting the default is an easy way to save time and effort when you apply the same formatting to most of your tables. If you have more than one table style you work with frequently, you can create more new table styles–or you might consider using Word’s Quick Tables gallery. The latter can save you a few steps. However, it’s important to note that Quick Tables tables are actually Building Blocks and not styles.
To add any table to the Quick Styles gallery, do the following:
- Select the formatted table. If it contains data, this feature will save that data too, which is helpful if you need to insert the same table of data in multiple documents or include heading text.
- Click the Insert tab.
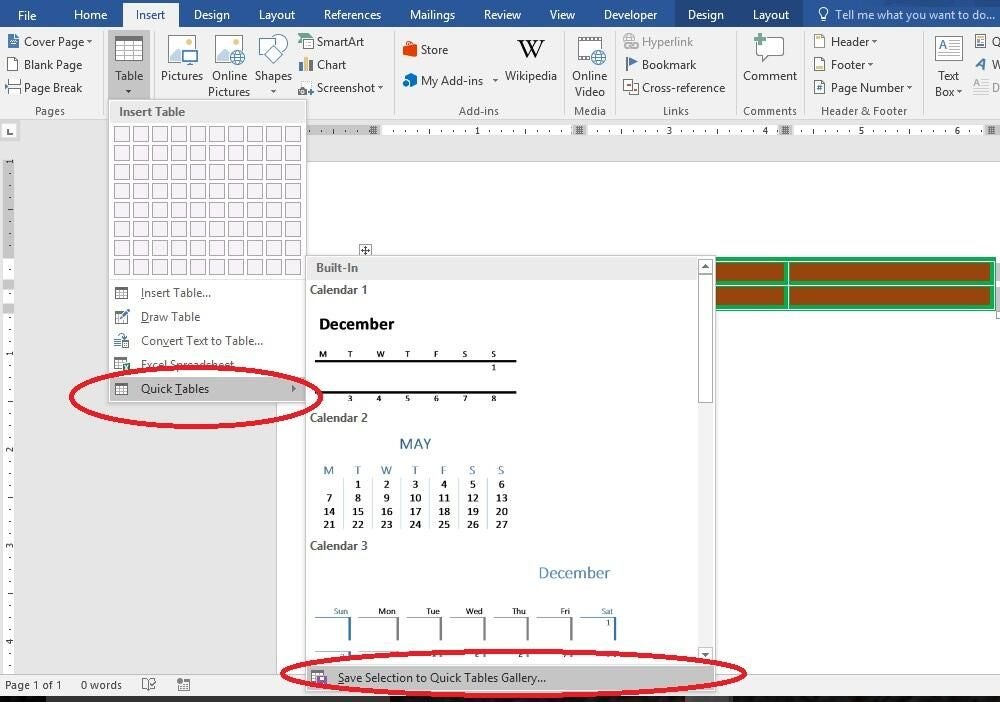
- From the Table dropdown in the Tables group, select Quick Tables.
- Choose Save Selection To Quick Tables Gallery (Figure F).
- Give the table a name (I named this one Ugly Table) and click OK.
Figure F
Save a table to the Quick Styles gallery.
After saving the table to the gallery, you can add it to any document as follows:
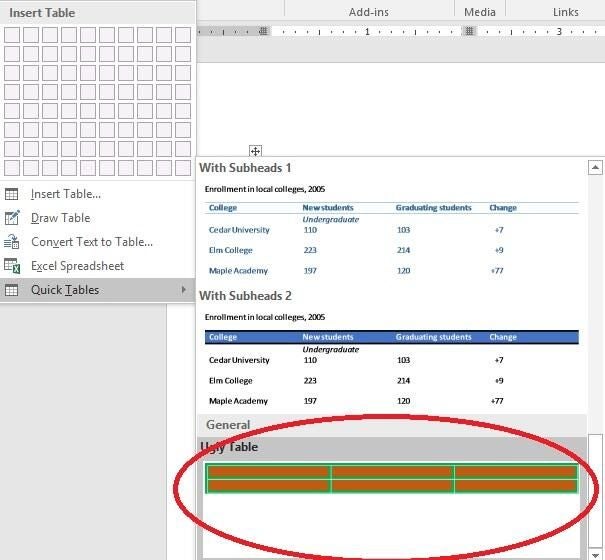
- Click the insert tab.
- From the Table dropdown, select Quick Tables.
- Select the table (Figure G).
Figure G
Add the table from the gallery.
This method of inserting a formatted table is a few steps lighter than using a style because you don’t have to generate the table and then apply the style. The newly inserted table already has the formatting (and possibly the data) you want. A style has a hierarchical advantage–you can base one style on another. If you don’t need this advantage, Quick Tables offers an easy way to access multiple table styles without creating new styles.
Send me your question about Office
I answer readers’ questions when I can, but there’s no guarantee. Don’t send files unless requested; initial requests for help that arrive with attached files will be deleted unread. You can send screenshots of your data to help clarify your question. When contacting me, be as specific as possible. For example, “Please troubleshoot my workbook and fix what’s wrong” probably won’t get a response, but “Can you tell me why this formula isn’t returning the expected results?” might. Please mention the app and version that you’re using. I’m not reimbursed by TechRepublic for my time or expertise when helping readers, nor do I ask for a fee from readers I help. You can contact me at susansalesharkins@gmail.com.