


Last month’s article, “Pro tip: Add a UserForm to aid data entry in Excel,” shares the basics of creating an Excel UserForm using VBA to populate list controls. To update the list, you can add or delete the item to the VBA procedure. This month, I’ll share techniques for populating combo and list box controls using data entered at the sheet level.
Before we get started, I have two bits of advice for sheet-level lists:
- Use a dedicated sheet for lists, even if there’s only one list. Chances are that you’ll add more once you get the hang of the process, and you’ll find a dedicated sheet practical, efficient, and safe. The dedicated list sheet in the example is named, appropriately enough, Lists.
- If possible, enter the list items in an order that makes sense to the data and the way users will use it. For instance, you might use alphabetical or numeric order. It isn’t always practical to enter the list items in order, but when you can, do so. Putting a list in order after the fact complicates things.
Use a range name
Perhaps the easiest way to populate one of Excel’s list controls is to enter the list at the sheet level and give the list a range name. Then, you can refer to that range as the control’s Row Source property. It’s the easiest method but the least flexible. To get started, you need a list, such as the one shown in Figure A. You can work with any list or you can download the example .xls or .xlsm file.
Figure A
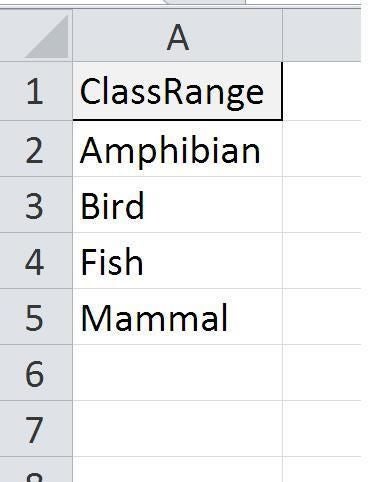
Enter a list of items into a dedicated sheet.
Once you have your list entered, apply a name range:
- Select the list, including the header (A1:A6).
- Click the Formulas tab.
- In the Defined Names group, click Create from Selection.
- Excel will default to the Top Row option in the resulting dialog (Figure B). Click OK.
Figure B
Now, you’re ready to add the UserForm:
- Press [Alt]+[F11] to launch the Visual Basic Editor (VBE).
- From the Insert menu, choose UserForm.
- Click the Combo Box control in the Toolbox, and then click the UserForm to insert the new control (Figure C).
Figure C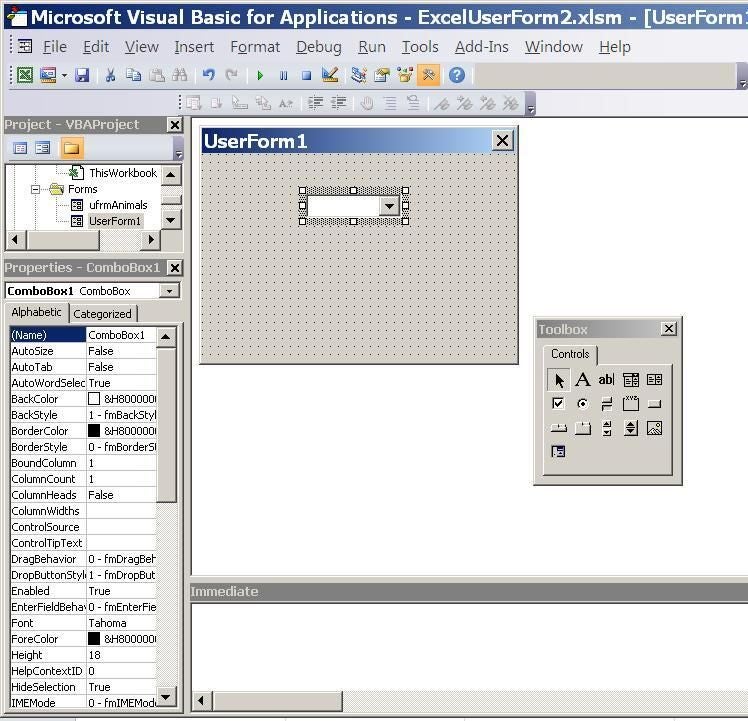
- If the Properties window is open, you’ll see that it displays the new control’s properties (the selected object). If this window isn’t visible, press [F4] or choose Properties Window from the View menu.
- With the combo box still selected, find the Row Source property and enter ClassRange (Figure D). That’s the name of the range (list) you created earlier (see Figure B).
Figure D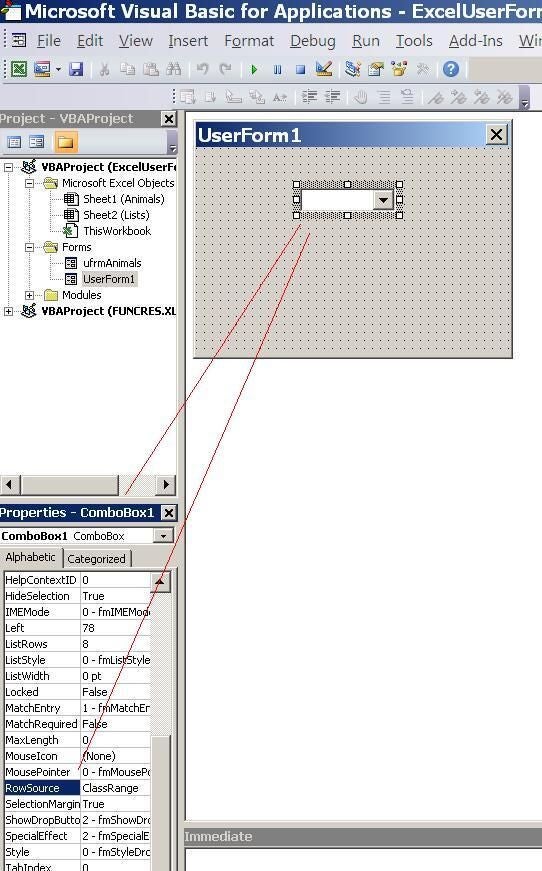
That’s it! At this point, you’re ready to test the new UserForm by pressing [F5] or clicking the Run Macro button on the VBE’s Standard toolbar. Figure E shows the control open to show its list. That was easy and didn’t require a bit of VBA.
Figure E

Excel populates the control using the data stored in the ClassRange named range.
Earlier, I mentioned that although this method is probably the easiest, it’s the least flexible. Here’s why: If you add an item to the bottom of that list, that new item won’t appear in the control’s list unless you remember to update the range name to include the new cell. If you insert a row and add the item, Excel will update the range name to include the new row, but you still have to remember to do it. In addition, if the list is in alphabetical order, you’ll have to remember to re-sort it. It’s not a horrible solution by any means, but reducing the amount of maintenance necessary is a good goal, which is an excellent segue to the next method — using a Table object to store your list.
Before we move on, I know some of you are wondering why I don’t suggest a dynamic range formula (“Populate a userform combo box in Excel with a dynamic list“). In most situations, such a complex solution isn’t necessary — and it’s my least favorite, because a dynamic range can be difficult to maintain in a distributed workbook.
Use a Table object
Some lists won’t be static. You’ll want to add and maybe even delete items. Excel’s Table object excels at this! (The Table object is new to Excel 2007, so it’s unavailable in earlier versions.) The process is essentially the same as a named range, but instead of a range, you use a Table and then refer to the Table as the control’s Row Source property. As before, you need a list, similar to the one shown in Figure F.
Figure F
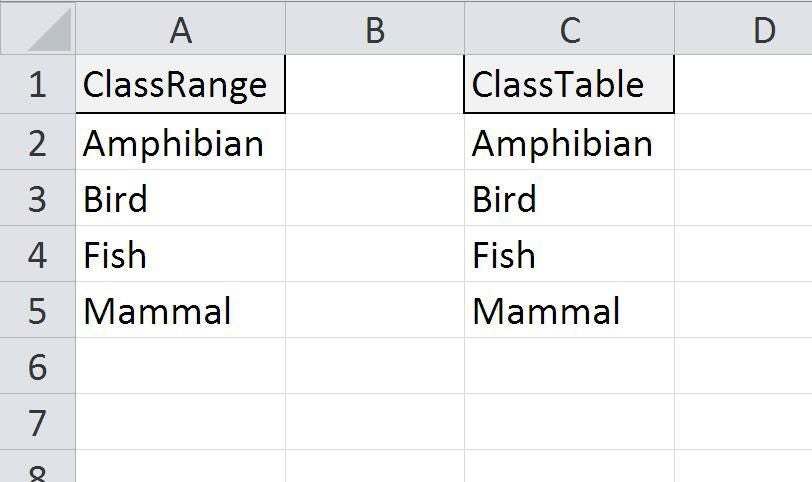
Enter your list items.
With your initial list in place, you’re ready to convert it to a Table object:
- Click anywhere inside the list.
- Click the Insert tab.
- In the Tables group, click Table (Figure G).
Figure G
- The default settings are correct, so click OK. If your list doesn’t have a header, be sure to uncheck that option. Excel will create the Table object and apply the default Table formats.
Excel assigns a default name to each Table. You’ll need to know this name, so with the Table selected, click the Design contextual tab. In the Properties group (to the left), Excel displays the Table’s default name. You can use the default name or assign a custom name as follows:
- Click inside the Table Name control to select the name.
- Type the new name (Figure H).
Figure H
That’s it!
Return to the VBE and add a second combo box control to the UserForm. With that control selected, enter ClassTable as the new control’s Row Source property, as shown in Figure I.
Figure I
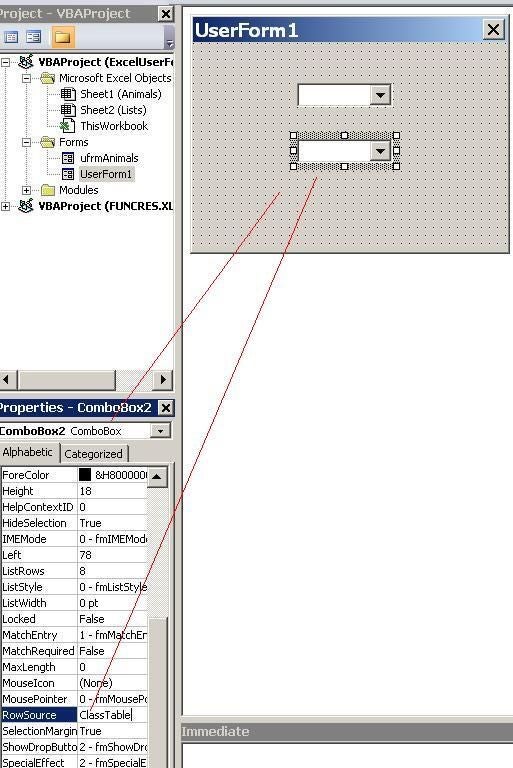
Set the control’s Row Source property.
Press [F5] to run the UserForm. Figure J shows the second control’s list.
Figure J

The new control displays the same list, but the source is different.
So far, the process has been almost the same as the first named range method, but here’s where the two methods part ways. Close the UserForm and return to the Lists sheet. There, add a new item to the bottom of the Table list. Simply select C6 and enter Reptile. If Excel doesn’t extend the Table to include the new item, delete it. Then, select cell C5 and press Tab to extend the Table to include C6 and enter Reptile, as shown in Figure K.
Figure K
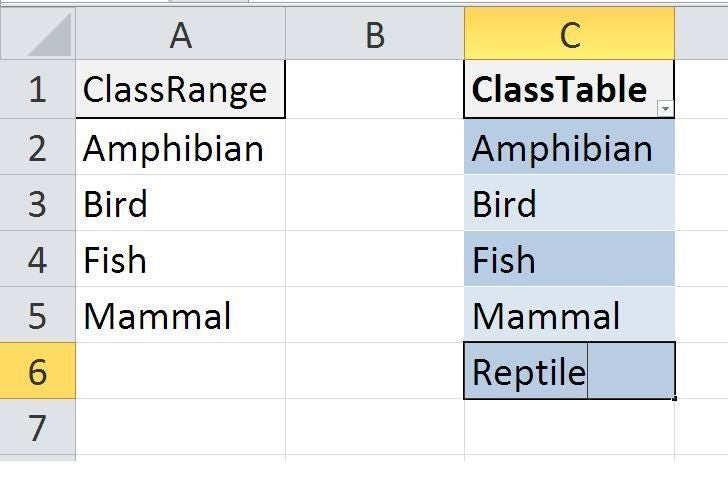
Add a new item to the Table.
Return to the VBE and press [F5] to run the UserForm. As you can see in Figure L, the new list includes Reptile. You didn’t have to update a range name or sort the list. It just works.
Figure L
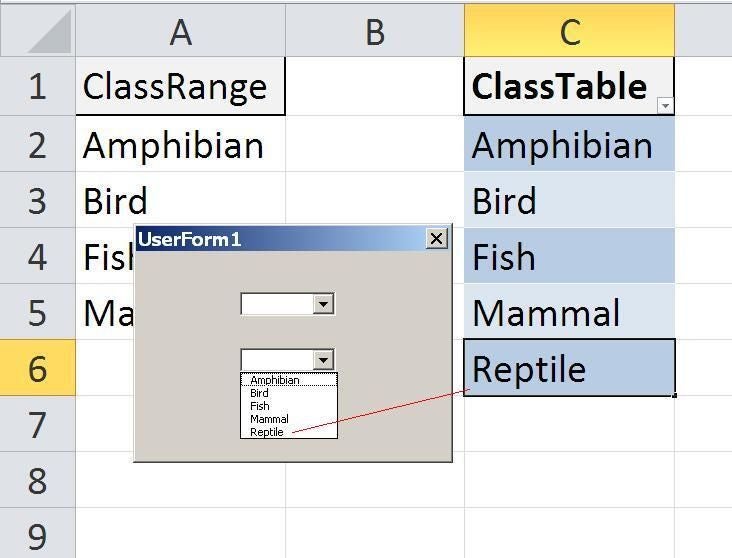
The new control updates automatically to include the new item, Reptile.
Neither of these methods requires a bit of VBA code, but the Table method is more flexible than the range name method. When creating your lists, keep maintenance and ease of use in mind.
Send me your question about Office
I answer readers’ questions when I can, but there’s no guarantee. When contacting me, be as specific as possible. For example, “Please troubleshoot my workbook and fix what’s wrong” probably won’t get a response, but “Can you tell me why this formula isn’t returning the expected results?” might. I’m not reimbursed by TechRepublic for my time or expertise, nor do I ask for a fee from readers. You can contact me at susansalesharkins@gmail.com.