


In my last article, I showed you how to enable and configure File History from the new Windows 10 user interface and how to create a backup. As I explained, once your initial backup is complete, File History will monitor all the files and folders you chose and back up any files you change.
Of course, the ultimate goal of File History is to be able to restore files that have been corrupted or inadvertently deleted. There are three places that you can begin a restore operation in Windows 10; however, they all perform the same basic operation. For the sake of expediency, I’ll cover only one of them in detail, since it is the easiest to find and makes the most sense. Let’s take a closer look.
Initiating a restore operation
You can launch a File History restore operation by accessing a file’s Properties page and using the controls on the Previous Versions tab. Alternatively, you can launch the File History tool and navigate to the Restore command at the bottom of the Backup Options page. But neither of these methods is as intuitive as launching the restore operation from within File Explorer, so that’s the approach we’ll take.
To get started, select the Home tab and go to the Open section. There you’ll see the History button, shown in Figure A. When you click this button, File History will launch in restore mode.
Figure A
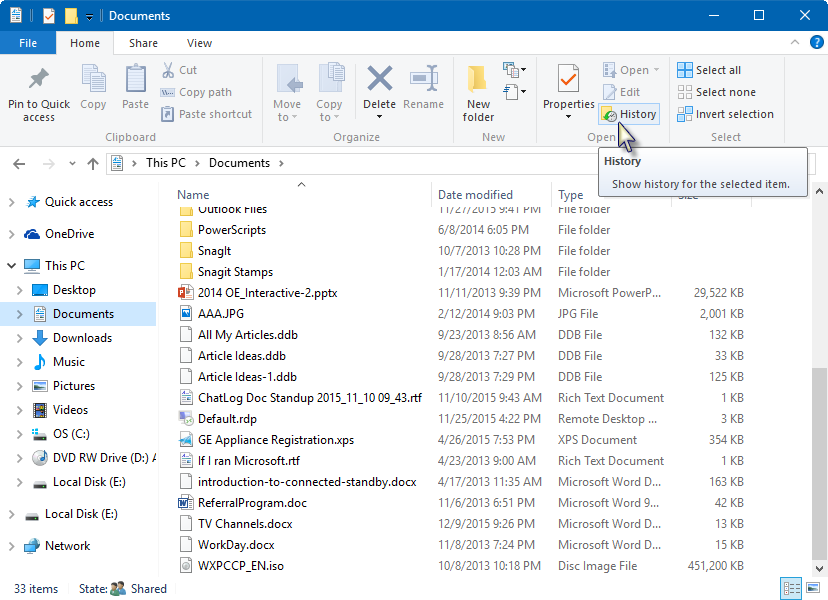
You can launch a restore operation from within File Explorer.
Restoring versions of a file
Let’s say you edited a file but now want to revert to a version before you made the changes. To perform this type of a restore operation, select the file in File Explorer and then click the History button. File History will open the most recent backup copy of the file in a preview mode, as shown in Figure B.
Figure B
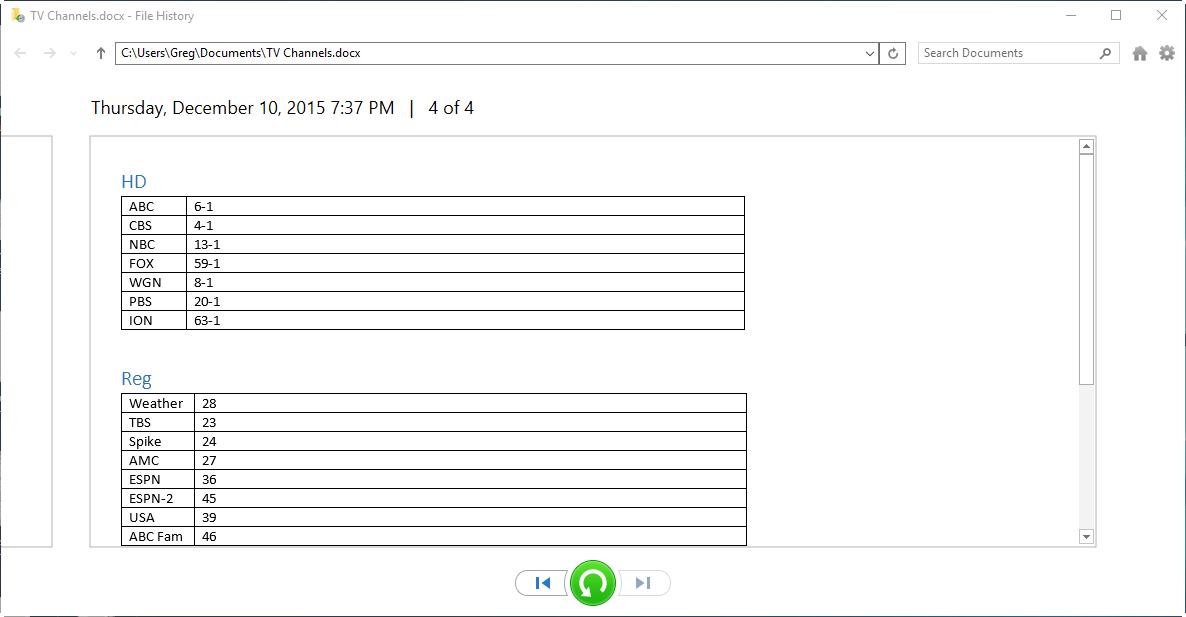
Clicking History opens a preview of the selected file.
At the top of this window is the Address bar, which displays the path and name of the file. Directly below the Address bar, you’ll see information about the most recent version of the File History backup. In this case, the backup of this file is from December 10, 2015, at 7:37 PM and it’s version 4 of 4. To the left is the outline of the previous version. You can scroll through all the available versions by using the Previous and Next buttons at the bottom of the screen.
As you do, you can scan through the various versions of the file’s contents in the preview window. Once you locate the version you want to restore, just click the green Restore button. File History will then prompt you for the next step, as shown in Figure C.
Figure C
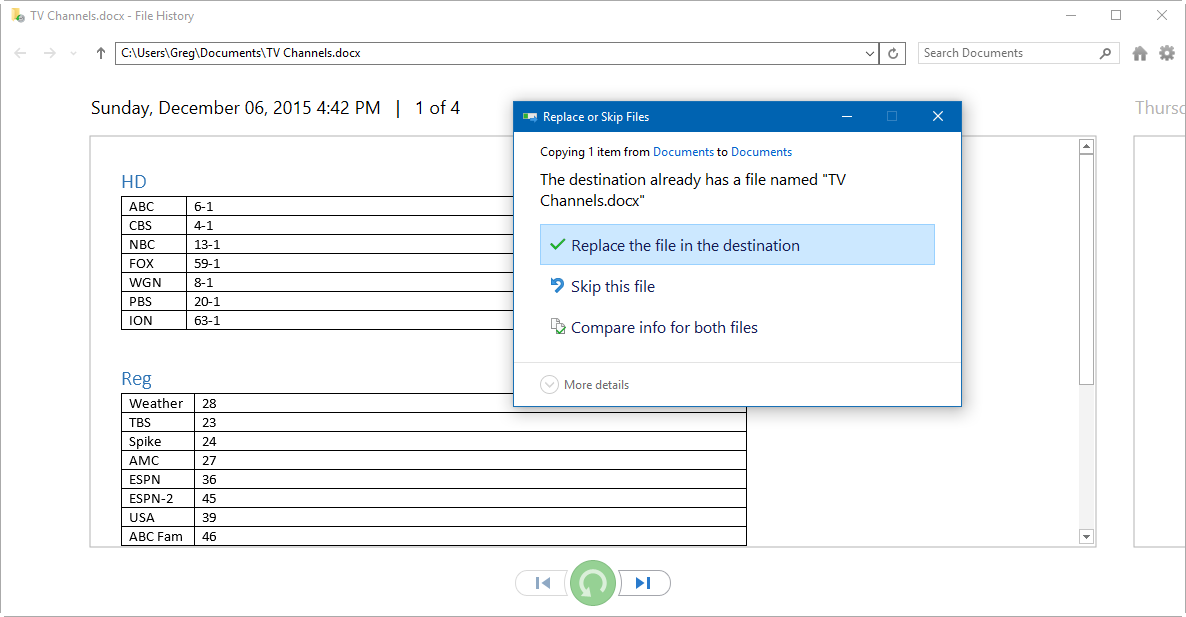
The Replace Or Skip Files dialog offers these options.
The default choice is Replace The File In The Destination. If you want to double-check before proceeding, select Compare Info For Both Files. This will open a File Conflict dialog like the one shown in Figure D. You can select both files, which will append a number to the copied file’s name, then decide later which one you want to keep.
Figure D
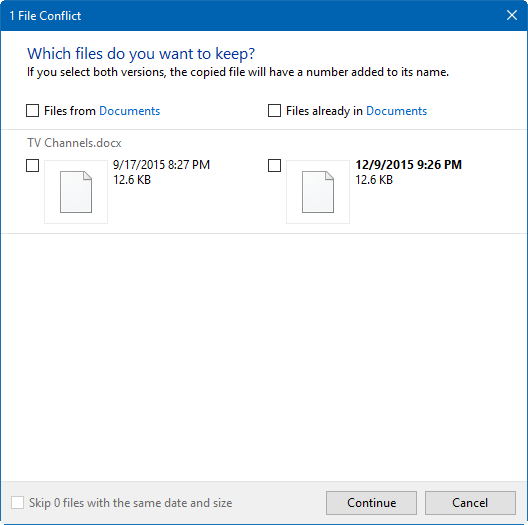
The File Conflict dialog will allow you to keep both files.
If you click Skip This File, File History will automatically restore the next file. This seems like an odd behavior and might just be a bug that slipped through. Even so, if it turns out that isn’t the version that you want, you can always repeat the restore operation, as the file is still a part of the backup. In other words, you can restore a version of a file multiple times if you want or need to.
You’ll also notice the cog icon in the upper-right corner of the window. Clicking the icon and choosing Restore To will open the Restore To dialog. Here you can select another location on your hard disk to restore the file, as shown in Figure E. This option also allows you to have two versions of the file so you can decide later which one to keep.
Figure E
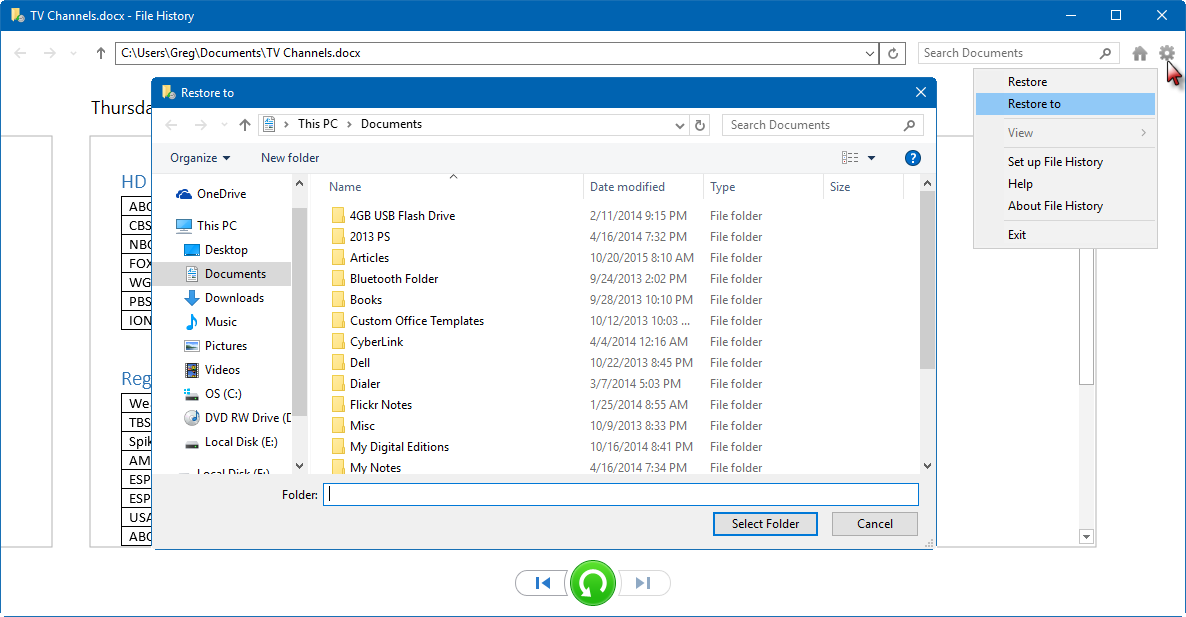
You can restore the file to another location on your hard disk.
Regardless of which restore options you choose, you’ll see a copy operation progress dialog box complete with a graph. When the operation is complete, the folder containing the restored file will open.
Restoring individual files
Another situation where you might want to perform a restore operation from File History is when an individual file, or group of files, has been accidentally deleted. Or maybe you intentionally deleted the file and now wish you hadn’t.
To restore a deleted file, open the folder where the file used to be and click the History button. File History will display all the files contained in the most recent backup of that folder, as shown in Figure F. You can then use the Previous button to locate the file.
Figure F
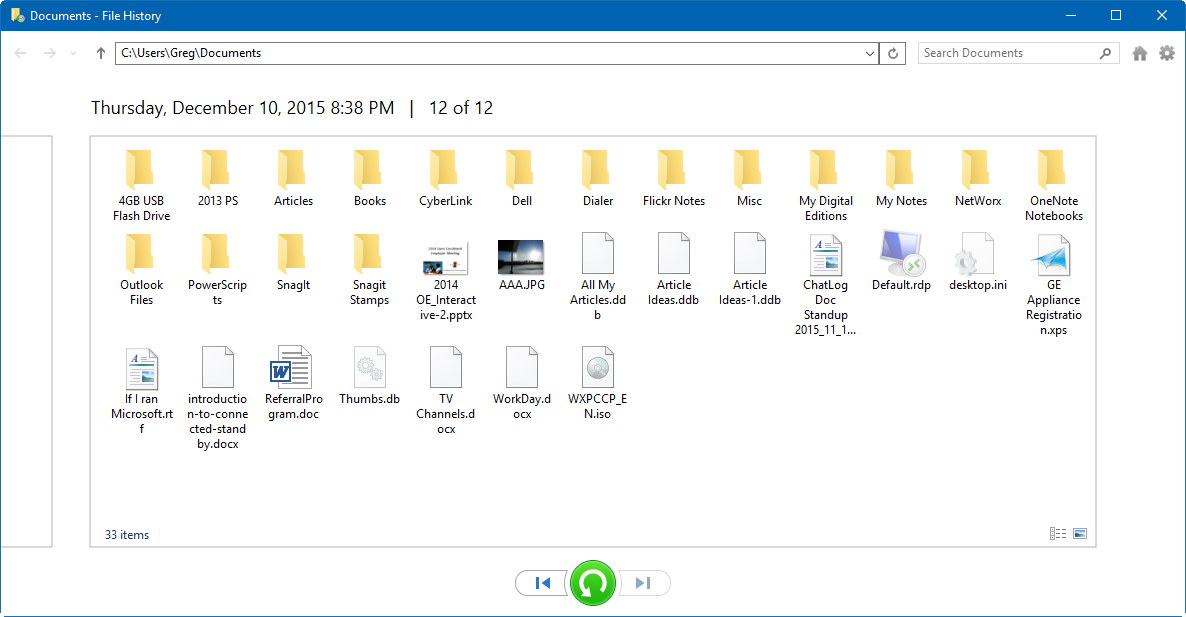
When restoring a deleted file, select the folder where the file used to be. File History will show you all the files contained in the most recent backup of that folder.
Once you locate the file you want to restore, select it and click the green Restore button. File History will display a copy operation progress dialog box and restore the deleted file. Again, when the operation is complete, the folder containing the restored file will open.
The operation is the same for restoring a deleted folder.
Restoring after a hard disk crash
If you have a major hard disk failure, you can use File History to restore the most recent versions of all your files. Once you have Windows 10 installed on your new hard disk, reconnect your external hard disk and launch File History.
To do so, access Settings from the Start menu or from the Action Center, select the Upgrade & Security tile in the Settings window, and select the Backup tab. On the Back Up Using File History page, click the Add A Drive button. Windows 10 will then search for and prompt you to select a drive. When you select the drive containing your backup, File History will recognize that it already contains a set of files. You can begin the restore operation using the steps I explained above for restoring individual files and folders.
What’s your take?
File History makes it easy to restore files in the event of an accidental deletion or a hard disk failure. Are you using File History? If so, what has been your experience? Share your opinion in the discussion thread below.
Also read…
- Extend your mobile battery life with Windows 10’s Battery Saver
- Analyze battery usage with Windows 10’s Battery Saver
- Balance efficiency and performance with Windows 10 Power Options
- How’s your battery holding up? The Windows 10 Battery Report will tell you
- Which Windows editions let you use Remote Desktop Connection with multiple monitors?