If you were running Windows XP, then you know that when you wanted to uninstall an application from your system, you went to the Control Panel and used the Add or Remove Programs tool. If you were running Windows 7 or Windows 8.x, you went to the Control Panel and used the Programs and Features tool (Figure A).
Figure A
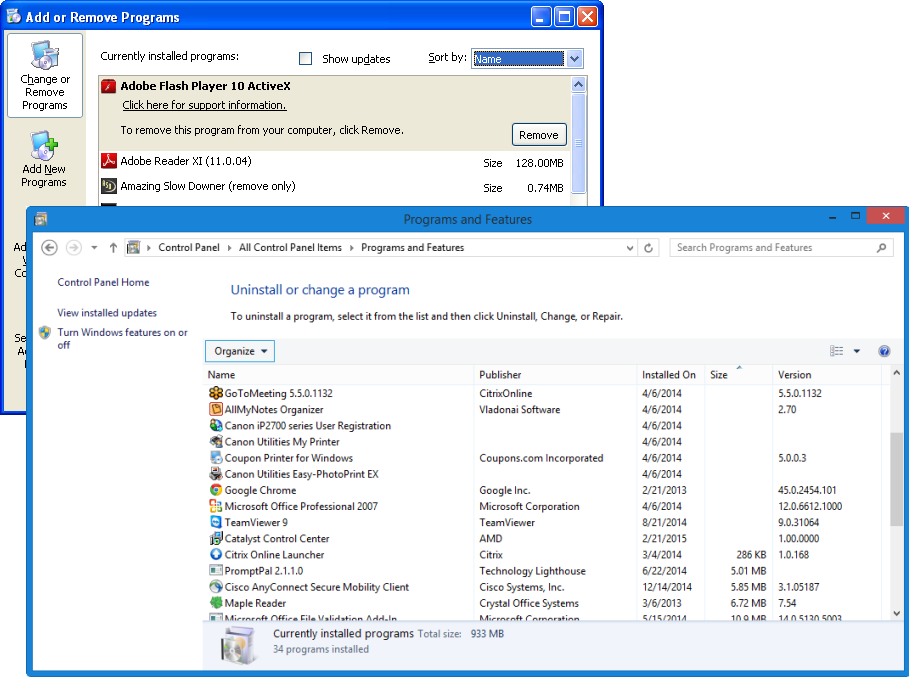
In Windows XP/7/8 you used the Add or Remove Programs tool or the Programs and Features tool to uninstall applications.
Now that you’re using Windows 10, you’ll go to Settings and use a new tool called Apps & features when you want to uninstall an application from your system. Let’s take a closer look at how the Apps & features tool works and the features it provides.
Getting to Apps & features
Getting to Apps & features in Windows 10 is easy. To begin, access the Start Menu and select the Settings command on the lower left side (Figure B).
Figure B

You can get to Settings from the Start Menu.
When you see the Settings window, select the System icon (Figure C).
Figure C
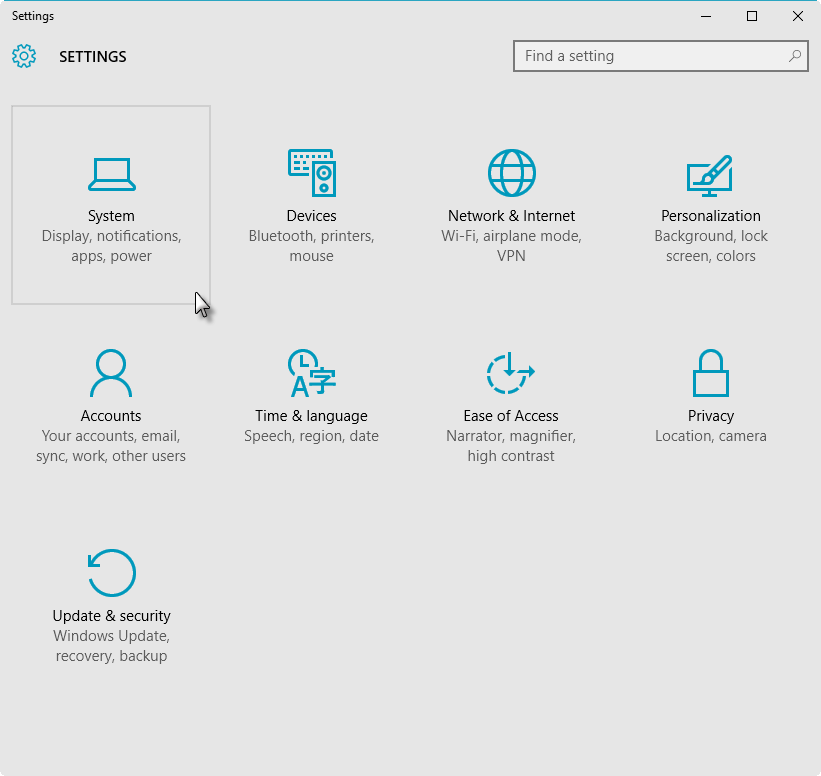
You’ll find the Apps & features tool in the System category.
When the System window appears, select the Apps & features tab, and you’ll see the new user interface for uninstalling apps and desktop applications from your system (Figure D). While my example screenshot shows all modern apps, most desktop programs will appear here as well. If you don’t see a particular desktop program in the list, you can still find it in the Programs and Features tool, which you can launch from the Control Panel.
Figure D

The Apps & features tool provides you with a very straightforward user interface.
As you can see, in addition to a list of installed applications, which also includes the size of the app\program and the date when it was installed, there are three text boxes that you can use to filter through a long list of applications.
Working with Apps & features
To uninstall an app/program, just click it. When you do, you’ll see an Uninstall button–click it to remove the app/program from your system (Figure E). You’ll also see a Move button. If you have more than one drive installed in your system, the Move button will be available, and you can use it to move the app/program from one drive to the other. This can come in handy when you need to free up space on one of your drives.
Figure E
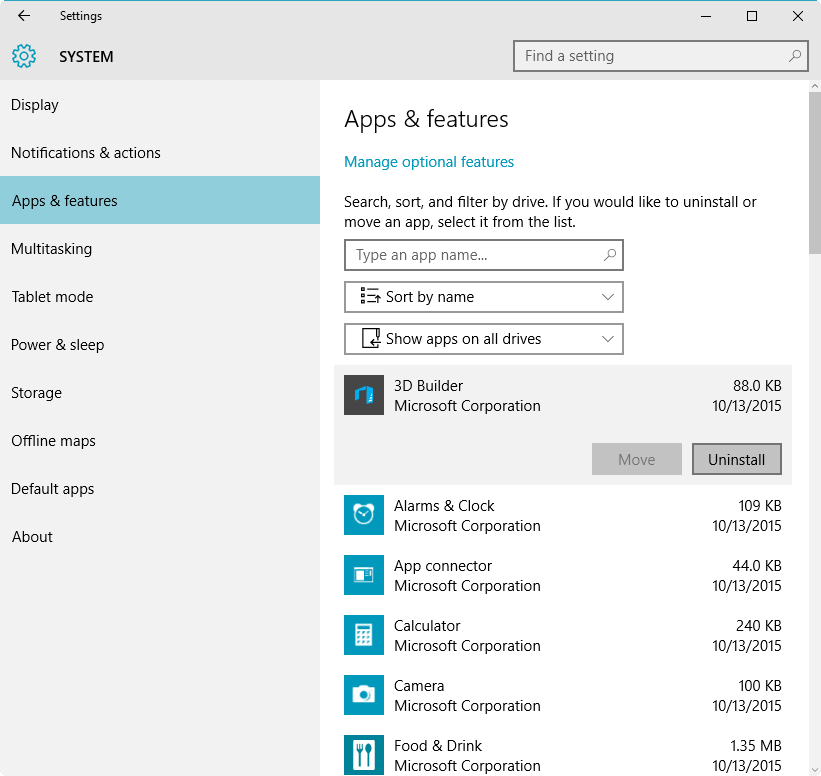
Once you select an app/program, you’ll see the Uninstall button.
If you have a long list of apps/programs installed on your system, scrolling through the list to find the one that you want to uninstall can be tedious. Fortunately, the Apps & features tool comes with search capability. To use it, just type a few letters in the name of the app/program that you want to uninstall in the text box titled Type an app name. When you do, all other apps/programs listed will disappear except for the one whose name you typed (Figure F).
Figure F
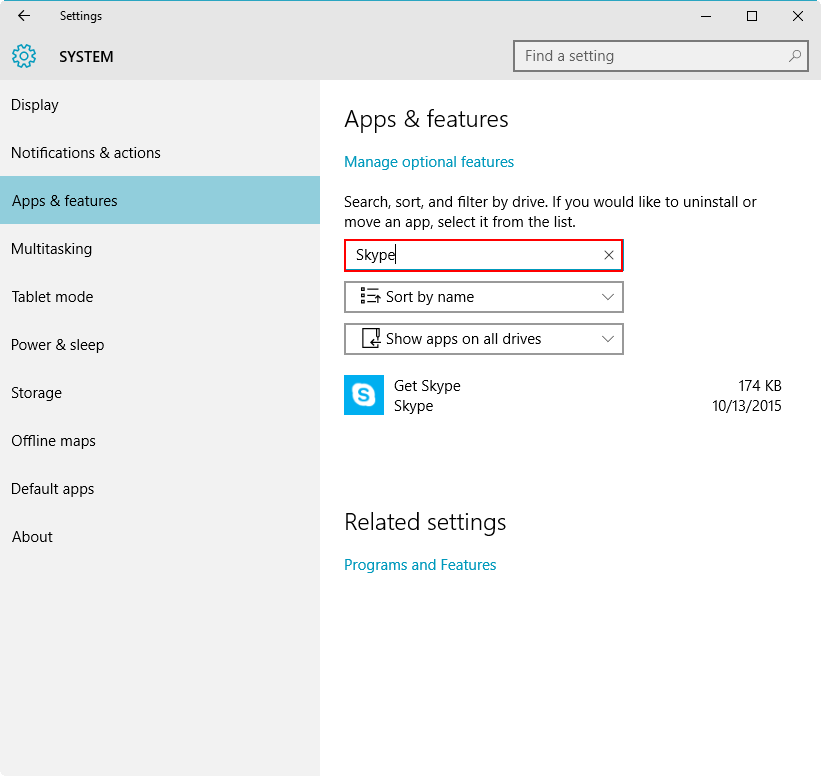
The search feature make it easy to find what you’re looking for in a long list of apps/programs installed on your system.
Another way that you can work through a long list of apps/programs installed on your system is to filter the list using the options in the Sort control. While the default sort is by the name of the app/program, you can also sort the list by install date or by size (Figure G). This can come in handy when your goal is to free up hard disk space, because you can easily determine which apps/programs are taking up the most space on your disk.
Figure G
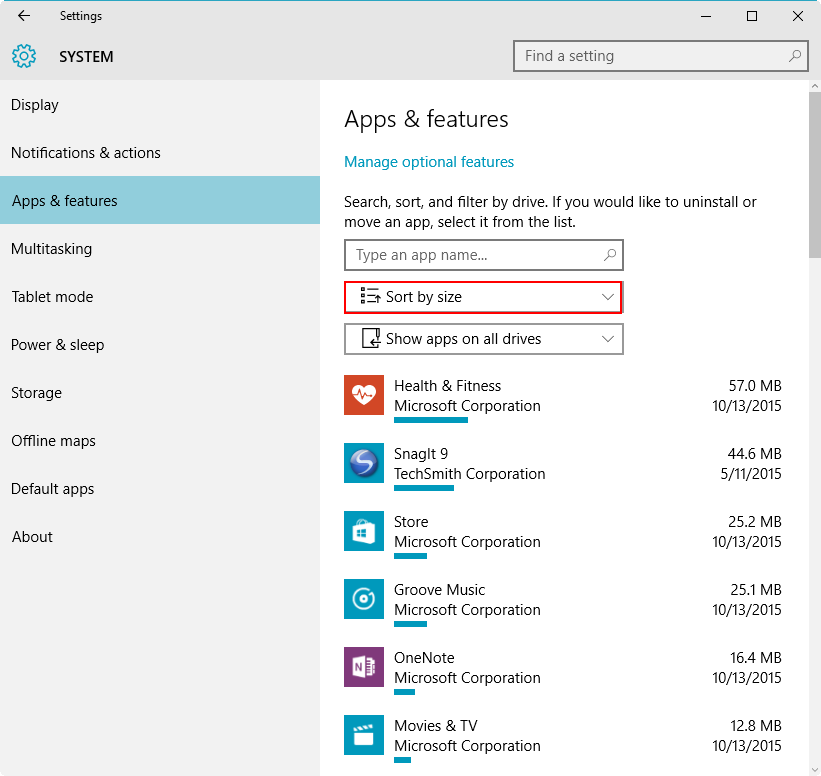
You can use the Sort by size filter to determine which apps/programs are taking up the most space on your disk.
If you have more than one drive installed in your system, you can use the third filter control to only show the apps/programs installed on one of your drives (Figure H).
Figure H
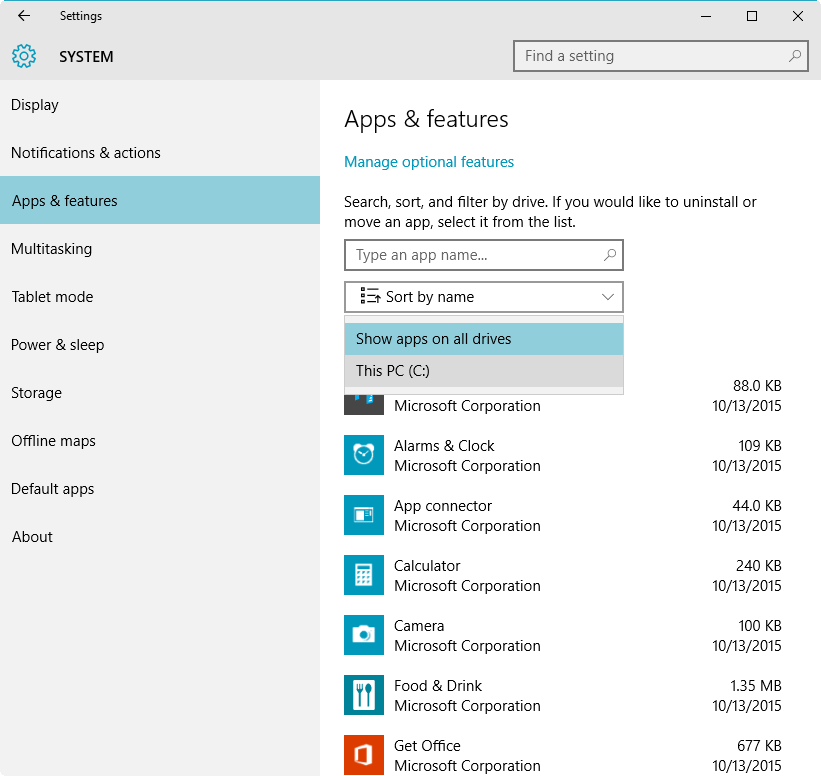
If you apps/programs installed on more than one drive in your system, you can use location filter to narrow your list.
What’s your take?
What do you think about the Apps & features tool in Windows 10? Let us know in the discussion thread below.