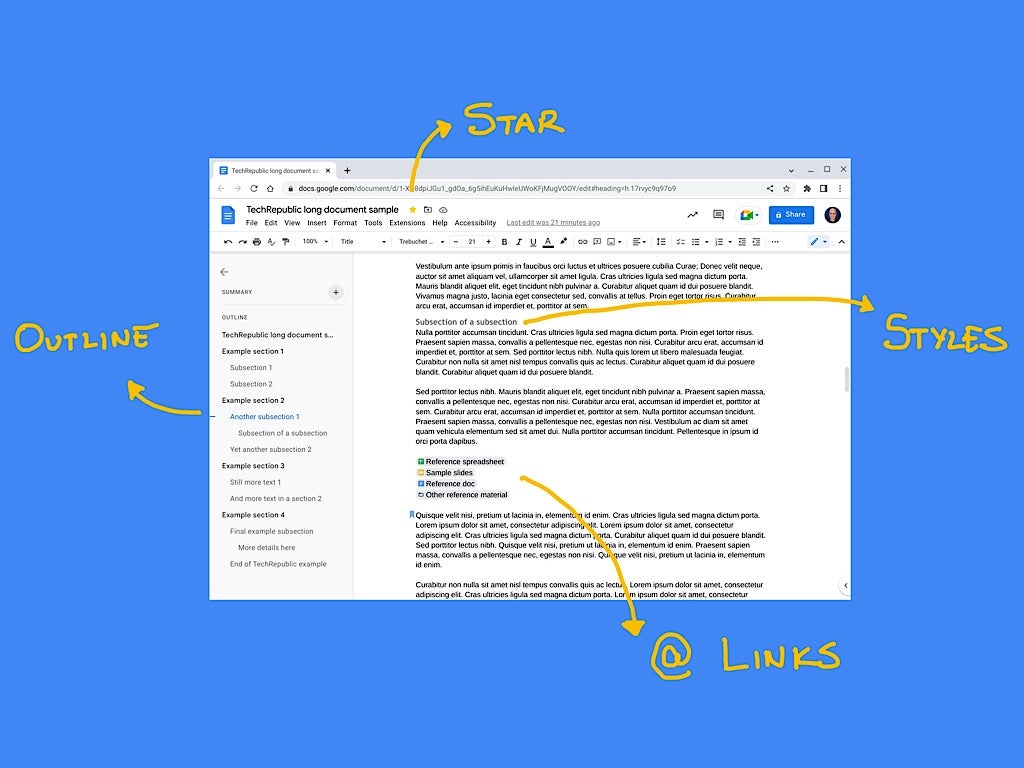
Navigation techniques, writing time, and the need for related content and collaboration may all differ when you work with long Google Docs. With a file of a few hundred words, it takes little time to scroll from beginning to end. With a long Google Doc, however, scrolling may not be the best way to navigate.
Many short files are short term projects, started and completed within minutes, hours or days rather than the weeks, months or years that you might labor on a long Google Doc.
Often, short Google Docs are self-contained, with no need for other files, while some long Google Docs rely on folders full of relevant reference and source material. Additionally, you might want to collaborate with people for a particular portion of content for a long Google Doc, rather than sharing access to your main file as you might with a short Google Doc.
SEE: Google Workspace vs. Microsoft 365: A side-by-side analysis w/checklist (TechRepublic Premium)
The sections below cover how to organize folders and files, apply styles to aid structure and navigation, link to places in a document and related files, share specific folder or file access, and prepare your work for final review.
How to organize files in Google Drive
For larger projects that may involve multiple parts, create a new folder on Google Drive. Within that folder, you might create additional folders to contain files relevant to a portion of your project. For example, a recent project I worked on examined six different software solutions in-depth, so I created a folder for each vendor that contained a Google Doc for notes, a separate Google Doc for my draft write-up, a Google Sheet to track feature details and a recorded video of a Google Meet demo meeting.
Within the main project folder, create a new Google Doc for your project. Give your Doc a name that ensures you’ll recognize the file quickly and easily. If there’s a deadline associated with the project, you might indicate that in the name. For example, a file named MajorWritingProject-20221130 subtly reinforces that you need to complete your work by the end of November 2022.
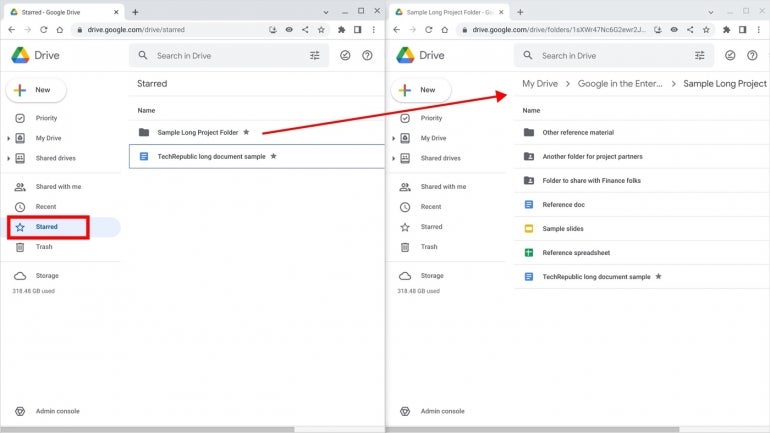
Select your project folder on Google Drive, then select the three-dot more menu and choose Add To Starred. Do the same for the main Google Doc for your project. This way, you may rapidly access your project files by going to Google Drive | Starred, from the menu on the left, as shown in Figure A.
Figure A
Structure sections
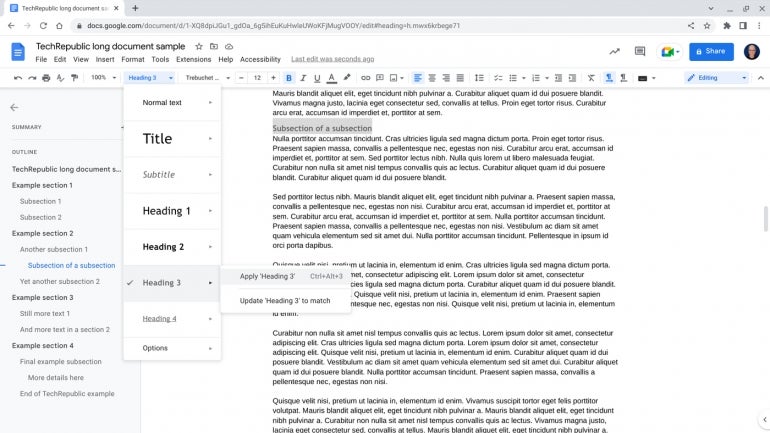
As you work, apply paragraph styles to provide structure to text sections. Styles differentiate between titles (e.g., Title, Subtitle), headings (e.g., Heading 1, Heading 2, Heading 3) and normal text. The system relies on these styles to build a document outline automatically, which you may access from View | Show Outline. Once active, the outline icon provides a fast way not only to display the sections of text, as shown in Figure B, but also allows you to click or tap on a section listed to jump directly to the corresponding content.
By my count, Google gives you at least five different ways to apply styles as you write. I take that as a strong signal that you should use styles, as shown in Figure B. For example, here are five different ways you might enter Heading 2 text.
- Select text, then click or tap on the arrow to the right of the Normal text menu item and select Heading 2.
- Select text, then Format | Paragraph Styles | Apply Heading 2.
- Type @heading, which brings up an in-document menu from which you may select and apply any of the heading options.
- Select text, then press a keyboard shortcut: Ctrl+Alt+2 on Windows and ChromeOS or Command+Option+2 on macOS.
- With Markdown enabled (Tools | Preferences | Automatically Detect Markdown), start a line of text with ## followed by a space. The next text entered will be in the Heading 2 style.
Variants of each of these allow you to enter the full range of titles, headings and normal text styles.
Figure B
Link to access a location or file fast
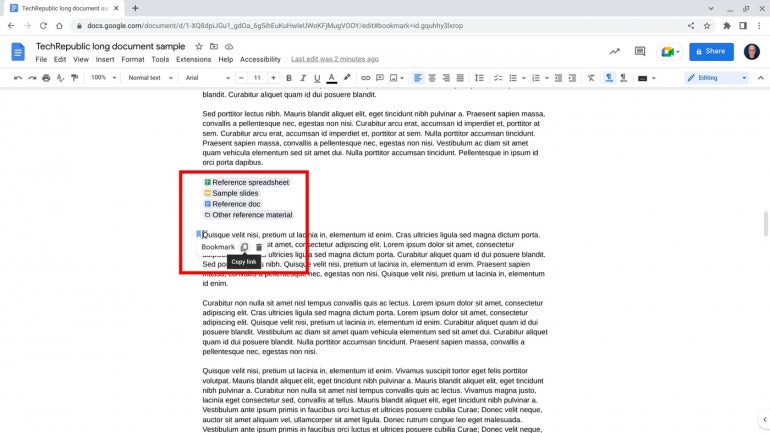
For rapid access to a specific spot within a Google Doc, position the cursor at a point in the text, then choose Insert | Bookmark from the menu system. Alternatively, type @bookmark followed by the enter or return key. This adds a bookmark indicator to the side of your text, as shown in Figure C.
Click on or tap the bookmark, then select the copy icon to place the link to the bookmark on your clipboard. You may then paste this link elsewhere. For example, you might paste this link near the top of your document to rapidly jump to the bookmark by following the link.
You also may insert a link to other items stored on Google Drive for rapid access to a related file. Type @ followed a portion of a file or folder, then select the file or folder from the displayed Google Drive list when displayed. The system inserts a small icon that indicates a folder or the type of file along with the item name, as shown in Figure C. Place your cursor over the icon or name, then click or tap on the file name to open the file.
Figure C
Collaborate
In Google Drive, select a folder or file followed by the Share button, enter email addresses of collaborators and adjust the permission level (i.e., Viewer, Commenter or Editor) as desired. Remember the subfolders suggested earlier for specific portions of your project? You might share access to an entire folder to allow collaborators access to every item in it. Or, instead, you might share access to a single Google Doc. For projects with logical segments, a prudent folder and file structure allows you to collaborate with different people on different pieces of your project.
While it may be increasingly rare, some people still prefer to review and mark up printed pages. Select File | Page Setup | Pages to configure your document for print output. Once in that mode, you may use Insert | Page Numbers for various numbering options. See How to add page numbers and bookmarks in Google Docs for additional details. Select File | Print to output your Doc to a printer.
Final review
When you think your document is close to complete, select Tools | Spelling And Grammar | Spelling And Grammar Check. This can find many potential errors or omissions in your document. Make sure to review and correct any issues identified.
Additionally, you might also use the find feature (Ctrl+F on Windows or ChromeOS, Command+F on macOS) to search for words or terms that you want to make sure are used consistently. For example, the terms multi-factor and multifactor are both widely used in technology publications such as this one. A search can help you find terms within your document so as to ensure consistency. In long documents, you might identify several terms that merit similar consideration and standardization.
What’s your experience?
Have you used any of the above strategies when you have worked with long documents in Google Docs? What other techniques have helped you manage larger writing projects with Google Docs? Do you regularly use styles along with the outline tool to organize and navigate to sections of your file? Mention or message me on Twitter (@awolber) to let me know how you work with larger writing projects in Google Docs and Google Drive.
