


Image: PixelMe/Shutterstock
Numbered lists are easy to create in a Word document. Type the list, click the Numbering option in the Paragraph group on the Home tab and Word adds a consecutive number to each list item, starting with 1. There’s a lot you can do with that list though, and coloring the numbers separate from the text is one of the easiest. In this article, we’ll create a simple list and apply color to those numbers in three different ways.
SEE: 83 Excel tips every user should master (TechRepublic)
I’m using Microsoft 365 on a Windows 10 64-bit system, but you can use earlier versions. You can download the demonstration .docx and .doc files, but you can also quickly create your own list. This technique isn’t supported by Word Online.
How to add the numbers in Word
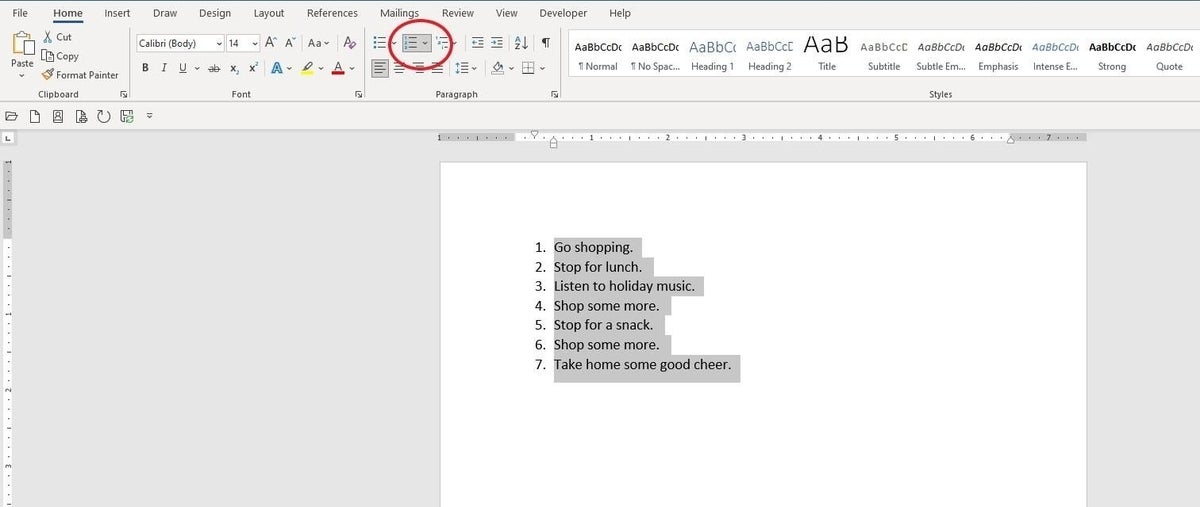
We’re going to need a quick and simple list for demonstration purposes. To save time, you can download the demonstration files or create a quick list of your own. I’ll use the fun list shown in Figure A. To add the numbers, select the list and then click Numbering in the Paragraph group on the Home tab. Don’t worry if the number format is a bit different; this option is sticky—it remembers the last number format and uses the same one. Your numbers don’t have to match but if you want them to, click the Numbering dropdown and choose the appropriate format. Now that we have a list of numbers, it’s time to add the color.
Figure A
1. Define a new format
Adding color to only the numbers is easy because Word supports a number format. By default, it matches the text, but you can easily change it. First, select the list; Word won’t highlight the numbers, though—that’s normal. To color the numbers, do the following:
- With the list selected, click the Numbering dropdown and choose Define New Number Format (it’s at the bottom of the dropdown list.
- This first dialog lets you change common formats for the numbers. We won’t change these. Instead, click Font.
- This next dialog lets you change the font color for only the numbers. Remember, we’re defining a number format. From the Font Color dialog, choose red (or any color you like), as shown in Figure B.
- Click OK twice to return to the document and the brightly colored numbers shown in Figure C.
Figure B
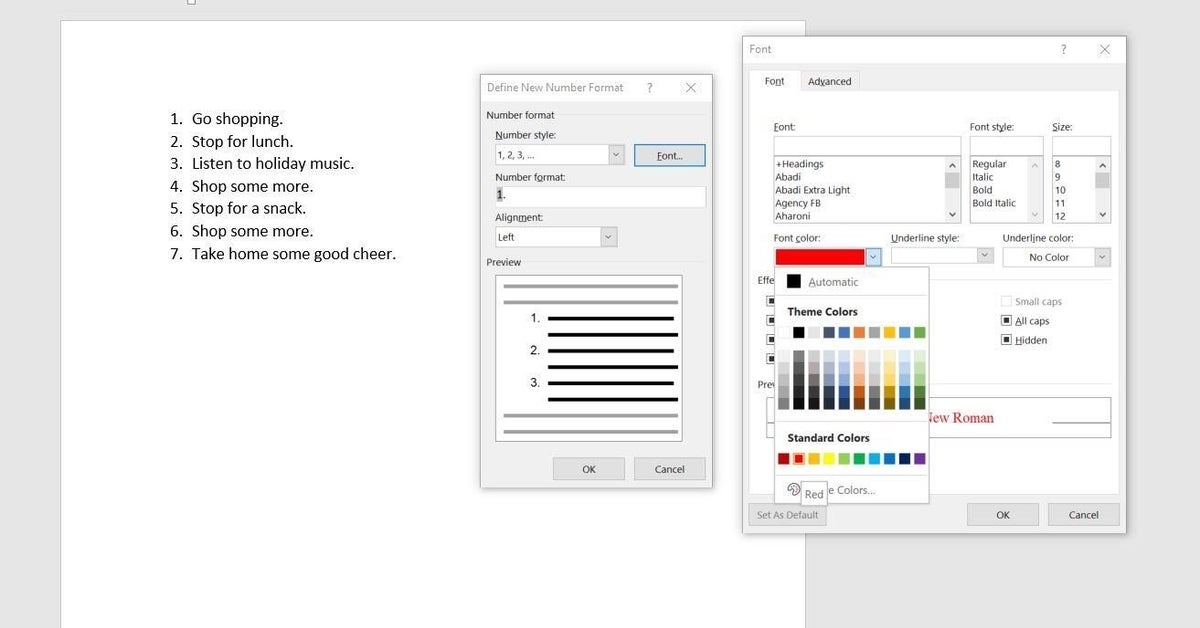
Figure C

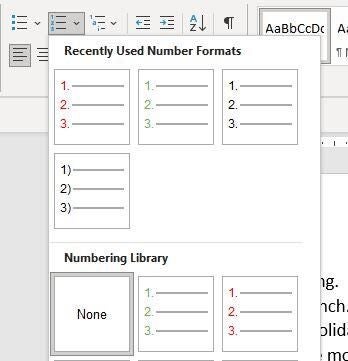
Once you create the new format, it will be available in the Numbering dropdown, as shown in Figure D, so you won’t have to repeat these steps again. However, there is another way.
Figure D
2. Use a font color
If you don’t plan to use the colored numbers again, you don’t have to create a new number format. The advantage of doing so is that the format—the colored numbers—are available in the Numbering dropdown. But there is another way, and it’s a tad quicker:
- Double-click any number in the list. Doing so will highlight only the numbers, as shown in Figure E.
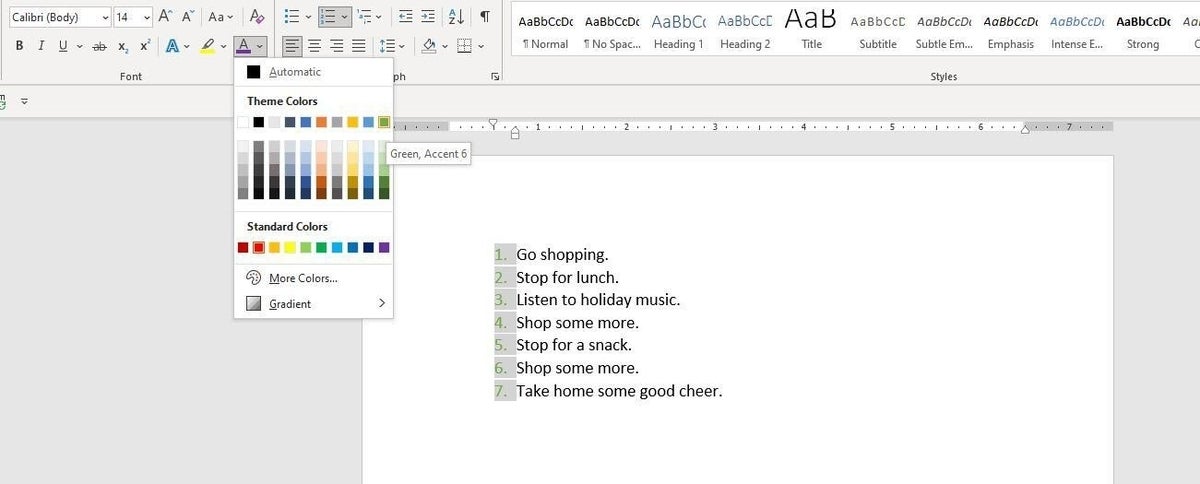
- Click the Font Color dropdown (in the Font group on the Home tab) and choose a color from the palette. This time, I chose green, as you can see in Figure F.
Figure E

Figure F
As mentioned, the big difference is that the green number format won’t be available in the Numbering dropdown. There’s one more way to color the numbers, but it takes a bit more work.
SEE: Office 365: A guide for tech and business leaders (free PDF) (TechRepublic)
3. Alternate colors
So far, we’ve formatted all of the numbers with the same color. Let’s suppose you want one or more numbers to be a different color. In this case, you need a clean list, so remove the numbers altogether. Then, click Show/Hide in the Paragraph group. We’re going to use the paragraph marks to assign different colors to the numbers as follows:
- Select the paragraph mark at the end of the first item, Go shopping.
- Click the Font Color dropdown and choose Red.
- Select the second item’s paragraph mark and choose Green, as shown in Figure G. Notice that the paragraph marks take on the selected color.
- Continue alternating red and green until you’ve formatted each paragraph mark, as shown in Figure H.
Figure G
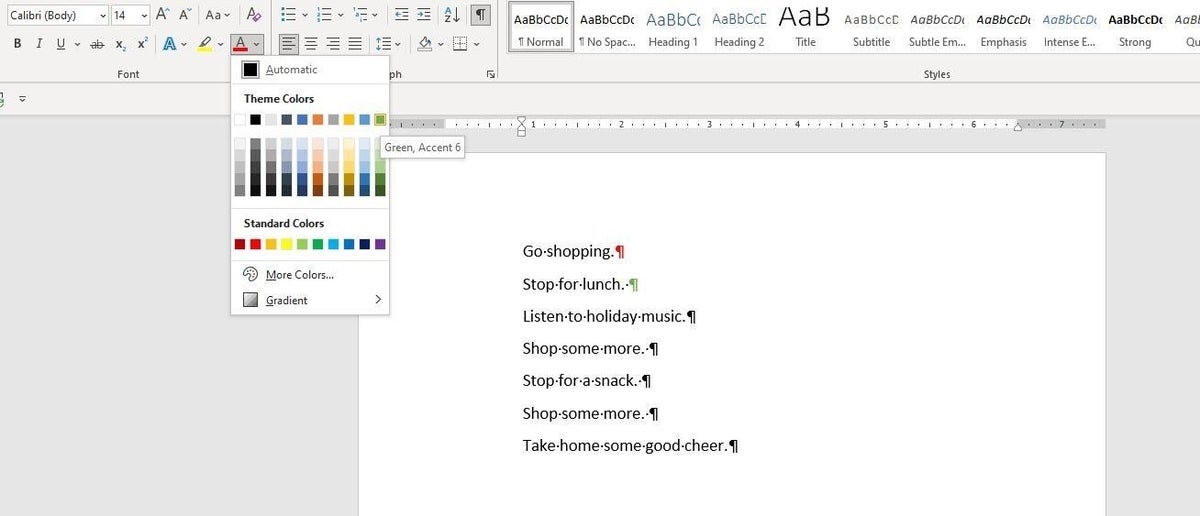
Figure H

Now you’re ready to create the list. To do so, select the list and then click the Numbering option in the Paragraph group. Figure I shows the results—kind of cool and fun! Click Show/Hide to hide the paragraph marks. You could also add the numbers and then color the paragraph marks.
Figure I

When applying color to more serious content, you might color the number for only one item—something that you want to stand out. You can also color bullet points as shown in Figure J. In this case, you’d simply click Bullets. The formatting is already there, and the change is immediate. To work from scratch with bullets, the process is the same: select the list and then choose Define New Bullet from the Bullets dropdown.
Figure J

One thing to keep in mind is that the numbering feature is sticky—I mentioned this before. So, if you move around and do other things and come back to the list, the experience might be a little different, which can be frustrating. That’s why defining a format is helpful.