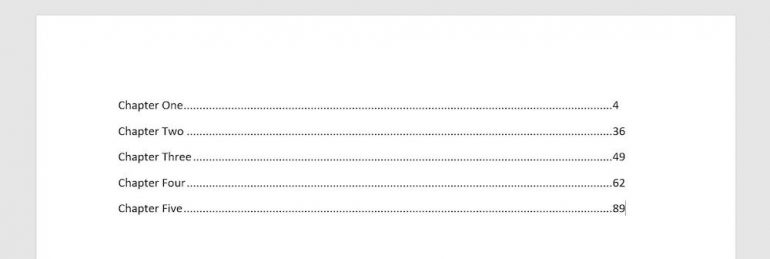
Adding leaders to a Word document is a simple task, and most of the time, the feature works as expected. But sometimes leaders don’t look the way we want them, and trying to fix the results can become a difficult task.
In this tutorial, you’ll learn what leaders are and how to insert them in Microsoft Word. In addition, we’ll take a look at some common problems and how to avoid or fix them.
I’m using Microsoft 365 desktop on a Windows 10 64-bit system, but you can use older versions. Word for the web fully supports leaders. There’s no demonstration file; you won’t need one.
SEE: Windows, Linux and Mac commands everyone needs to know (free PDF) (TechRepublic)
How to add leaders in Word
Leading is a typographical term that refers to the vertical space from the same point on one line to the same point on the next, within the same paragraph. Leading and leaders aren’t the same thing. Leaders or dot leaders are characters to the left of information — quite often at the right margin. They guide your eyes from left to right. You’ve probably seen them in table of contents, indexes, and other tabular information. Those dots lead your eyes to the page number.
For instance, in a table of contents, the chapter title is at the left margin, and your eyes follow a line of leaders, or dots, to the page number. Simply put, they are a visual guide.
Microsoft Word controls leaders with tabs. Specifically, you connect leaders to a specific tab stop. In addition, Word doesn’t limit you to dots. Word offers several types of dot leaders.
Adding leaders requires only a few simple steps:
- Select the content to which you want to add leaders.
- Click the Layout tab.
- Click the dialog launcher for the Paragraph group.
- Click Tabs (bottom-left).
- Add or select an existing tab stop — this is the difficult part and often requires a bit of tweaking. For now, enter 6 and click Set.
- Select a leader character (Figure A), such as 2 for dots. As you can see, there are other leader characters: Hyphens and underscores.
- Click OK.
Figure A

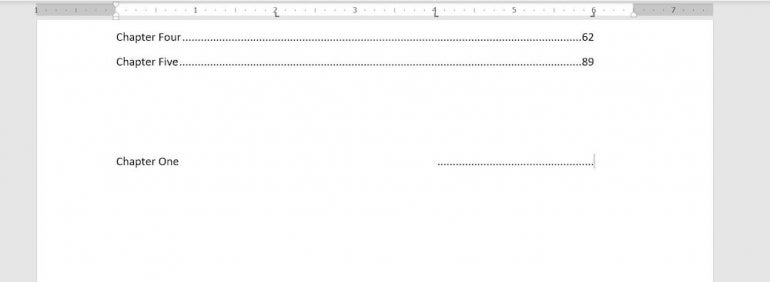
Now let’s see what Word does when we use the tab. Enter Chapter One and press Tab, and then enter 4. Word enters dot leaders from the last character, e in One, to the tab stop at 6. That’s where you enter the page number for Chapter One, as shown in Figure B.
Figure B

By default, Word has a tab stop every half inch, but this feature ignores those. The only tab stop is at 6.
The problem with this method is turning it off. You can’t press Enter twice to cancel it like you can with some other Word features. To turn leaders off, open the Tab dialog as before and click Clear.
You can also apply leaders to existing content, if you keep the tab in mind. Enter the content, pressing Tab once between the content to appear on the left and the content to the right. Then, select the content (all lines) and apply the tab leader as shown above. Don’t forget to clear the leader settings before you begin entering normal content.
There’s a problem though. Go back and review Figure B — can you spot it?
How to align the leaders in Word
The feature doesn’t align the page numbers correctly. The page number 4 should be one space to the right.
In this case, the fix is simple, and if you remember to do this when you set the leaders, you won’t need to fix it after the fact.
Open the Tab dialog as you did earlier and change the Alignment setting, which is Left by default, to Right, as shown in Figure C.
Figure C

Figure D

As you can see in Figure D, that took care of it! If you added a three-digit page number, the feature would also align it correctly.
This is a simple problem with an easy fix. Let’s look at a problem that’s a bit harder to troubleshoot.
Why you should avoid extraneous tabs in Word
Combining tabs and leaders is a logical choice, but it can be confusing if you try to add multiple tabs. Word inserts the leaders between the tab you assign them to and the next tab, which leaves a lot of white space. Leaders work with only one tab. Now, let’s insert multiple tabs and see what happens:
- Access the Tabs dialog and click Clear.
- In the Tab Stop Position, enter 2 and click Set (near the bottom).
- Enter 4 and click Set.
- Enter 6 and click Set.
- Choose Right in the Alignment section.
- Choose 2 in the Leader section.
- Click OK.
Now, enter Chapter One and press Tab — no leaders. Press Tab a second tab — no leaders again. Press Tab a third time.
This time, as you can see in Figure E, Word inserts leaders, but only between the two last tabs. If you connected the leaders to the tab stop at 2, you’d have leaders between positions 2 and 4. The solution is to use only one tab.
Figure E

How to troubleshoot leaders in Word
It’s possible to think you’re doing everything right but still not get the results you expect. The best way to troubleshoot is to use Show/Hide in the Paragraph group on the Home tab. Word displays tabs as a right-arrow, as shown in Figure F. You may have more than you want, or, more likely, none at all!
Figure F

Adding leaders on the fly like this is kind of like direct formatting — you’re working with specific data.
This isn’t a feature that you’ll turn on and leave on. You’ll create the leaders for specific paragraphs and then turn it off. To add leaders to a table of contents or an index in Word, use that feature to do so — both have leader settings.


