


As far back as Windows 95, users have been able to create a recovery disk to aid in troubleshooting minor issues that would creep up from time to time. This usually involved pairing a writable media such as a floppy disk and the installation media to enter the command line for running DOS utilities to resolve issues, as necessary.
Must-read Windows coverage
- CrowdStrike Outage Disrupts Microsoft Systems Worldwide
- 10 Best Project Management Software for Windows in 2024
- Windows 10 Extended Security Updates Promised for Small Businesses and Home Users
- Securing Windows Policy
Fast-forward two decades and you’ll find that while the old standby still works–albeit with a few modifications–modern versions of Windows can now use their own Diagnostics And Recovery Toolset (DaRT). This is a fully functional environment based on WinPE to boot the computer and allow offline access to the installed OS for the purposes of performing surgically precise troubleshooting and repairs of almost any issue that plagues your system.
Here are a few requirements necessary in the creation of this type of bootable media:
- PC running Windows 8 (or later)
- Windows 8 (or later) Setup files
- Microsoft Diagnostics and Recovery Toolset (32/64-bit)
- 8GB USB Flash Drive or DVD optical media
Note: Creation of a DaRT recovery image, by default, is specific to the architecture. So if you require support for both 32-bit and 64-bit architectures, you will be required to run the process for each and subsequently copy the files to their own USB flash drive or optical media disk.
SEE: 12 tips to get more out of Windows 10 (TechRepublic PDF)
The steps
Launch the Microsoft DaRT Recovery Image Wizard, clicking Next to bypass the welcome screen (Figure A).
Figure A

Then, select the architecture for the drive you’ll be creating and click the Browse button to navigate to the path to the installation media (Figure B).
Figure B

Click the Next button, and you’ll see the Tools wizard page. Here, just check the box next to the applications you wish to include with your DaRT drive and click the Next button to proceed (Figure C).
Figure C

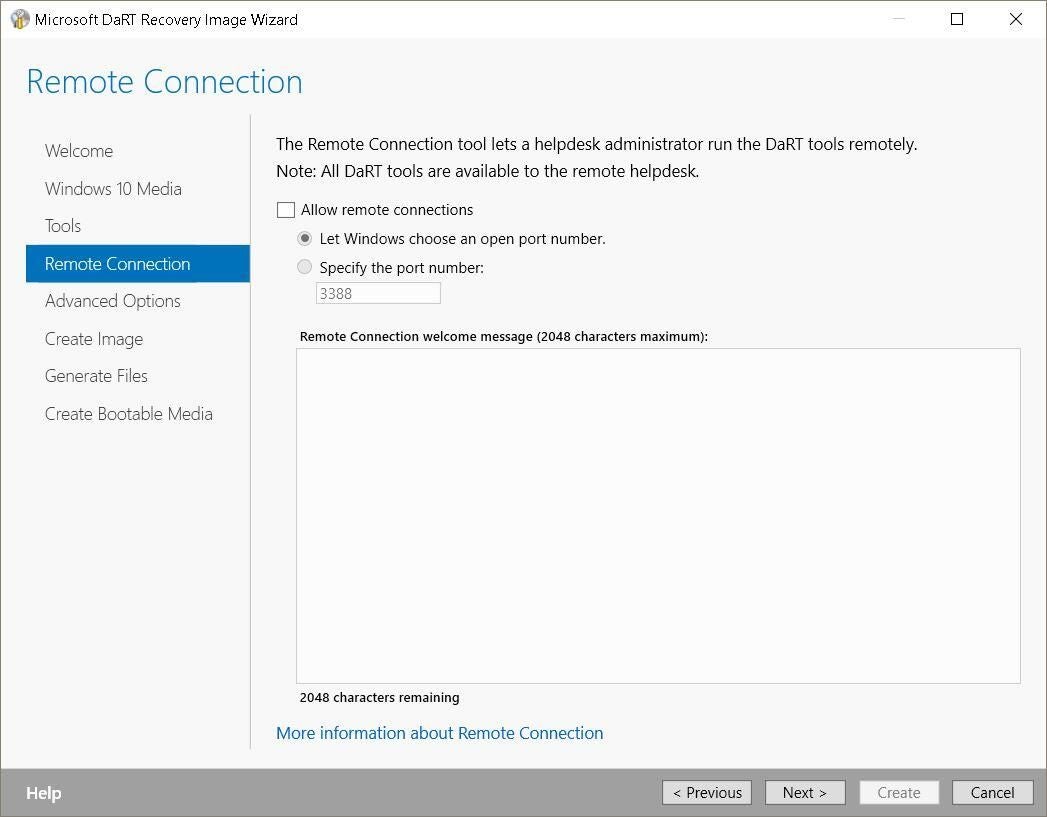
The Remote Connection page is optional, but recommended for additional troubleshooting support when using DaRT. If you want to enable RDP, select the Allow Remote Connections check box and specify the port number (Figure D).
Figure D
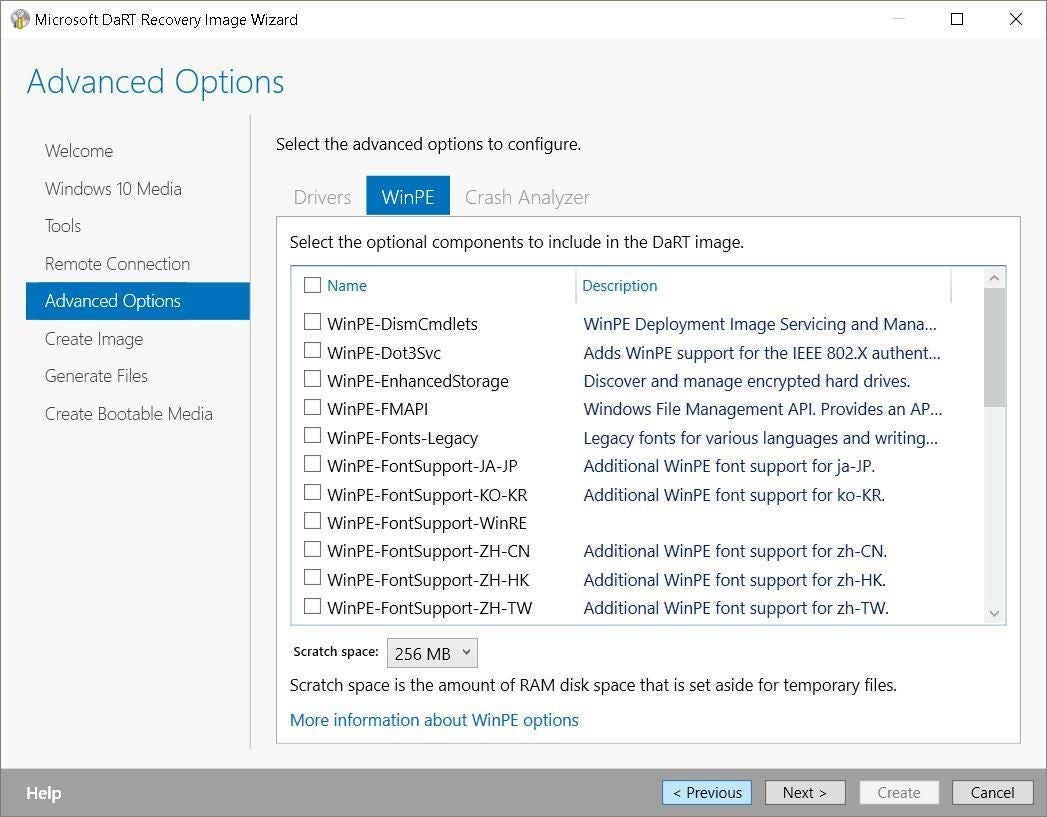
The Advanced Options page contains three tabs with which you can add functionality to your DaRT drive. The Drivers tab allows for 3rd-party device drivers to be added to the image for managing multiple types of devices. The WinPE tab allows you to add components that are accessible from within the WinPE environment–be it services or PowerShell cmdlets–that facilitate ease of management. And the Crash Analyzer tab allows for use of an optimized, more robust debugging solution (Figure E).
Figure E
SEE: Windows administrator’s PowerShell script kit (Tech Pro Research)
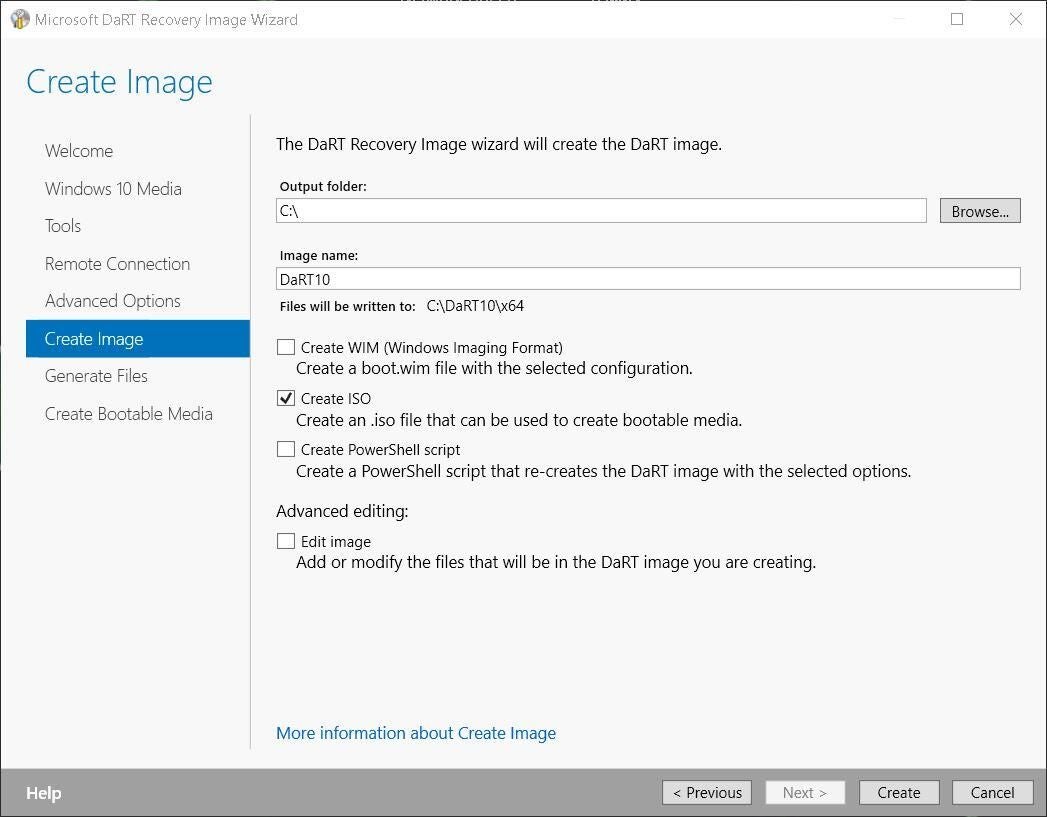
During the Create Image process, select the output folder and name for the image file types you wish to create. Check the appropriate box next to Create ISO (which must be selected if you plan to copy the image file to USB or optical media), then click the Create button to begin creating your file(s), as shown in Figure F.
Figure F
Depending on the components included, any additional files, and the speed of the computer, the process is fairly swift and shouldn’t take much time to complete (Figure G).
Figure G

When the process finishes, you’ll see the message shown in Figure H.
Figure H

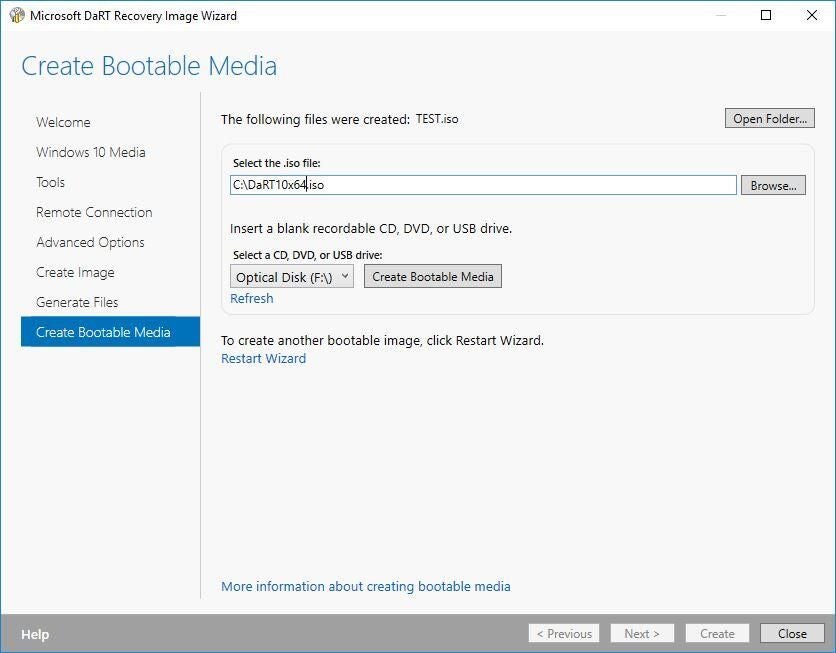
Once your image has been created, you can use the same wizard to burn the newly created ISO to optical media or USB flash drive by browsing for the ISO and clicking the Create button once again to create the bootable media (Figure I).
Figure I
Now you can boot your troublesome computers with the DaRT media to gain access to all of DaRT’s recovery options, including advanced troubleshooting apps, components, and utilities to fix what ails your devices.
Also read…
- Microsoft Universal Windows Platform Expert Bundle (TechRepublic Academy)
- 5 hidden search tricks for Windows 10 (CNET)
- How to protect Microsoft’s Diagnostics and Recovery Toolset from unauthorized access (TechRepublic)
- How to integrate DaRT into Microsoft Deployment Toolkit and Windows Deployment Services (TechRepublic)
- Windows 10 tip: Run any program (except one) as an administrator (ZDNet)
Your take
What are your experiences in using DaRT to recover from system issues? Share your tips and advice with fellow TechRepublic members.