


Microsoft PowerPoint is all about consistency — from one slide to the next you want things to look like they belong together. That’s where the slide master feature comes in. You can format layout slides so formatting is the same for each slide. You can also create a layout slide with picture placeholders. By default, picture placeholders are rectangular, but you can use most any shape you want.
In this article, I’ll show you how to create a custom picture placeholder and add it to a layout slide so that you can use it over and over in your presentation.
SEE: Windows, Linux, and Mac commands everyone needs to know (free PDF) (TechRepublic)
I’m using Microsoft 365 desktop on a Windows 10 64-bit system, but you can use earlier versions. You can download the demonstration .pptx and .ppt files. PowerPoint for the web won’t let you create a layout slide, but it will support an existing one.
How to add a layout slide in PowerPoint
When you open a new PowerPoint presentation file, you start with a set of default layout slides. You can change that set by choosing a built-in design or by designing your own. That’s how you’ll add a custom picture placeholder: Add a new layout slide in the Slide Master section. That way, the layout slide with the custom picture placeholder will be available at any time.
Must-read Windows coverage
- CrowdStrike Outage Disrupts Microsoft Systems Worldwide
- 10 Best Project Management Software for Windows in 2024
- Windows 10 Extended Security Updates Promised for Small Businesses and Home Users
- Securing Windows Policy
You can work with a new PowerPoint presentation, or you can modify an existing one, but I’ll be working with a new blank presentation.
The first step is to open PowerPoint’s Slide Master section by clicking the View tab and then clicking Slide Master in the Master Views group. The default presentation’s layout slides are in the left pane. The selected slide is in the middle of the screen — this should already be familiar to you because Normal View uses the same configuration.
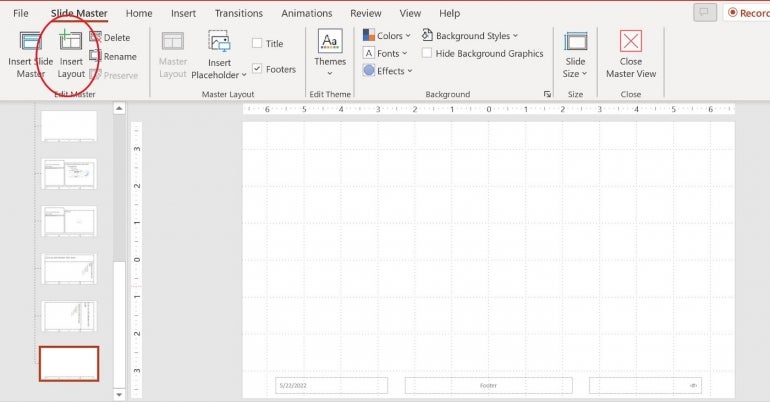
Click Insert Layout in the Edit Master group. PowerPoint will insert a layout slide to the bottom of the list.
Delete the title text box. You’ll also see footer elements at the bottom that are pre-defined for the default layout. Don’t bother with them for now, but you might want to when applying this technique to your own work.
At this point, you have a blank layout slide, as shown in Figure A. Now it’s time to add the picture placeholder.
Figure A
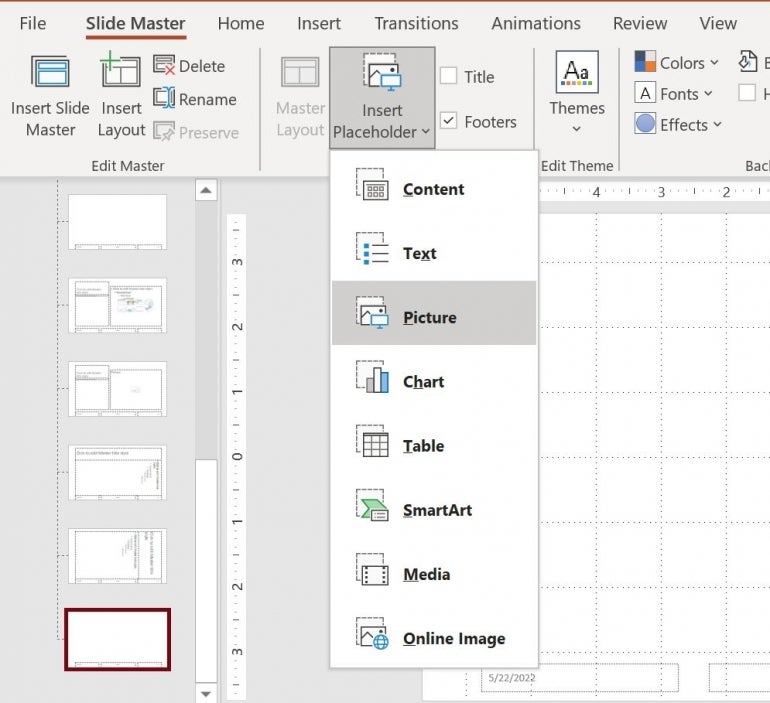
How to add a picture placeholder in PowerPoint
PowerPoint offers several placeholders, but we’ll work with the picture placeholder.
With the new blank layout slide selected, click Insert Placeholder in the Master Layout group. Choose Picture from the dropdown shown in Figure B.
Figure B
Then, drag to size. As you can see in Figure C, the default picture placeholder is a rectangular shape.
Figure C
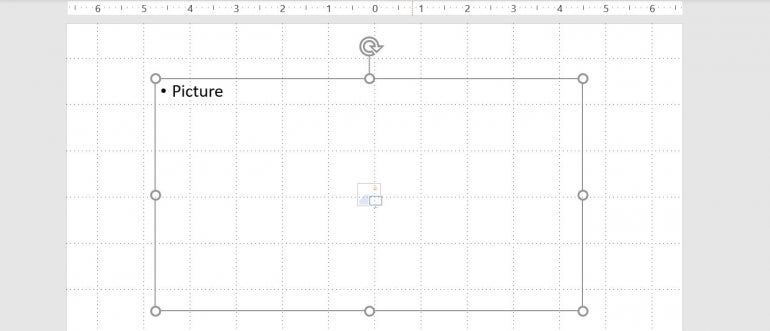
You can make the Microsoft placeholder large or small, and you can add more than one to the same layout slide — it’s all up to you. We’ll keep things simple by working with one large picture placeholder.
Now it’s time to customize the picture placeholder.
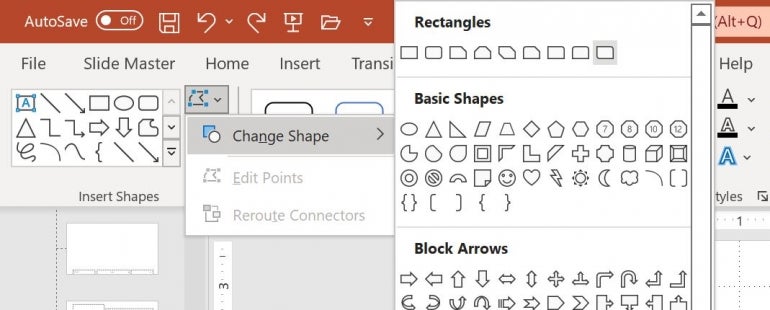
How to change the placeholder’s shape in PowerPoint
PowerPoint’s default picture placeholder is a rectangle, but you’re not stuck with that. You can change the shape to most any that you like, but you’ll want to be reasonable. With the picture placeholder selected, do the following to change its shape:
- Click Edit in the Insert Shapes group.
- From the dropdown, choose Change Shape.
- From the shapes gallery, choose a shape, as shown in Figure D.
Figure D
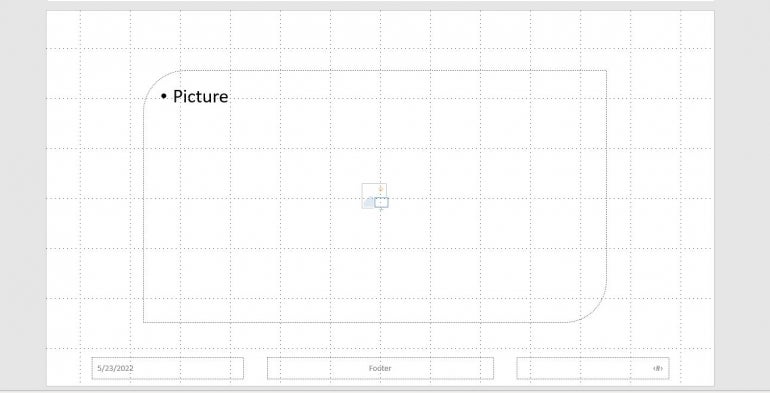
If the PowerPoint placeholder doesn’t change shape, hover over either of the yellow dots (edit points) to see the new shape, as shown in Figure E. With the custom picture placeholder in a layout slide, you’re ready to use it. Click Close Slide Master to return to Normal View or click Normal from the View menu.
Figure E
How to use the custom picture placeholder in PowerPoint
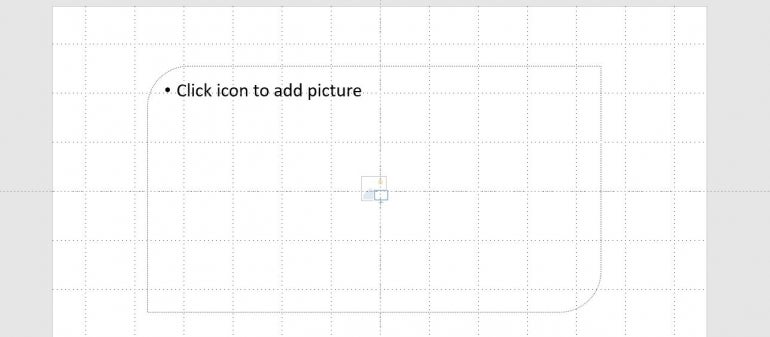
Once you’ve added a layout slide for the custom picture placeholder, you can use it in the current PowerPoint presentation. In Normal View, click New Slide in the Slides group. Thumb down to the bottom until you find the new picture placeholder shown in Figure F, and click it to insert the new layout slide shown in Figure G.
Figure F
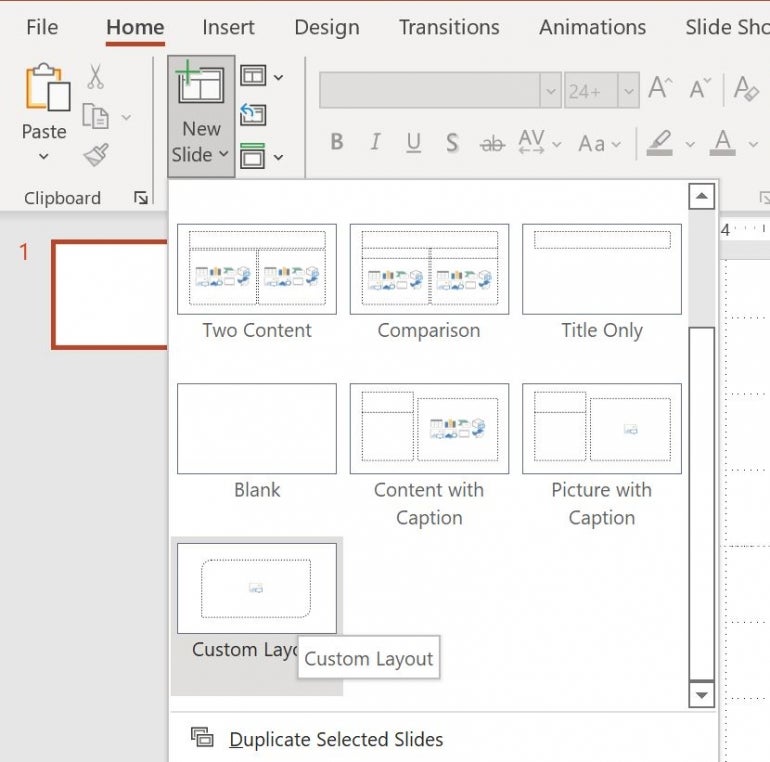
Figure G
You’ll insert a picture as you normally would:
- Select the custom picture placeholder.
- Click the Insert tab.
- In the Images group, click Picture and then choose Stock Images from the dropdown.
- Click a picture and click Insert.
Back in the slide, run the PowerPoint presentation to see the custom picture placeholder, shown in Figure H. It isn’t the normal rectangle, but the difference is subtle. When choosing a shape, don’t choose something outlandish unless you have a reason to do so. It’s okay to have a single picture with something unique, but it isn’t likely that you’ll need to create a layout slide for a one-time use.
Figure H

By using a customized PowerPoint picture layout slide, your pictures will all be uniform in shape and position on each slide.
Perhaps you’ll make your placeholder smaller and position it off to the side. Maybe you’ll add two or three to the slide. It’s up to you, and you can make more than one layout slide, so don’t be stingy with your imagination. But do work more efficiently by creating the layout slides first.