


Image: GettyImages/Maryna Andriichenko
All current Windows products require activation with Microsoft to confirm their validity and prevent software piracy. This can be a simple and easy process for computers connected to the internet or in an office environment with access to a Key Management Server (KMS), which can handle the activation process in the background. KMS periodically reactivates Windows on machines to ensure their licenses remain legitimate.
Unfortunately, it’s a bit trickier to get Windows activated if you’re not fortunate enough to have internet access (such as on a system connected to an internal network subnet that does not permit internet access for security reasons) or a working KMS server.
Must-read Windows coverage
- CrowdStrike Outage Disrupts Microsoft Systems Worldwide
- 10 Best Project Management Software for Windows in 2024
- Windows 10 Extended Security Updates Promised for Small Businesses and Home Users
- Securing Windows Policy
In my case, I ran afoul of a rampant Windows activation prompt on several company-owned servers I administer because the KMS server went down and eventually the servers stopped using what they considered valid licenses. Worse, Microsoft limits the functionality of unactivated Windows machines, preventing you from performing tasks such as customizing the taskbar or applying patches.
SEE: Windows 11: Tips on installation, security and more (free PDF) (TechRepublic)
Since these servers were due for some critical patches to be applied, I needed to move as fast as possible. I was able to quickly get Windows activated on these machines while also preparing to get a new KMS server stood up after the fact. I conducted these steps on several Windows 2012 machines, but they should also apply to Windows 10, 11 and 2016.
You can use this process whether you have a KMS server that’s “in the shop,” so to speak, or you don’t have a KMS server at all. It relies on a smartphone with texting capability, so make sure to have one handy.
I want to stress that this is a legitimate process sanctioned by Microsoft; it is not a “hack,” nor does it involve piracy.
First you will likely need to right-click the Start menu, choose System, click Activate Windows or Change The Product Key Or Upgrade Your Version Of Windows, then click Change Product Key and apply the product key.
In my case, Windows wouldn’t accept the key I knew to be valid, so I opened a command prompt and ran the slmgr (Software License Manager) command as follows:
slmgr /ipk (Windows product key)
That worked, so next I used the Software License User Interface command to run:
slui 0x4
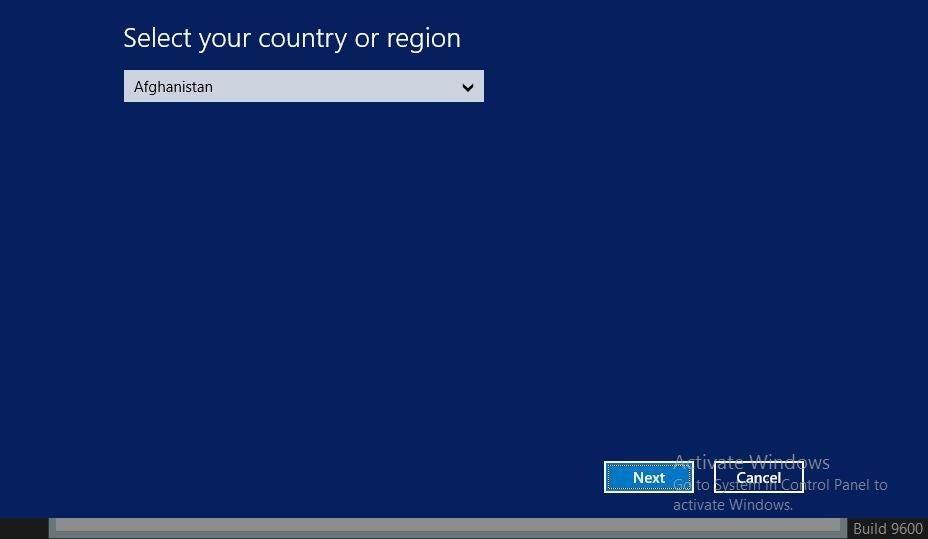
This kicks off the offline activation process. You’ll be prompted to select your country or region (Figure A).
Figure A
Once you click Next, you’ll be provided a screen similar to the one in Figure B.
Figure B

Call the number shown and you will be walked through a menu by a voice assistant that will ask whether you consent for the call to be recorded and ask what product you’re calling about. Answer “Windows” and then when asked if you have a smartphone say “yes” and consent to the suggestion that the assistant text a link to your phone, which you can use to complete the activation process. This is much faster and easier than using the default phone-based interface, which is slow and tedious, not to mention prone to error.
SEE: Checklist: Securing Windows 10 systems (TechRepublic Premium)
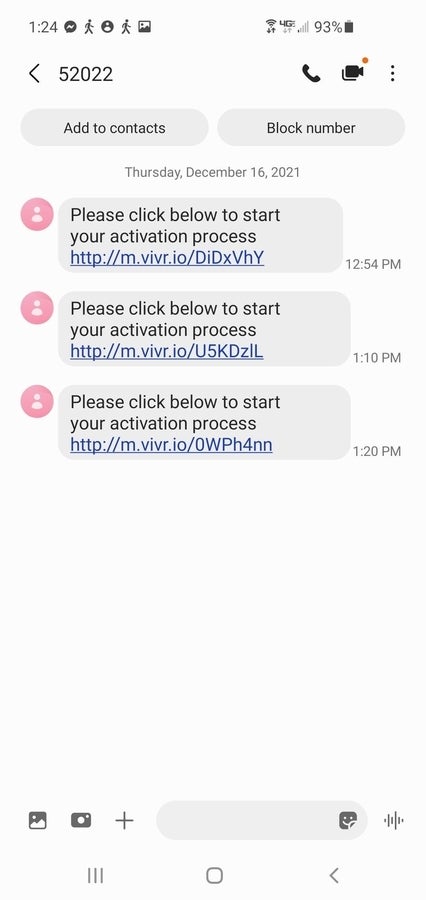
The text will come in right away. As you can see in Figure C, I had to repeat the call a few times over the course of my work as the link does expire, but if you’re fast enough, the same link will work for two or three activations so you can reduce the times you must initiate the phone call.
Figure C
Click the link and then you’ll be taken to a page similar to the one in Figure D.
Figure D
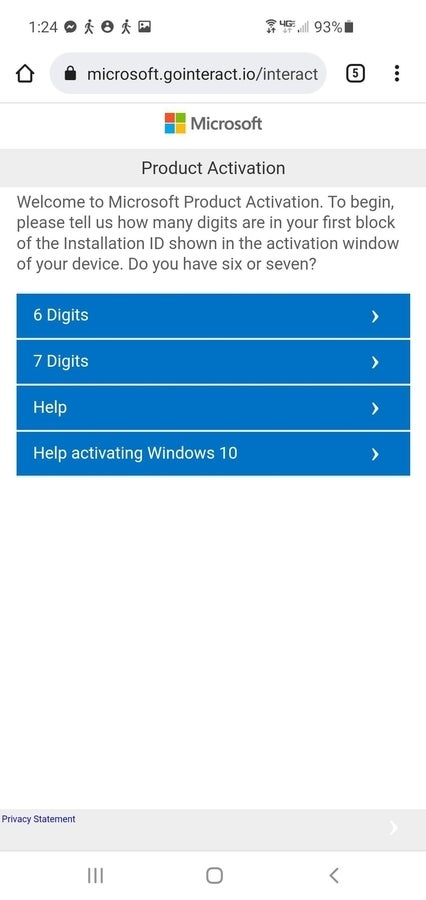
In my case, there were seven digits in the first block of the installation ID in the activation window, so I selected that as my answer.
I was then prompted to enter the nine sequences of numbers shown on my server in the next screen on my phone (Figure E). Please note I had to tap the empty field under “1” a few times before the option to plug in the digits came up; this caused me a bit of confusion and doubt about the functionality of the interface, but it worked fine once I knew the way to proceed.
Once I put in the entire set of sequences I clicked Submit.
Figure E

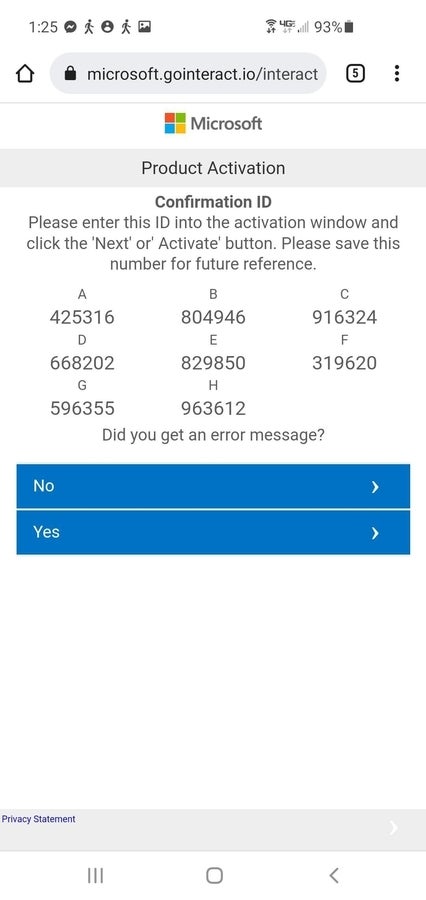
I was then taken to the screen shown in Figure F, which gave me eight sequences of numbers as shown. These numbers are based upon the numbers that had been displayed on my server screen under the Installation ID section. They are unique and based upon my Windows product code, so they will activate only that server.
Figure F
I switched back to my server and clicked Enter Confirmation ID and was taken to the screen shown in Figure G.
Figure G
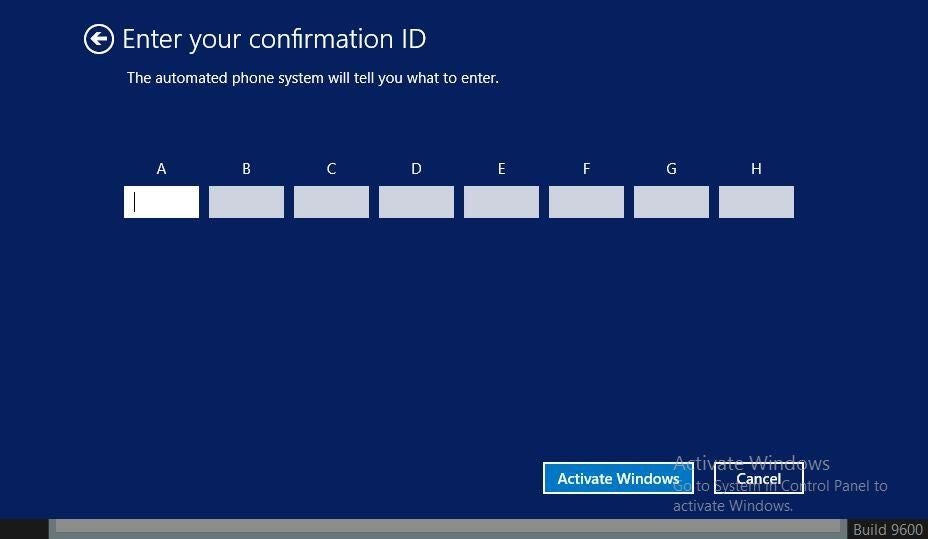
I then typed in the eight sequences of numbers on my smartphone and clicked Activate Windows, which brought up the screen shown in Figure H.
Figure H
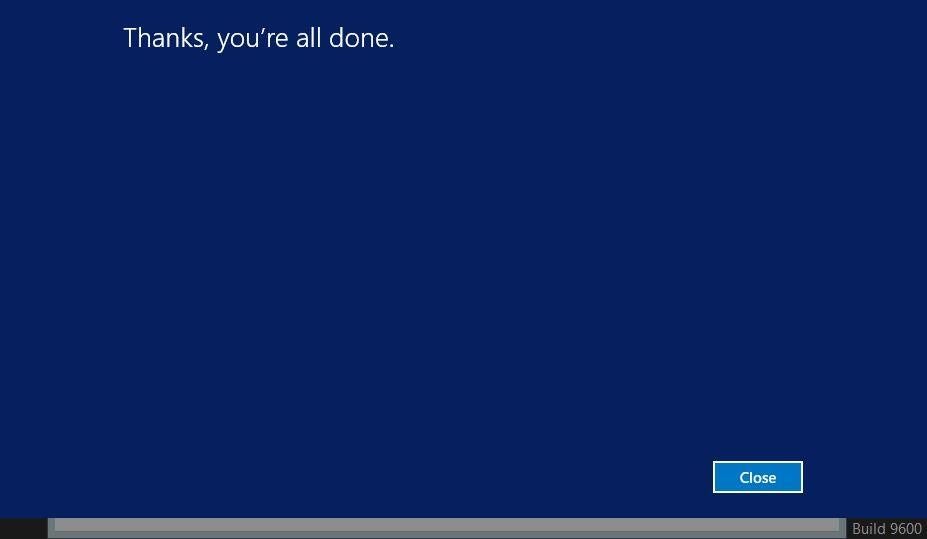
It was as easy as that!