


Image: iStockphoto.com/cosmin4000
In Microsoft Outlook, you can’t modify the default message form, but you can create a custom form and use it instead. Once you add the custom form, you can add it to the ribbon and still have the same one-click mail message you have now. The downside is you have to jump through a few hoops—although there are a lot of steps, the process isn’t complicated.
To automate the date, you’ll create and publish a custom form that automatically adds the date to the subject line of the new email message. Then, you’ll write a procedure (macro) that opens the form. Finally, you’ll add a new group to the Home tab that allows you to open the form with one quick click. The purpose of the article is to show you how to implement a custom form, so the form itself is simple. Later, you’ll want to explore all the options so you can create forms that help you work more efficiently.
I’m using Office 365 on a Windows 10 64-bit system. You can create custom forms in earlier versions, but the instructions will vary. This solution relies on code, so it isn’t appropriate for Mail (online version). You can import the downloadable .cls file instead of re-creating the procedure used.
How to design the custom form in Outlook
All custom forms are based on standard forms that contain the same functionality as the defaults; you can hide, add, and even add a script to automate them. In this case, we’re only adding the date to the subject. To get started, you need to create (design) a custom form by following these steps.
- Click the Developer tab and then click Choose Form in the Custom Forms group. If the Developer tab isn’t enabled, click the File tab and choose Options in the left pane. Then, choose Customize Ribbon. Check Developer in the Main Tabs list on the right, and then click OK.
- In the resulting dialog, choose Message (Figure A) in the Standard Forms Library (the default), and then click OK.
- In the new mail window, click the Developer tab. Then, click Design This Form in the Form group. This will open the standard form in editing mode.
- Click inside the Subject control and then click Property Sheet in the Tools group.
- In the resulting dialog, click the Value tab.
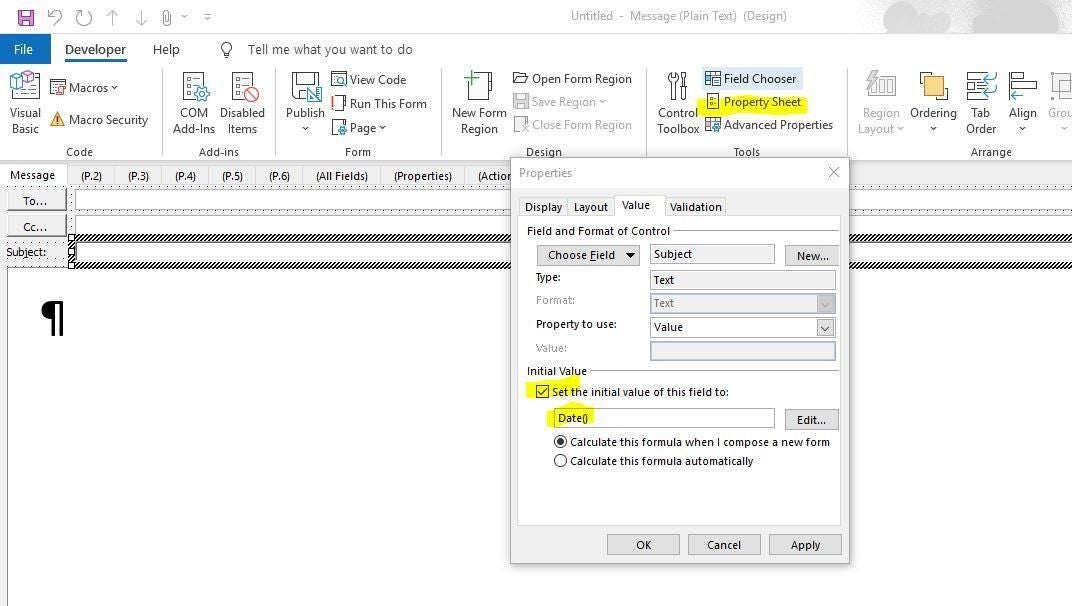
- Check the Set The Initial Value Of This Field To and then enter Date in the control just below (Figure B). The default calculating method is the one we want. (If you want to show the time, enter Time.)
- Click OK.
Figure A
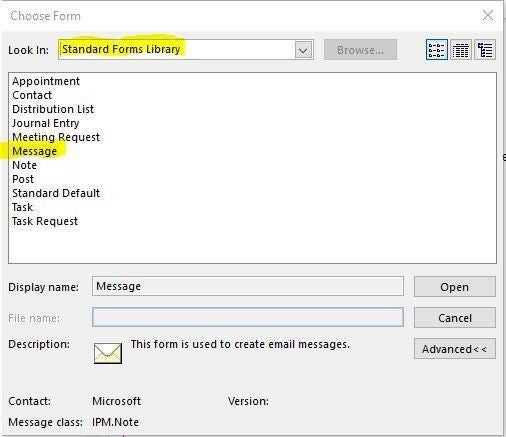
Figure B
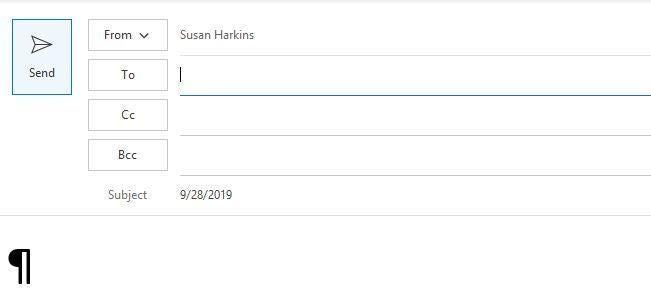
You can click Run This Form in the Form group to confirm the addition if you like. Figure C shows a very familiar Mail window with the current date in the Subject. Be sure to click the Developer tab to get back to the custom form in editing mode–if you click the Close button, you lose your work. You can skip this step if you like, but it’s a good idea to check your work. Also, we didn’t explore any of the properties–come back later and have a look around.
Figure C
Publish the form
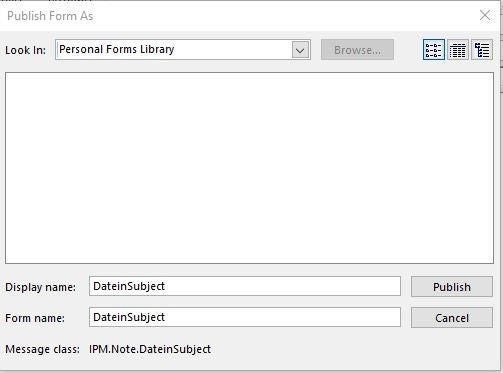
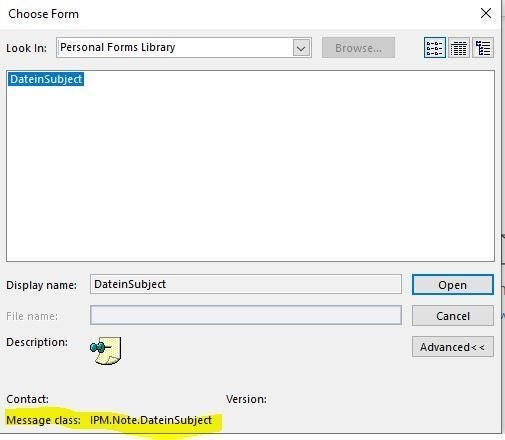
As is, the form isn’t available to you or anyone else–you must publish the form to make it available. To do so, click Publish in the Form group and then choose Publish Form As from the dropdown. (The Publish Form and Publish Form As options work similarly to the Save and Save As commands.) Outlook defaults to the Personal Forms Library, and that’s what we’ll use. If you want the form to be available to other users, publish the form to a public folder, which we won’t cover in this article. When sharing, only those users who have permission to the public folder will have access to the custom form. In the resulting dialog, enter a name for the form (Figure D). Before you continue, note the (internal) name of the form at the bottom of the form: IPM.Note.DateInSubject—you’ll need that later. Click Publish, close edit mode, and click Yes if prompted to save your work.
Figure D
Use the custom form
After going to all the trouble to create a custom form to work more efficiently, you might think it would be easy to use, but that’s not the case–at least, not initially. At this point, the only way to use the form is the hard way: In the Mail window, click New Items in the New group (on the Home tab) and then choose More Items from the dropdown. Then, select Choose Form in the resulting submenu (Figure E). In the resulting dialog, choose the appropriate library from the Look in dialog; in this case, you want the Personal Forms Library. Select DateinSubject (Figure F) and click Open. Finally, there’s your mail window with the date in the subject. Obviously, this is much more labor intensive than simply entering the date yourself! You want a one-click form.
Figure E
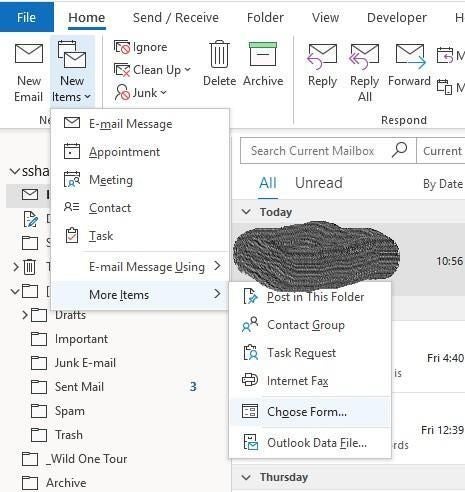
Figure F
The good news is that you can add a one-click custom form; create a macro that opens the form, and then add the macro to the ribbon. To that end, press Alt+F11 to open the Visual Basic Editor (VBE) and enter the procedure in Listing A to the ThisOutlookSession module. Don’t try to copy the code from this web page. Enter it manually or import the demonstration ThisOutlookSession.cls module. Save and close the module to return to Outlook.
Listing A
Public Sub OpenDateEmailForm
Dim Items As Outlook.Items
Dim Item As Object
Set Items = Application.ActiveExplorer.CurrentFolder.Items
Set Item = Items.Add(“IPM.Note.DateInSubject”)
Item.Display
End Sub
You’ll probably want the DateInSubject option next to the New Email option in the New group on the Home tab—that’s where I’d want it. If so, follow these steps.
- Click the File tab and choose Options. In the left pane, choose Customize Ribbon.
- From the Choose commands from the dropdown, choose Macros.
- Select OpenDateInSubject in the left list.
- On the right side, click New under Home and then click New Group.
- Rename the group New Item Date by clicking Rename (with the new group selected) and entering the name in the Display name control in the Rename dialog (Figure G).
- Click OK.
- With New Item Date (Custom) still selected, select the OpenDateInSubject macro in the left list and click Add (Figure H).
- Right-click the macro and choose Rename. In the resulting dialog, enter New Item Date and click OK. If you skip this step, Outlook will display the entire macro name.
- Click OK to return to Outlook, where you will see a new group: New Item Date (Figure I).
Figure G

Figure H
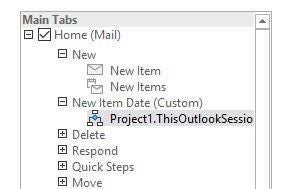
Figure I
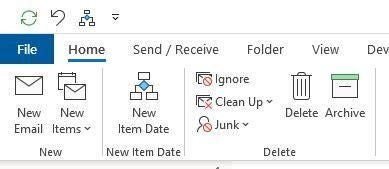
To open the form, click New Item Date in the New Item Date group. That’s it! (If asked to enable macros, do so.) You can’t remove the default New Email from the ribbon, but you can position the custom group you created before the existing New group.
Send me your question about Microsoft Office
I answer readers’ questions when I can, but there’s no guarantee. Don’t send files unless requested; initial requests for help that arrive with attached files will be deleted unread. You can send screenshots of your data to help clarify your question. When contacting me, be as specific as possible. For example, “Please troubleshoot my workbook and fix what’s wrong” probably won’t get a response, but “Can you tell me why this formula isn’t returning the expected results?” might. Please mention the app and version that you’re using. I’m not reimbursed by TechRepublic for my time or expertise when helping readers, nor do I ask for a fee from readers I help. You can contact me at susansalesharkins@gmail.com.