
Image: iStock/champlifezy
Adding page numbers to a document is a frequent task and easy, as long as you don’t need anything beyond the basics. However, that’s not practical, is it? It seems like you always need something to be just a little different, and for better or worse, Word’s page-numbering feature can be a bit confusing. In this article, we step beyond the basics and consider a common but easily solved problem: The disappearing page number.
SEE: 60 Excel tips every user should master (TechRepublic)
I’m using Microsoft 365 on a Windows 10 64-bit system, but you can use earlier versions. For your convenience, you can download the demonstration .docx file. This page-numbering solution works in the browser, but the browser doesn’t display header/footer text, so previewing is necessary.
The basics: How to add a page number in Word
Let’s take a step backward, just in case you don’t know how to include a page number in a Word document. You can display a page number anywhere, but the header/footer area is the usual spot. In addition, Word offers a few helpful, built-in options, that take the guesswork out of basic page numbering. Let’s work through a quick example that displays the page number at the top-right of every page—no bells or whistles—just page numbers. Using a three-page document, similar to the demonstration file, do the following:
- On any page, click the Insert tab.
- In the Header & Footer group, click the Page Number dropdown and choose the third option—Plain Number 3 (Figure A)—to open the header section and insert the page numbering field. You’ll know the header is open when the rest of the document dims a bit and Word displays a dotted border with a Header tag. Also, there are several options that you’ll want to explore later.
- Double-click the Header tag to close the header.
Figure A
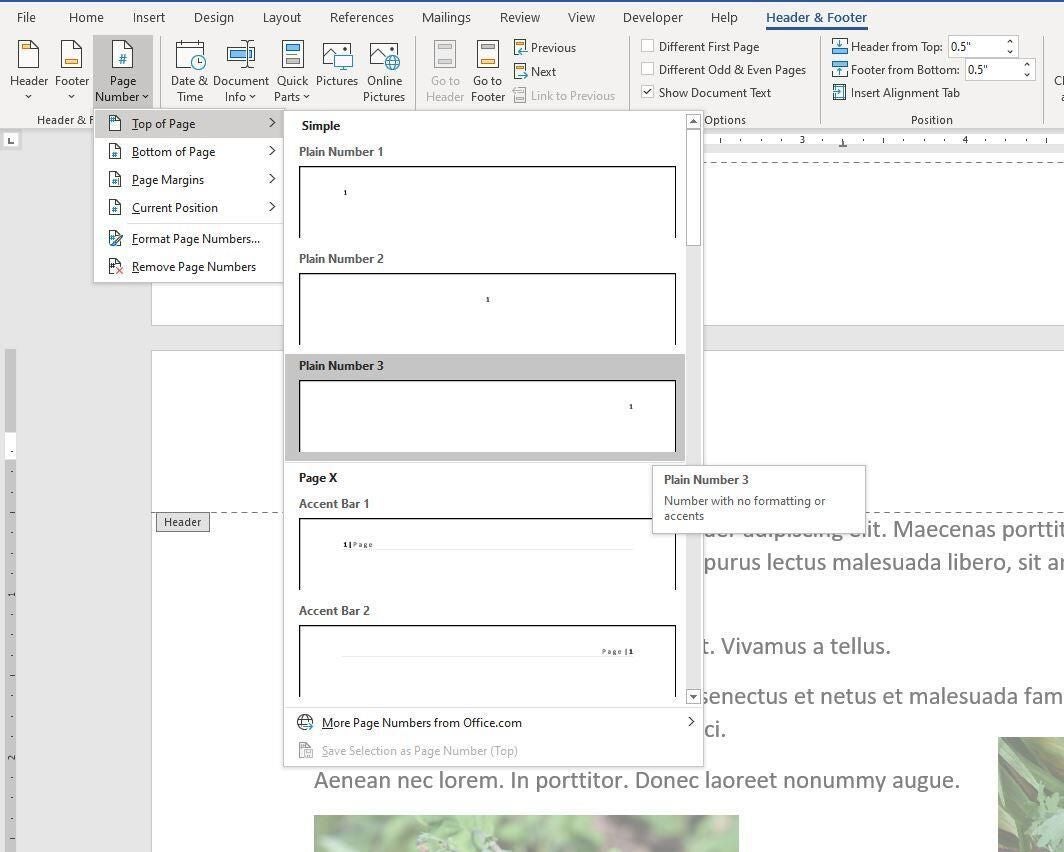
Each page is numbered, the first page is 1, the second is 2, and the third is 3—jut as you might expect. You might never need anything more than the basics. But it’s good to know that this feature is flexible if you do.
How to disable numbering for page 1
Probably the most common page-numbering scheme, beyond the basics is to not display a page number of the first page. It might be a title page, a cover letter, or something similar. To inhibit page numbering on the front page, do the following:
- Page numbering already exists, so we can skip those few first steps of entering the page number field. Double-click any page number to open the header.
- In the contextual Header & Footer tab, click the Different First Page option (Figure B) in the Options group.
- Double-click the Header tab to close the section.
Figure B
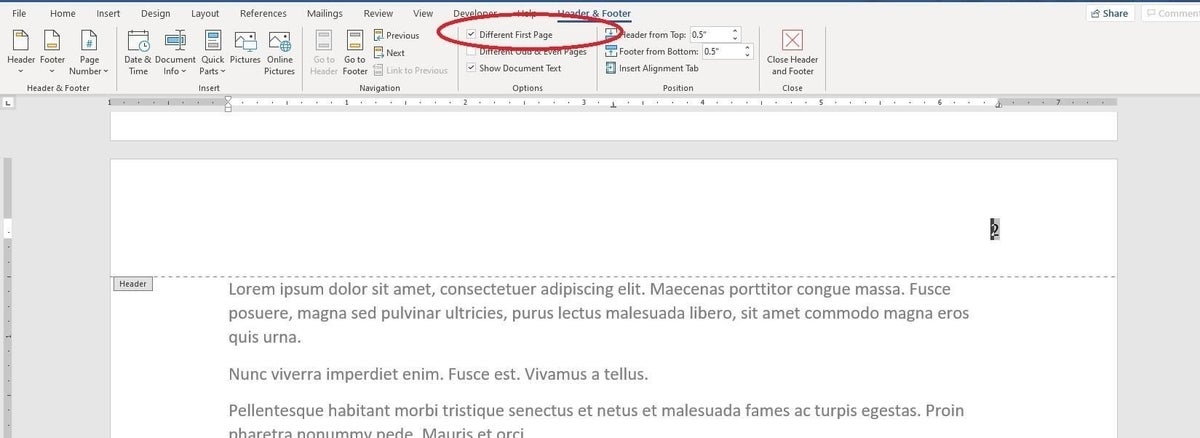
Page 1 won’t display a page number, but page 2 and 3 still do. If this is what you need, you’re done. If you want to restart page number at page 2, you have one more step.
How to restart page numbering
When you disable page numbering for the first page, you might also want to restart page numbering at page 2, so that the second page displays 1, instead of page 2, page 3 displays 2, and so on.
To reset the page numbering sequence, double-click the number that begins the new sequence. In this case, that’s 2 on page 2. Doing so will open the header section. To continue, do the following:
- Right-click 2—the current page number in the header section.
- Choose Format Page Numbers from the resulting submenu (Figure C).
- In the resulting dialog box, enter 1 in the Start At option in the Page Numbering section (Figure D).
- Double-click the Header tag to close the header section.
Figure C

Figure D
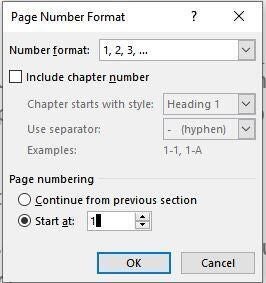
When you review the page numbers you’ll find that … oops … absolutely nothing changed! I did this on purpose to drive home the importance of sections. A section is a page or several pages that contain its own formatting. A single-page document is actually a single-paged section.
Now, let’s backtrack a little by adding a page section after page one as follows:
- Position your cursor at the top of the page that begins the new numbering sequence. If there’s text, position the cursor before the text (ignore anything in the header for now).
- Click the Layout tab.
- In the Page Setup group, click the Breaks dropdown and choose Next from the Section Breaks section (Figure E). Notice that the page number (2) disappears! What happened?
- Double-click the header for page 2.
- Uncheck the Different First Page option in the Options group on the Header & Footer contextual tab. Figure F shows the continuous page break (at the bottom of page 1) and the page number on page 2 is now 1. You must uncheck this option or Word treats page 2 as the new first page of the second (new) section and applies this option.
- Close the header by clicking the Header tag.
Figure E
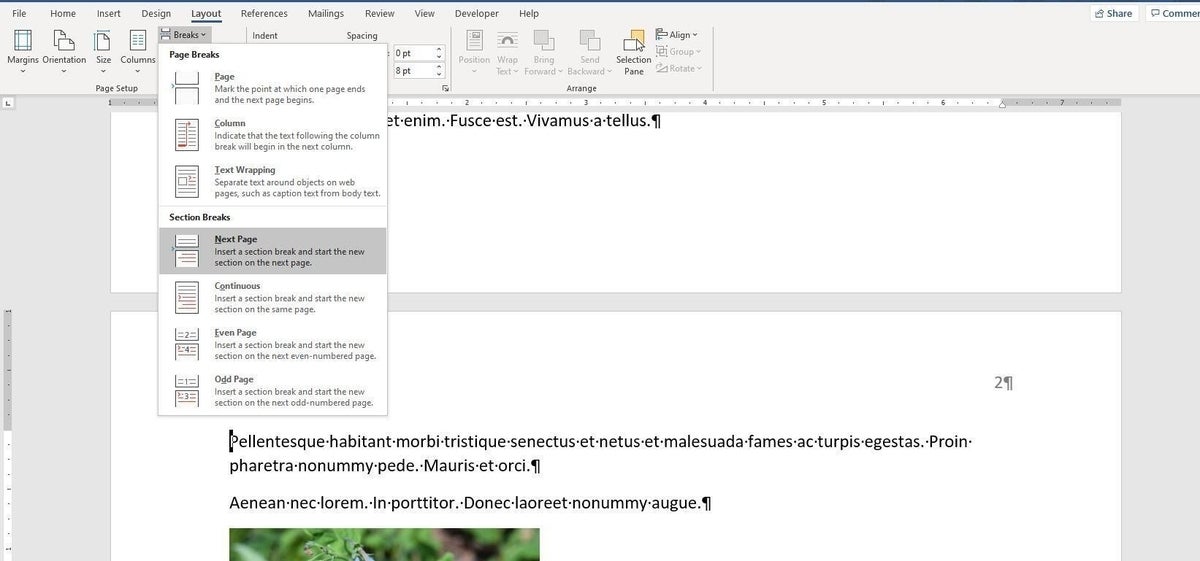
Figure F
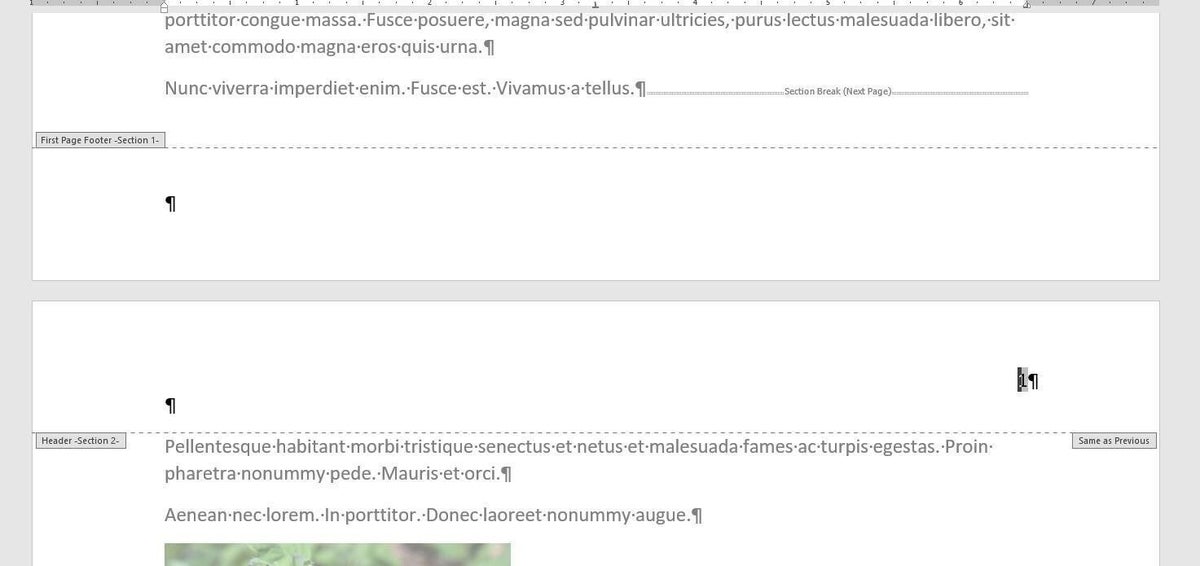
It’s easy to forget about the different header option and until you disable it for the new section, Word won’t return the page-numbering scheme you expect. Restarting the page number wasn’t the problem: The different header option was.
Stay tuned
Page numbering can be confusing, especially when Word doesn’t do what you expect, and you have no idea how to troubleshoot the problem. Over the next few months, I’ll share a few other page-numbering problems and their solutions.

