Photo and Illustration: Andy Wolber/TechRepublic
Chromebooks are designed to work best with an internet connection. Start your system, open the Chrome browser and all the resources of the web are yours to access. Google designed Chromebooks to be fast, secure and simple to use. System updates that install with a restart are measured in seconds.
You can do a lot with a Chromebook offline, too, including working with Gmail, Drive, Docs, Sheets, Slides and Drawings. But since the device presumes an internet connection, you need to take a few steps to make sure apps and data are available offline. To prepare your Chromebook for offline work, make sure your system is up-to-date and connected to the internet. Also make sure you’ve signed in to your Chromebook with the Google account you plan to use offline, then explore the various settings and features that let you work offline, as described below.
Note: If you use a Google Workspace account, be aware that an administrator can prevent offline access to data and apps. So if you use your Chromebook with an account associated with work or school and any of the settings aren’t available, check with your Workspace administrator.
SEE: Electronic communication policy (TechRepublic Premium)
Gmail offline
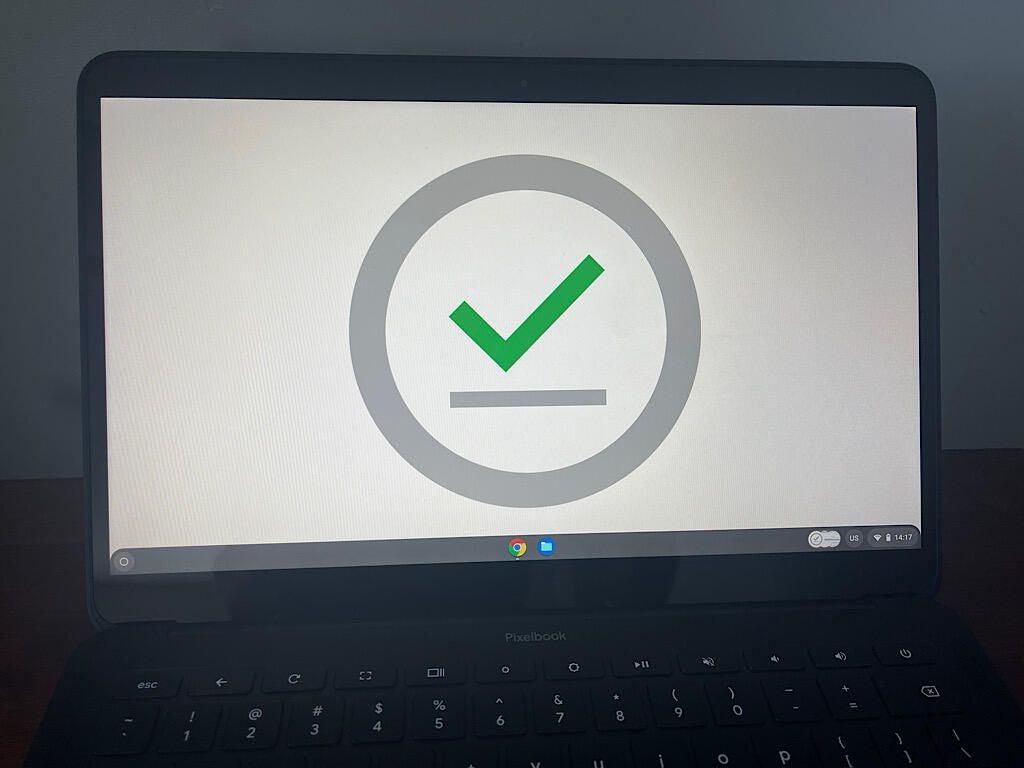
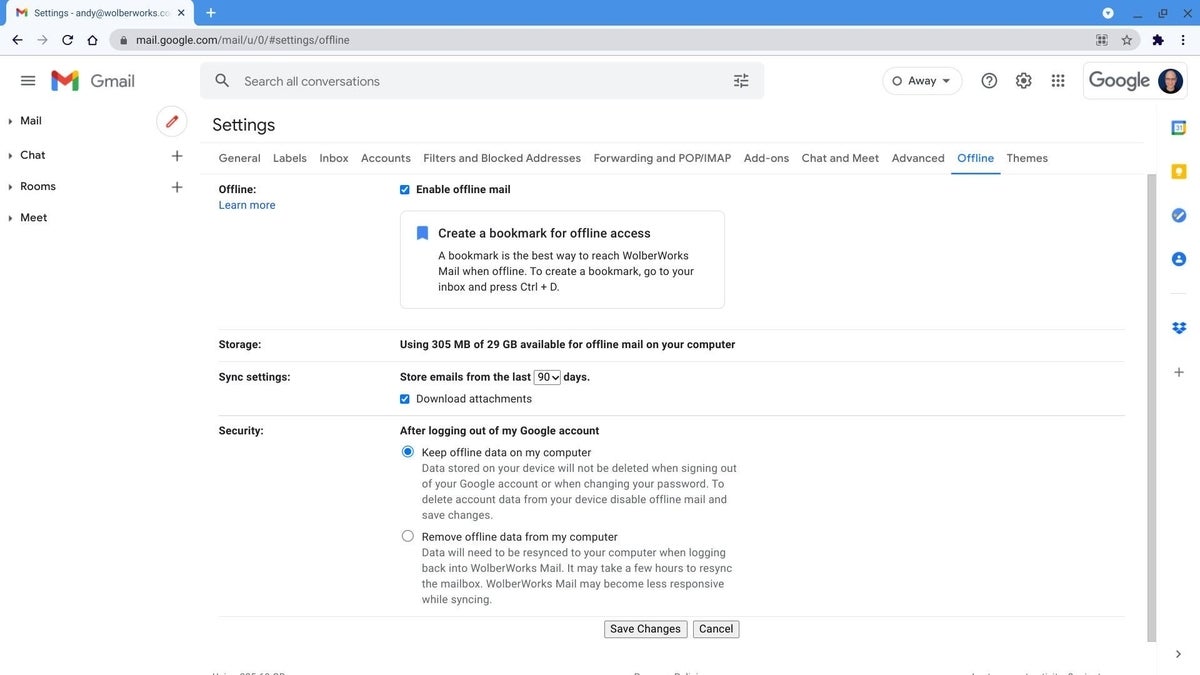
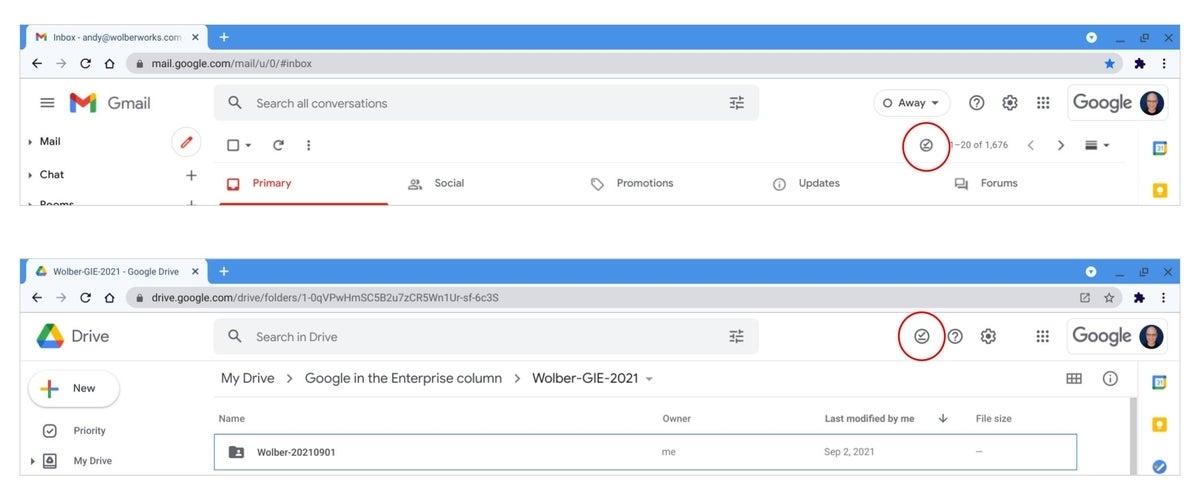
Go to Gmail offline settings and check the box next to Enable Offline Mail (Figure A). If desired, change the amount of mail to make available offline. Select Save. Next, go to your inbox, then press Ctrl+D to create a bookmark to return to your synced mail when offline. Wait until the system displays the circle with a checkbox to indicate a successful sync (Figure I, top). Return to the bookmark you created earlier to read, reply to or write Gmail when offline. Mail you “send” while offline will be stored in the outbox and send when you reconnect to the internet.
Figure A
Google Calendar offline
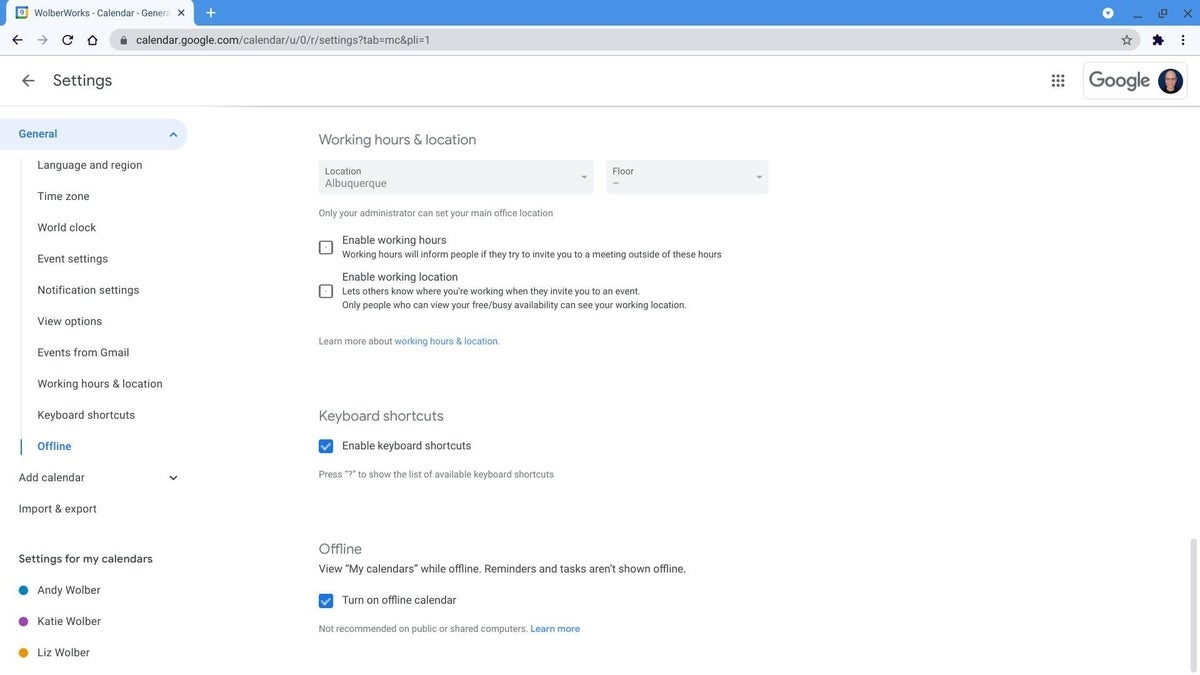
Go to Calendar | Settings | General | Offline and select the box next to Turn On Offline Calendar (Figure B). Wait until the system displays the circle with a checkbox to indicate that recent files have been synced to your system. When offline, go to Google Calendar to display all synced events and details.
Figure B
Google Drive, Docs, Sheets, Slides and Drawings offline
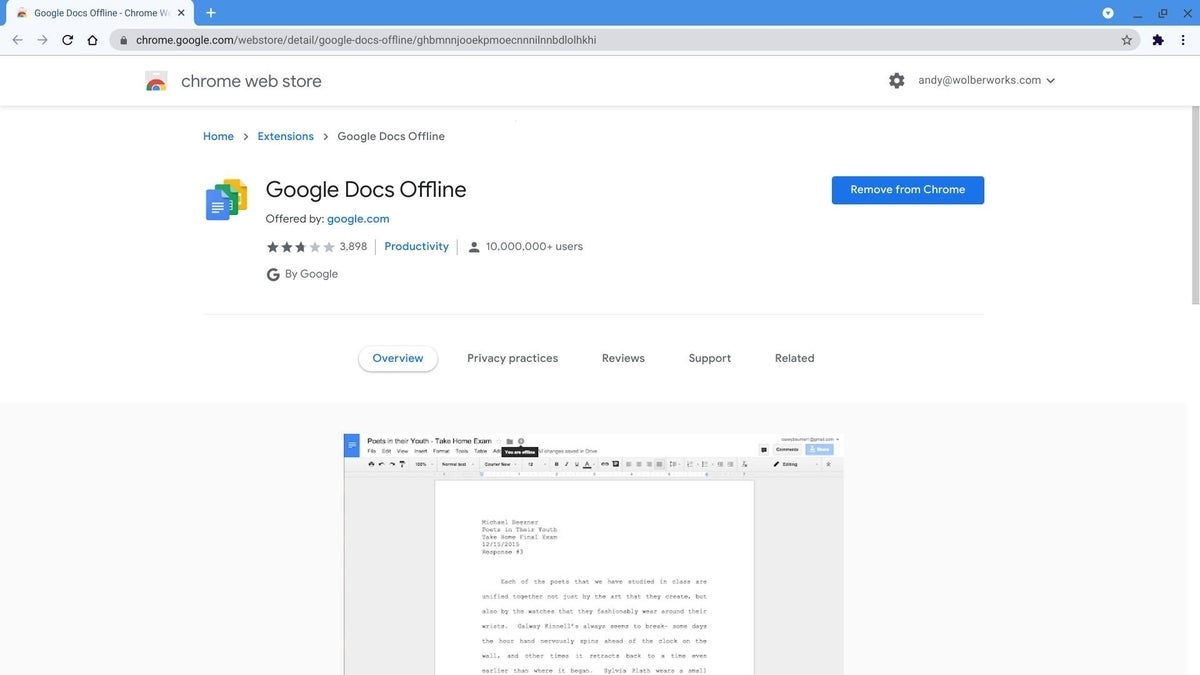
Follow the link to the Google Docs Offline extension, select Add To Chrome, then choose Add Extension to complete the installation. If the system displays Remove From Chrome (Figure C), you already have it installed.
Figure C
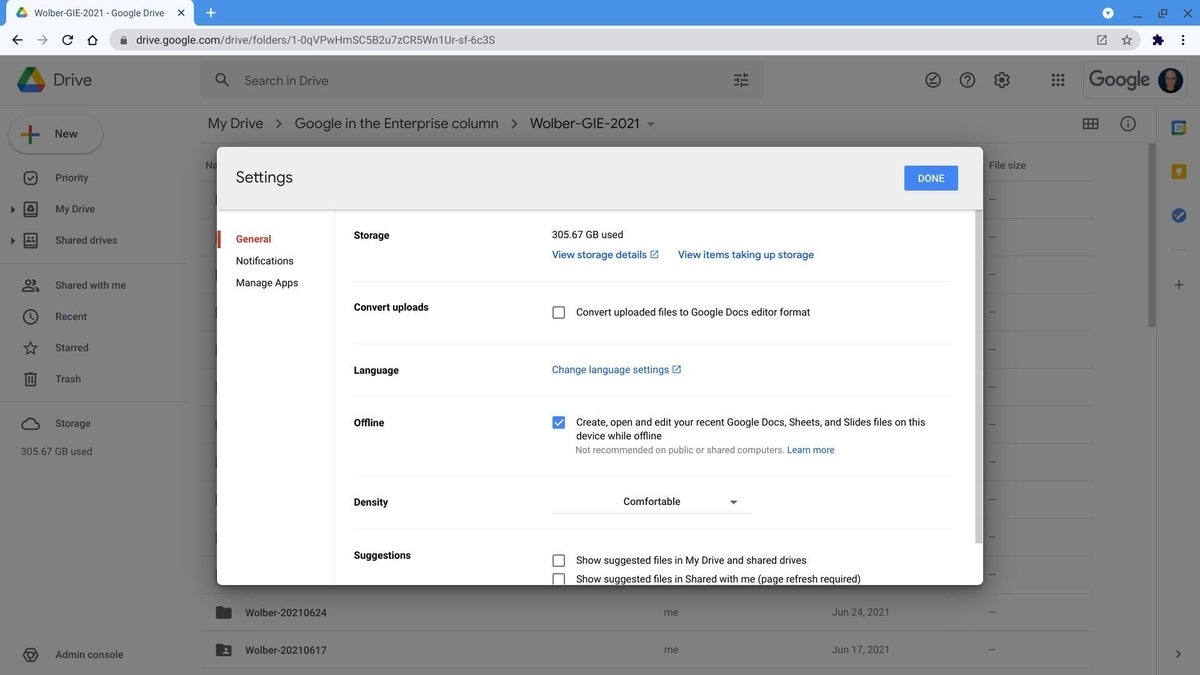
Additionally, go to Drive | Settings (sprocket in the upper right) settings and check the box next to Create, Open, And Edit Your Recent Google Docs, Sheets, And Slides Files On This Device While Offline (Figure D). Again, wait until the system displays the circle with a checkbox to indicate that recent files have been synced to your system (Figure I, bottom).
Figure D
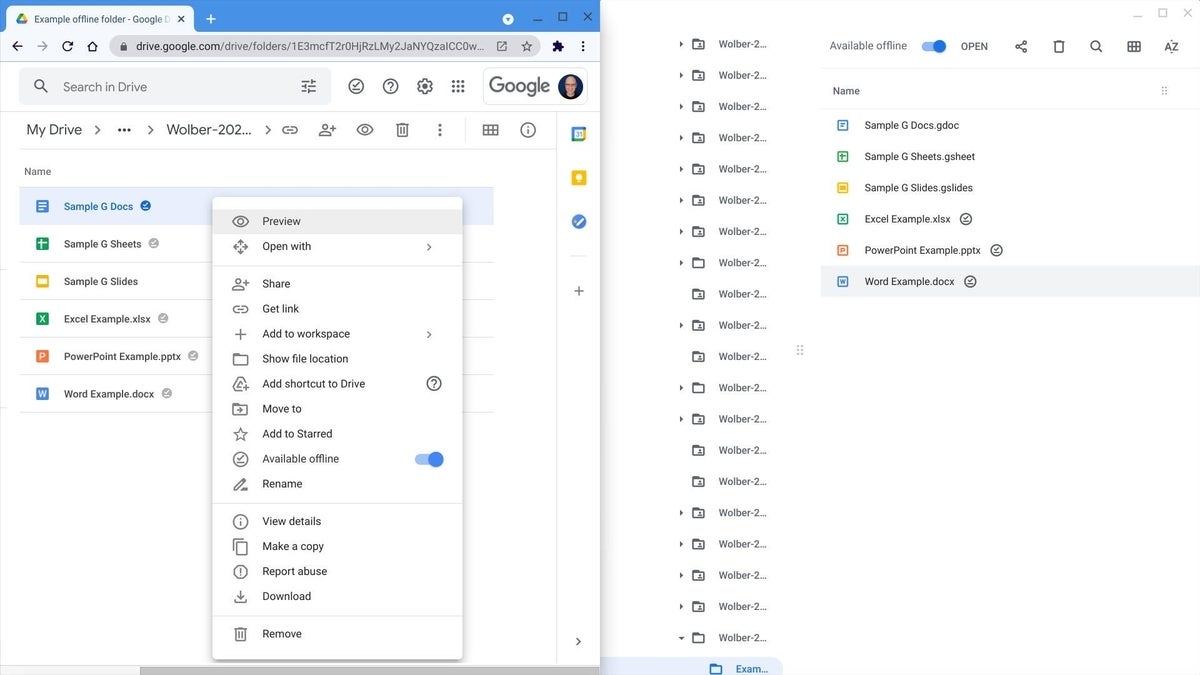
On a Chromebook, you have two ways to select specific items for offline access—either Google Drive on the web or the Chrome Files app (Figure E). While in Google Drive in Chrome, select (single click) a file or folder, then select the three-vertical dot menu and adjust the Available offline slides to sync the item offline. To verify available offline files, select the offline status indicator (the circle with a check in it) and move the slider to the right.
Alternatively, from the Files app on your Chromebook, select (single click) a file or folder, then move the slider next to Available offline to the right. To verify available offline items from the Files app, select the Offline pin icon (from the bottom of the left-side menu) under Google Drive.
Figure E
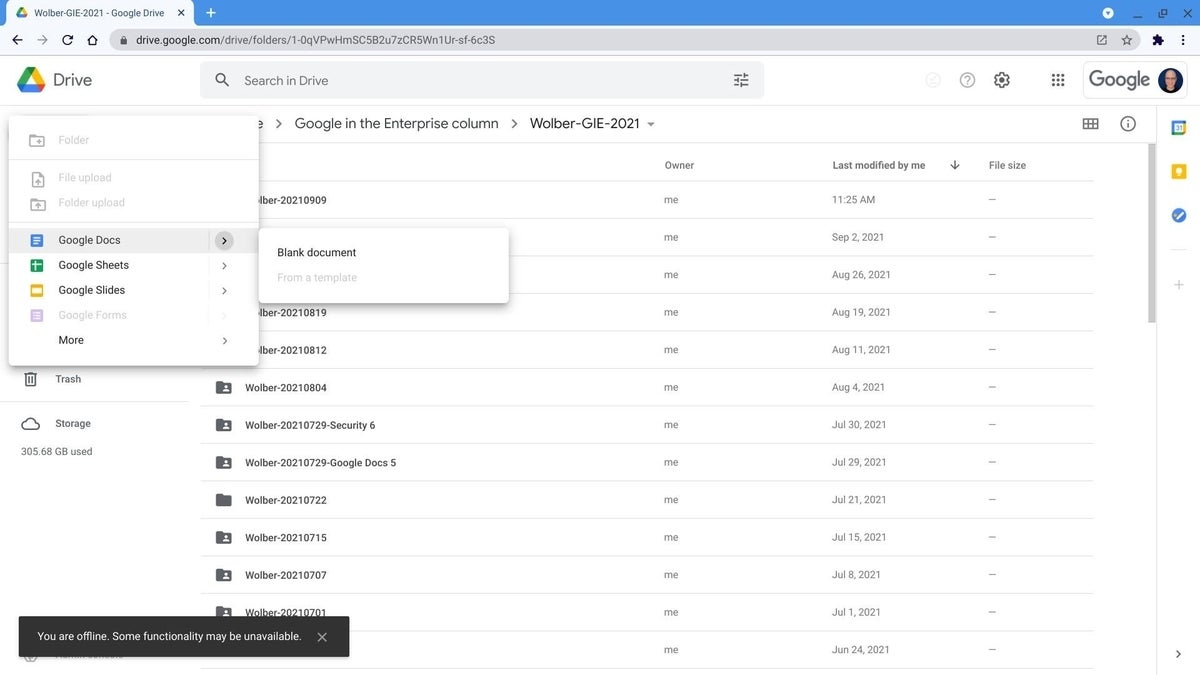
To create a new item (i.e., Doc, Sheet, Slide, Slide or Drawing) when offline, go to Google Drive and select the +New button, then choose the type of document to create (Figure F). As you work on your file, the system will display a Saved To This Device indicator to the right of the file name (in the upper left) as you make changes.
Figure F
Now, you’ve completed the basics. When you’re connected to the internet, your system will sync recent Gmail and Drive files and make them available for offline access.
Webpages offline
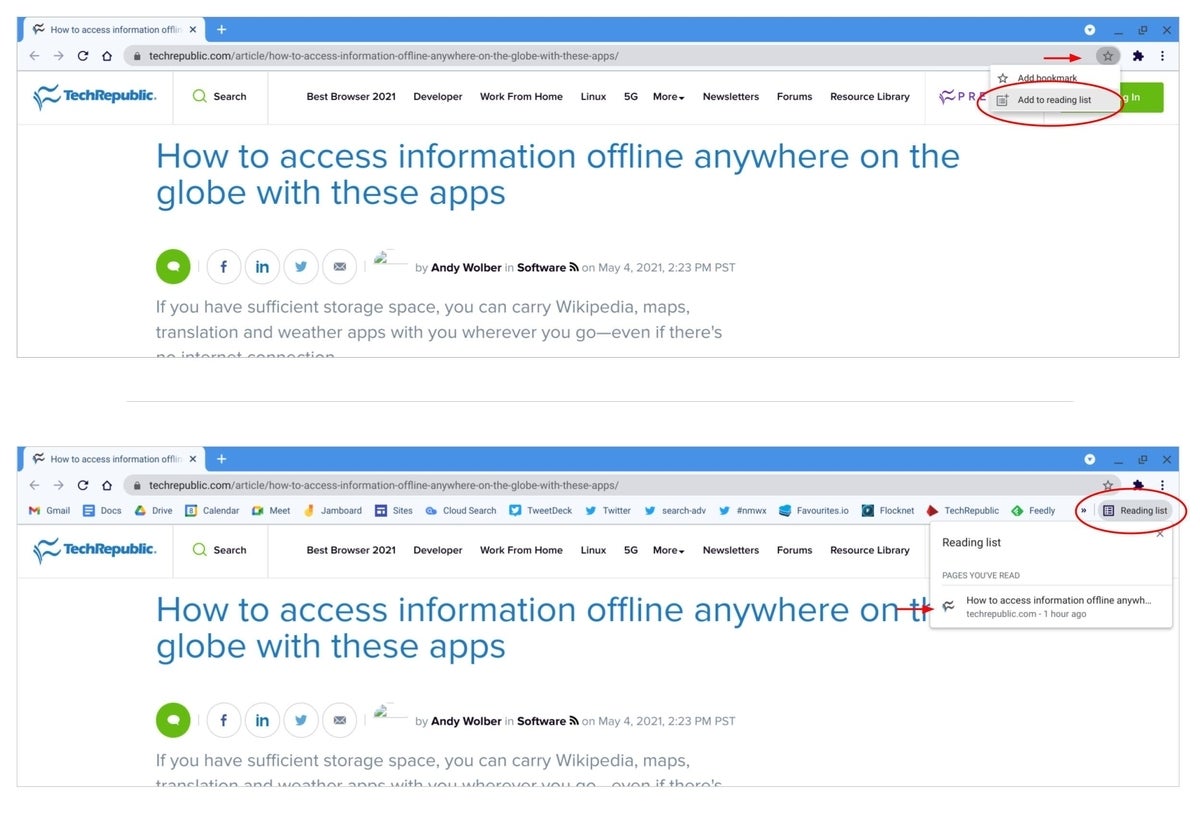
When online with an article or post you want to read later displayed in your browser, select the Star icon (in the upper right) then choose Add To Reading List to save the contents offline (Figure G, top). When offline, make sure your bookmarks bar is displayed (Shift+Ctrl+B), then select the Reading list (on the right side of displayed bookmarks). Select an article from the list to read (Figure G, bottom).
Figure G
Android apps
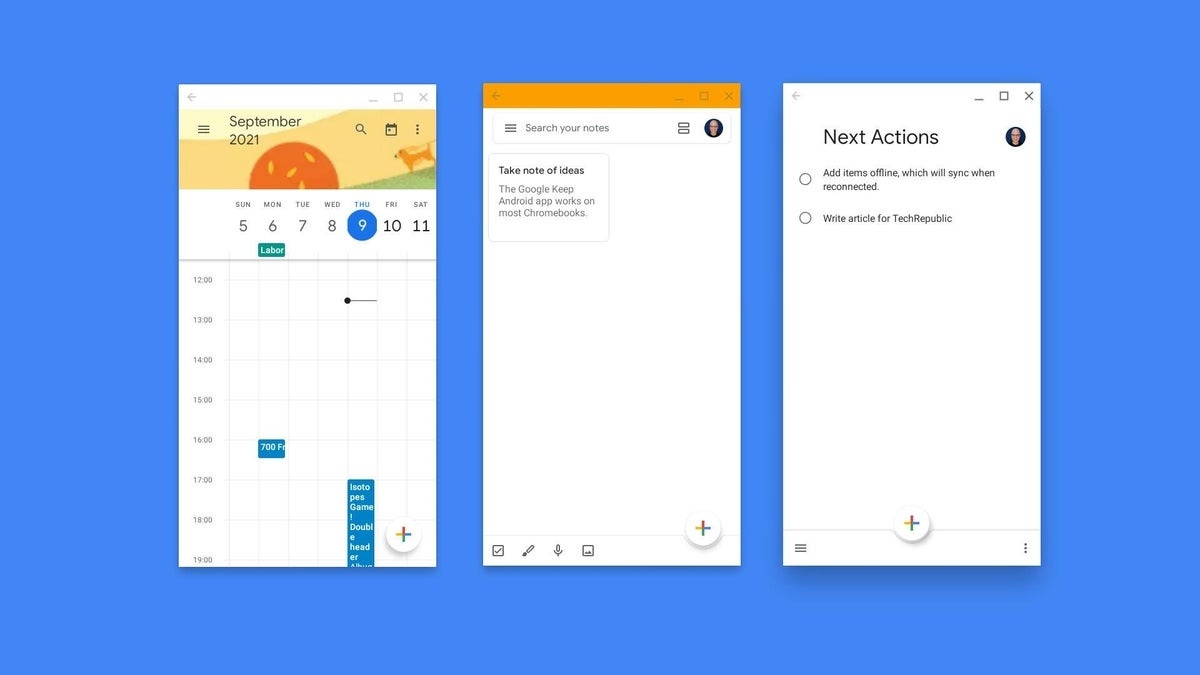
Many Chromebooks allow you to install Android apps, and many Android apps store data for offline use by default. Google Calendar, Google Keep and Google Tasks (Figure H) all sync data and work offline. Notably, while the Google Calendar web app is view-only, the Google Calendar Android app allows you to create and edit appointments and then syncs when reconnected to the internet.
Figure H
Sync before you disconnect
As a precaution, I recommend you check the sync status (go to Gmail and Google Drive in Chrome and make sure the circle with a checkmark displays, as shown in Figure I) immediately before you go offline to ensure your data is current. Similarly, for Android apps, open the app and give it time to sync before you disconnect from the internet.
Figure I
After you’ve completed all the above steps, you may take your Chromebook offline anytime: Click on the time (in the lower right), select Settings (the sprocket), then move the slider next to Wi-Fi to the left (i.e., Off).
What’s your experience?
If you use a Chromebook, how often do you use it without internet access? Do you actively take it offline in order to get work done? Have you found offline access to data and apps helpful when you travel? Are there specific Android apps you use when offline? Let me know how you use your Chromebook without internet access, either with a comment below or on Twitter (@awolber).