


Image: diignat, Getty Images/iStockphoto
The Microsoft Windows 10 May 2019 Update, which advances the OS to version 1903, modifies and improves many standard applications, including the relatively new Snip & Sketch app introduced in October 2018. Microsoft’s intention is for Snip & Sketch to replace the now deprecated Snipping Tool, which had been part of the basic Windows application lineup for years.
Must-read Windows coverage
- CrowdStrike Outage Disrupts Microsoft Systems Worldwide
- 10 Best Project Management Software for Windows in 2024
- Windows 10 Extended Security Updates Promised for Small Businesses and Home Users
- Securing Windows Policy
At its core, Snip & Sketch is a tool for capturing screenshots on your PC. Once a screenshot is captured, you can use the app to add simple annotations, highlights, or text. When you are finished, you can save your results or share them with colleagues or friends. Typically, the snipping screen overlay must be activated by starting the Snip & Sketch app from the Start Menu or from the Taskbar, but there is another way.
This how-to tutorial explains how to modify Windows 10 and Snip & Sketch so that the snipping screen overlay can be started by pressing the print screen button (PrtScn) on a standard keyboard.
SEE: Windows 10 May 2019 Update: 10 notable new features (free PDF) (TechRepublic)
How to open the Windows 10 snipping screen with the print screen button
Changing settings to allow the standard print screen button to activate image snipping is best accomplished by accessing two separate configuration screens. First, open the Snip & Sketch app by clicking or tapping its icon in the Start Menu or on the Taskbar. As you can see in Figure A, the opening screen doesn’t reveal much.
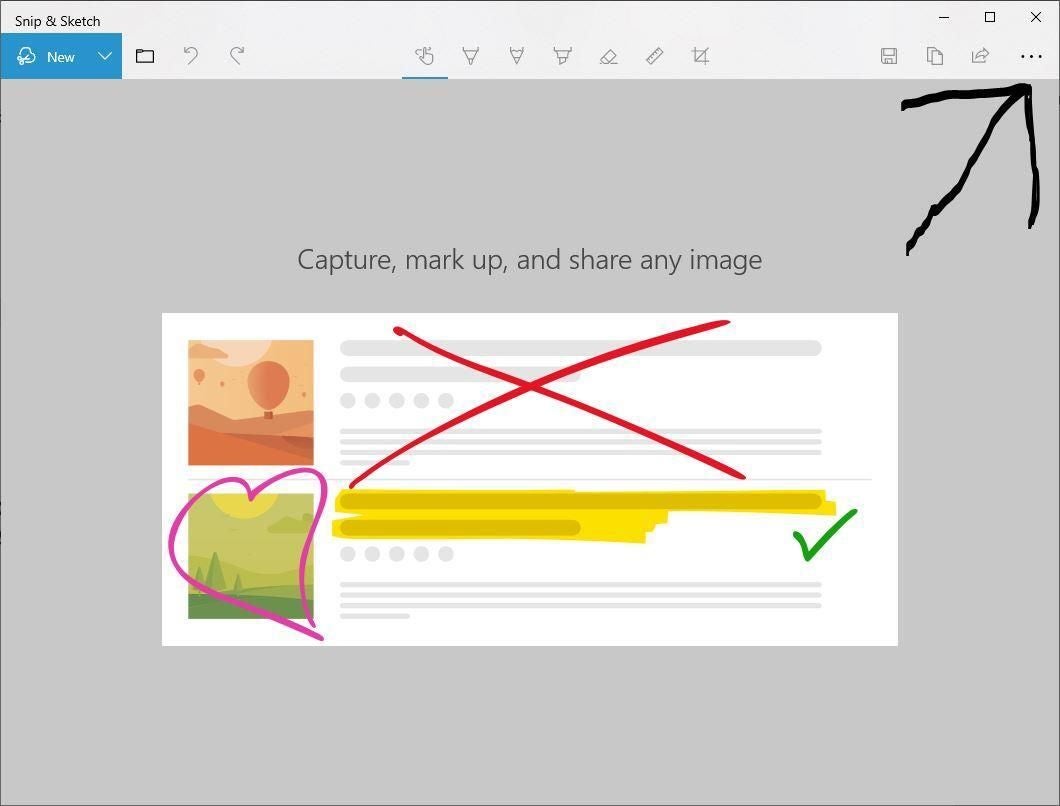
Figure A
Click the three dots to extend the menu and select Settings to open the screen shown in Figure B.
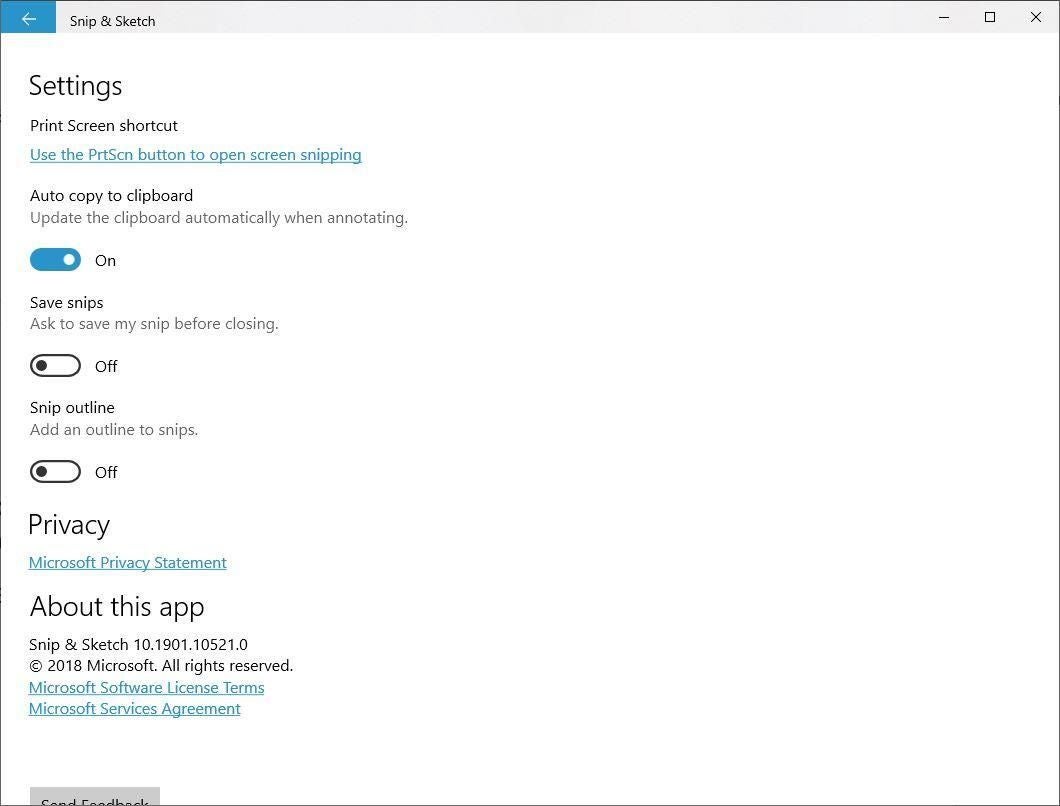
Figure B
There are a few application settings to consider. Personally, I prefer to update the clipboard automatically as I make annotations. However, for our purposes, we are interested in the link near the top of the screen that says: “Use the PrtScn button to open screen snipping.” Click it to be taken directly to the Keyboard section of the Windows 10 Ease of Access Settings screen, shown in Figure C.
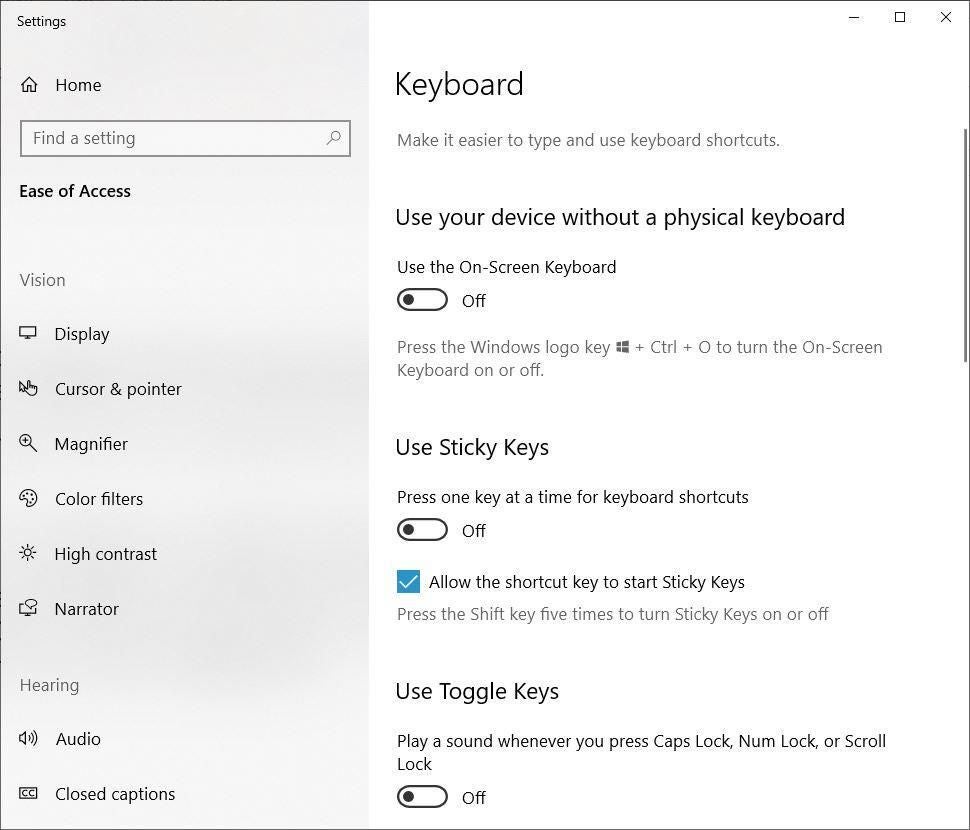
Figure C
Scroll down the screen until you find the slide button setting that allows you to open screen snipping with the print screen (PrtScn) button, as shown in Figure D.
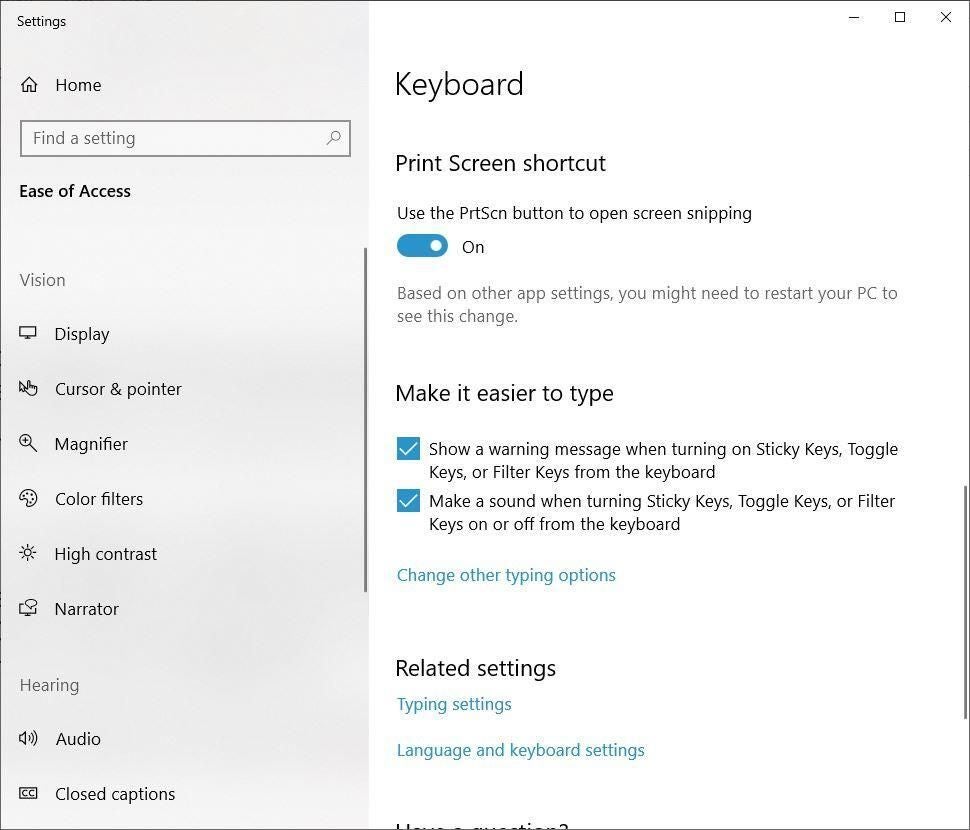
Figure D
Close the Settings screen and close Snip & Sketch. Now, when you press the print screen button you will see the screen snipping overlay, which looks something like Figure E.
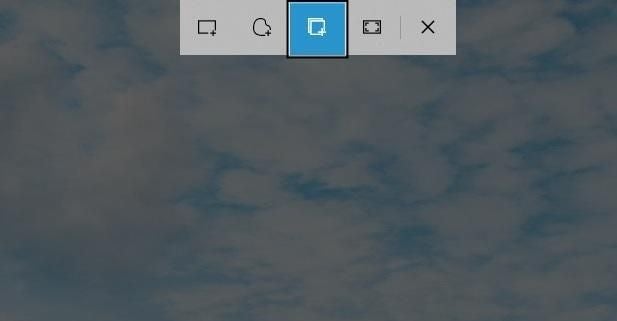
Figure E
The screen snipping overlay offers you several options. You can capture a particular window (a welcome new feature), draw a rectangle and capture the image, capture the full screen, or draw a freeform area and capture the image inside of it. The captured images reside on the Windows 10 clipboard, which you can access via the advanced clipboard function (Windows logo key + V).
It is important to note that the initial press of the print screen button still places an image of the full screen on the Windows 10 clipboard, even if you choose not to use the screen snipping overlay.
Snip & Sketch
Oddly, to use the annotation features of the Windows 10 Snip & Sketch app you will have to access the snipping screen overlay via the Snip & Sketch app itself—not through the print screen button.
Click the New button on the menu of Snip & Sketch (Figure A) and you will see the snipping overlay. Only now, when you capture an image using one of the options, you will be taken back to the Snip & Sketch app where you can make annotations and use the sharing tools.