Image: Wachiwit/Shutterstock
The Windows 10 Start menu tries to pack in a lot of content, including a list of all installed apps, a tiled screen for your favorite apps and a section for key Windows locations. But all that information can result in a crowded and messy Start environment, especially as you install more and more applications. With just a bit of effort, you can clean up your Windows Start menu so it’s more manageable and easier to navigate. Let’s check out how.
SEE: Windows 10 power tips: Secret shortcuts to your favorite settings (TechRepublic Premium)
First, you can control what details are displayed in the Start menu. Go to Settings, select Personalization and then choose the setting for Start. Here, you can adjust several options (Figure A).
Figure A
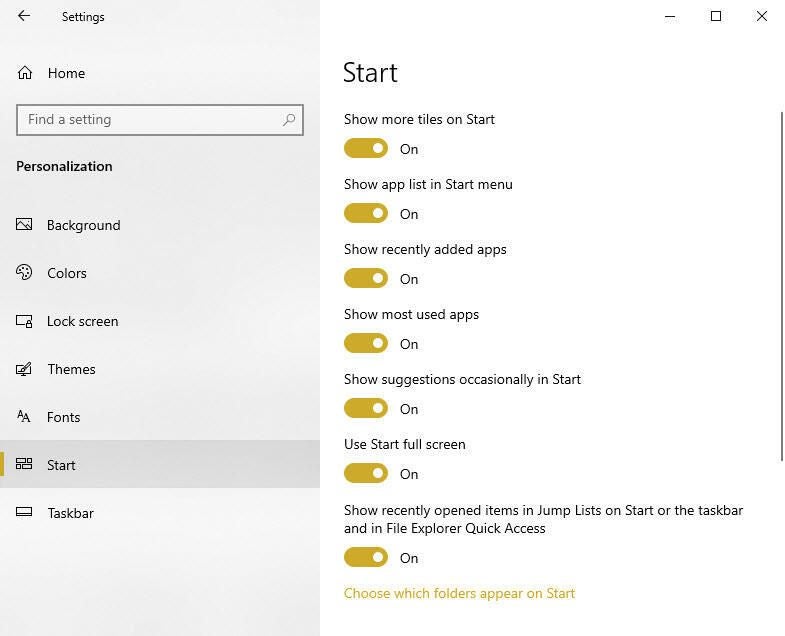
Show App List in Start Menu displays the column with all your installed apps. Turning this off certainly helps reduce the clutter, though it’s harder to find certain apps with just the tile screen visible. However, you can easily access the app list by clicking its icon. You can then switch back and forth between the app list and tiled screen, a handy option if you don’t need to see both at the same time.
Show Recently Added Apps displays any apps you’ve recently installed at the top of the apps list. Turning this off reduces some of the clutter in the Start menu.
Show Most Used Apps shows the apps you use most frequently. You can turn this off to cut down on the number of apps listed in the menu.
Show Suggestions Occasionally in Start is another option you can turn off to cut down on the number of apps listed.
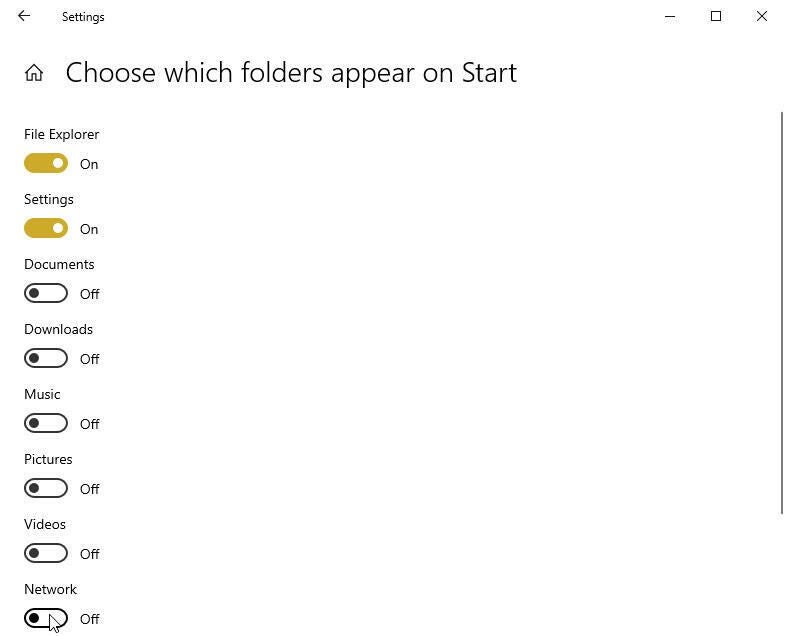
Next, click the link for Choose Which Folders Appear in Start. This option controls which Windows folders and locations appear all the way at the left of the Start menu. Turn off any folders you don’t access on a regular basis to reduce the number of icons in this area of the menu (Figure B).
Figure B
Next, you might want to reduce the number of apps that appear in the app list. One obvious task is to uninstall the ones you no longer need. After clicking the Start button, right-click on an app you want to remove and click Uninstall (Figure C).
Figure C
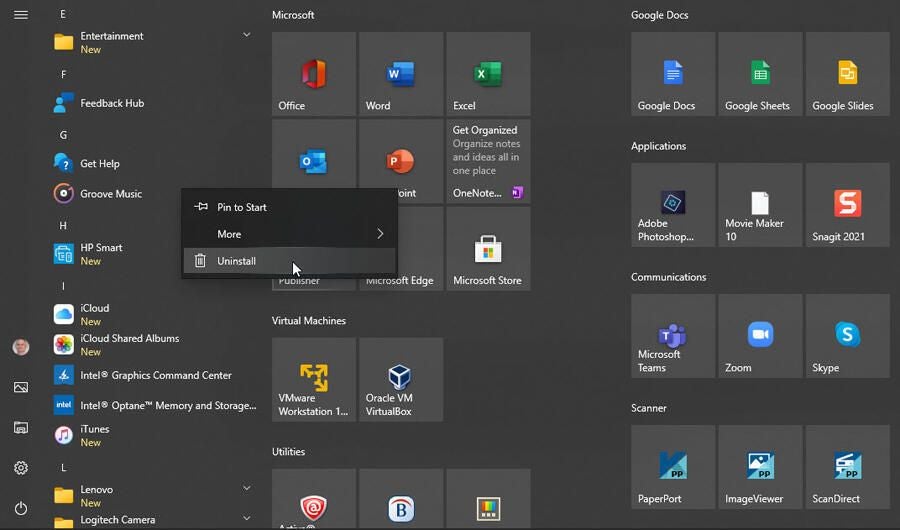
All those moves are fine so far, but maybe your Start menu’s apps list still seems cluttered. Unfortunately, Microsoft offers no way to organize the list directly through the menu. But you can do this by turning to File Explorer.
Open two instances of File Explorer. To do this, click the File Explorer icon on the taskbar to open the first window. Then right-click on the icon and select File Explorer from the jump list to open the second window. Position the two windows side by side.
In the first window, go to the following location: C:Users[your username]AppDataRoamingMicrosoftWindowsStart Menu. This folder stores the shortcuts for apps installed just for your account. In the second window, go to the following location: C:ProgramDataMicrosoftWindowsStart Menu. This folder stores the shortcuts for apps installed for all users (Figure D).
Figure D

Now create new folders to store specific apps in either or both locations. For example, you might want to create a folder called Microsoft Office to store the shortcuts for all your Office apps, a folder called Browsers to install the shortcuts for your web browsers, and a folder called Communications to store shortcuts for apps like Microsoft Teams and Zoom. Then cut and paste or drag and drop the appropriate shortcuts into the new folders (Figure E).
Figure E
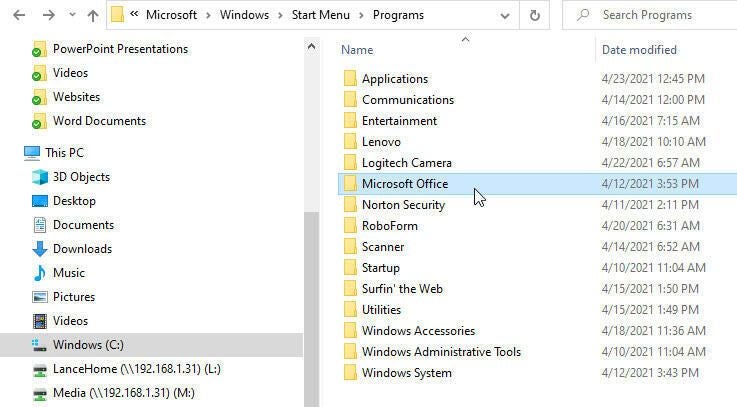
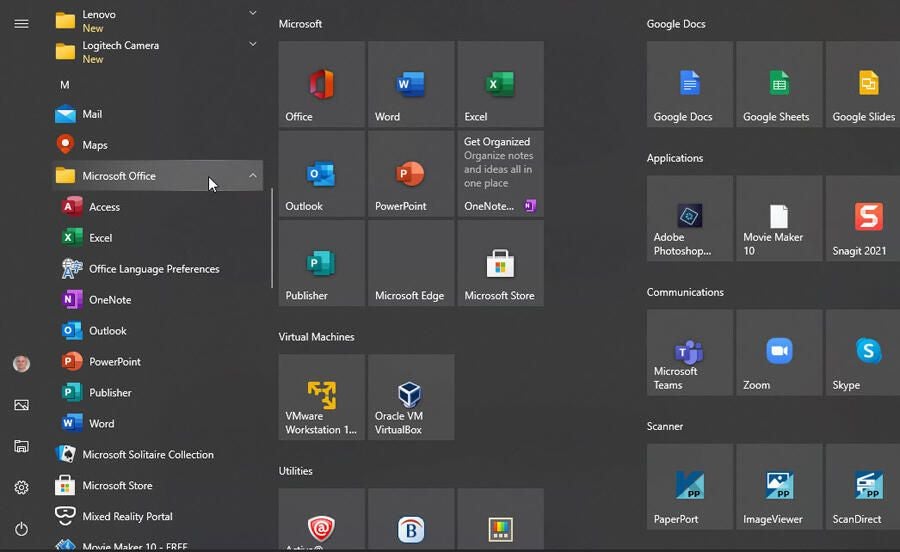
Click the Start button and scroll down the apps list. You’ll now see the new folders you created. Open any folder to access the shortcuts stored inside. By organizing your Start menu this way, you not only reduce the clutter but you arrange your apps so they’re easier to find (Figure F).
Figure F
