


From the office of, “If it’s not broken don’t fix it” comes this: In Ubuntu Server, there’s a brand new method of setting IP addresses. Gone are the days of manually editing the flat text /etc/network/interfaces file. In its place is netplan. That’s right, Ubuntu fans, the method you’ve known for years is now a thing of the past. Instead of a very simple text file, Ubuntu Server requires editing a .yaml file (complete with proper adherence to correct code indent for each line of the block), in order to configure your IP addressing.
Networking: Must-read coverage
- Gartner releases 4 trends that will impact cloud, data centers and infrastructure in 2023
- Support for these Microsoft enterprise products ends in 2023
- Dell Technologies World 2023: Q&A on how Dell sees security at the edge
- Best VPNs for small business in 2023
Before you panic, it’s not all that challenging. In fact, it’s really just a matter of understanding the layout of these .yaml files and how networking is now restarted. I’m going to show you just that, such that you can configure a static IP address in Ubuntu Server 18.04 as easily as you could in 16.04.
The new method
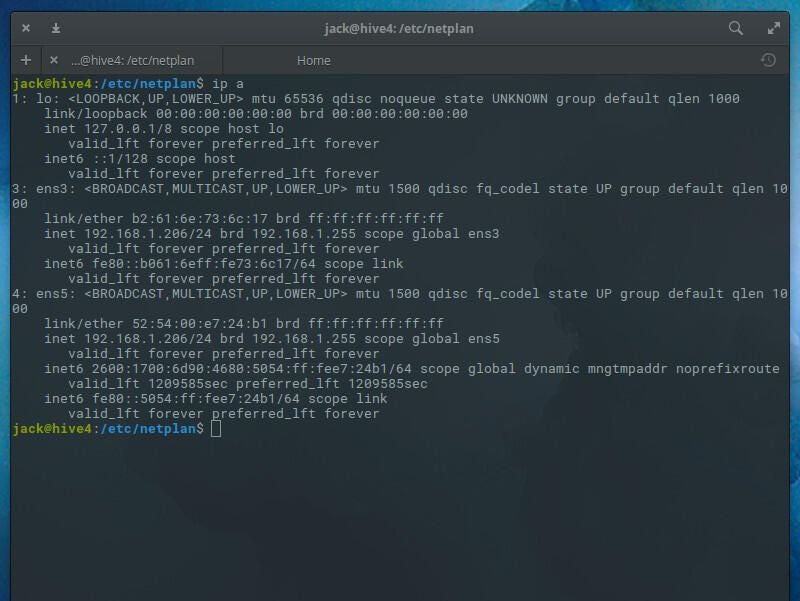
Open up a terminal window on your Ubuntu 18.04 server (or log in via secure shell). Change into the /etc/netplan directory with the command cd /etc/netplan. Issue the command ls and you should see a file named 50-cloud-init.yaml. If you don’t also see a file named 01-netcfg.yaml, create it with the command sudo touch 01-netcfg.yaml. Before we edit that file, we need to know the name of our networking interface. Issue the command ip a and you should see your system network interface listed by name (Figure A).
Figure A
Now we’re going to create a new netplan configuration file. If you don’t see the 01-netcfg.yaml file, create one with the command sudo nano 01-netcfg.yaml. Our file is going to look like that which you see in Figure B.
Figure B
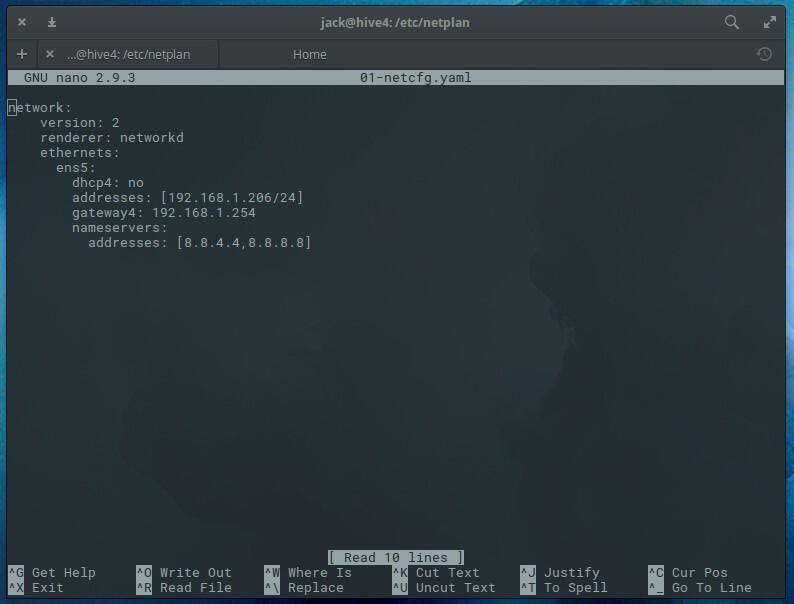
What’s crucial about the layout of this file is not using the exact same spacing as my example, but that you’re consistent. If you’re not consistent with your indents, the file will not work. What you see in that sample file is all you need to configure that static IP address. Do notice, you aren’t setting the address is the same fashion as you did with Ubuntu 16.04. With the old method, you set IP address and netmask like so:
address = 192.168.1.206

netmask = 255.255.255.0
With netplan, these are set with a single line:
addresses : [192.168.1.206/24]
Restarting/testing networking
With the new method, you must restart networking using netplan. So once you’ve configured your interface, issue the command:
sudo netplan apply
The above command will restart networking and apply the new configuration. You shouldn’t see any output. If networking fails to function properly, you can issue the command:
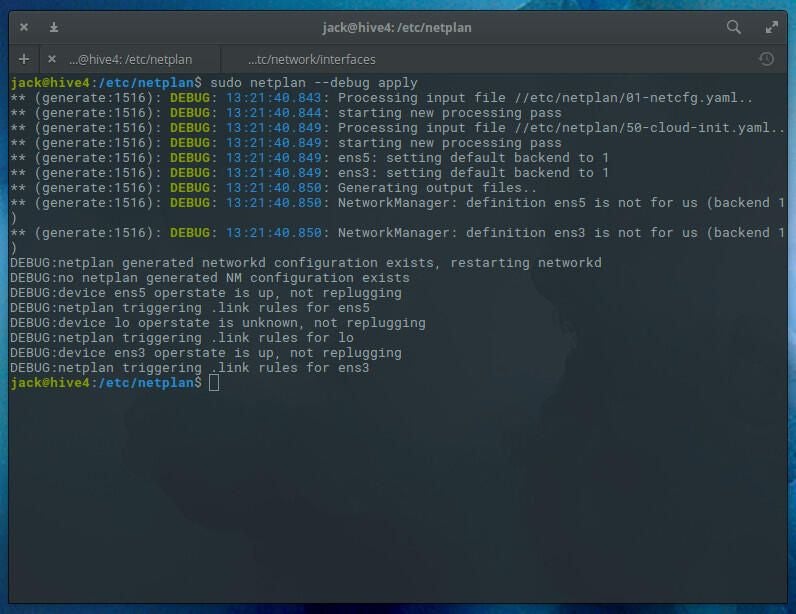
sudo netplan --debug apply
The output of the command (Figure C) should give you some indication as to what’s going wrong.
Figure C
That’s all there is to it
There ya go. That’s all there is to configuring a static IP address in Ubuntu Server 18.04. Remember, you’ll have to do this for each interface you have on your server. Make sure to name the files something like 01-netcfg.yaml and 02-netcfg-yaml. It’s not terribly difficult, once you’re used to not working with that old-school interfaces file.