


You have your Zabbix monitor up and running (How to install the Zabbix enterprise-grade monitor on Ubuntu Server 16.04), and it’s monitoring the host server like a boss. Now it’s time to connect a remote server (or multiple servers) to that monitor, so you can watch all of your Linux data center servers from one dashboard.
Networking: Must-read coverage
- Gartner releases 4 trends that will impact cloud, data centers and infrastructure in 2023
- Support for these Microsoft enterprise products ends in 2023
- Dell Technologies World 2023: Q&A on how Dell sees security at the edge
- Best VPNs for small business in 2023
How do you do that?
It’s a combination of command line and web-based GUI work. I’m going to demonstrate this process to connect on an Ubuntu 16.04 server to the Zabbix monitor. I will assume you already have the Zabbix monitor up and running (both machines are on the same network) and that you have access to an account with sudo privileges. With that in hand, let’s make this happen.
SEE: Quick glossary: Software-defined networking (Tech Pro Research)
Installing the Zabbix agent
The first thing that must be done is the installation of the Zabbix agent. Log into the remote machine you want monitored by Zabbix. Download a file that will install the repository with the command:
wget http://repo.zabbix.com/zabbix/3.4/ubuntu/pool/main/z/zabbix-release/zabbix-release_3.4-1+xenial_all.deb
Install that file with the command:
sudo dpkg -i zabbix*all.deb
Install the agent with the following commands:
sudo apt-get update

sudo apt-get install zabbix-agent
Add the pre-shared Zabbix key
Zabbix supports certificate-based encryption. However, for simplicity sake, we’ll use the pre-shared keys to secure our connection between agent and server. To do this, generate a pre-shared key with the command:
sudo sh -c "openssl rand -hex 32 > /etc/zabbix/zabbix_agentd.psk"
Display the key with the command:
cat /etc/zabbix/zabbix_agentd.psk
You’ll need to copy that key, as it’ll be pasted into the web-based GUI later.
Configure the Zabbix agent
Next comes the configuration of the Zabbix agent. All configuration options are found in a single file. Issue the command:
sudo nano /etc/zabbix/zabbix_agentd.conf
The first setting to change is:
Server=127.0.0.1
Change that to:
Server=ZABBIX_MONITOR
where ZABBIX_MONITOR is the IP address of the Zabbix Monitor server.
Scroll down until you see the TLSConnect section. At the bottom of that section, add the following:
TLSConnect=psk
Next locate the TLSAccept section and add the following to the bottom:
TLSConnect=psk
Now locate the TLSPSKIdentity section and add the following to the bottom:
TLSPSKIdentity=PSK 001
Finally, locate the TLSPSKFile section and add the following to the bottom:
TLSPSKFile=/etc/zabbix/zabbix_agentd.psk
Save and close that file. Restart and enable the Zabbix agent with the commands:
sudo systemctl start zabbix-agent

sudo systemctl enable zabbix-agent
Adding the host to the Zabbix Monitor
Log into your Zabbix server and click on the Configuration tab and then the Hosts tab. Click the Create host button near the top right corner. In the resulting page, (Figure A) change the Host name and IP ADDRESS sections to match the information for your remote server.
Figure A
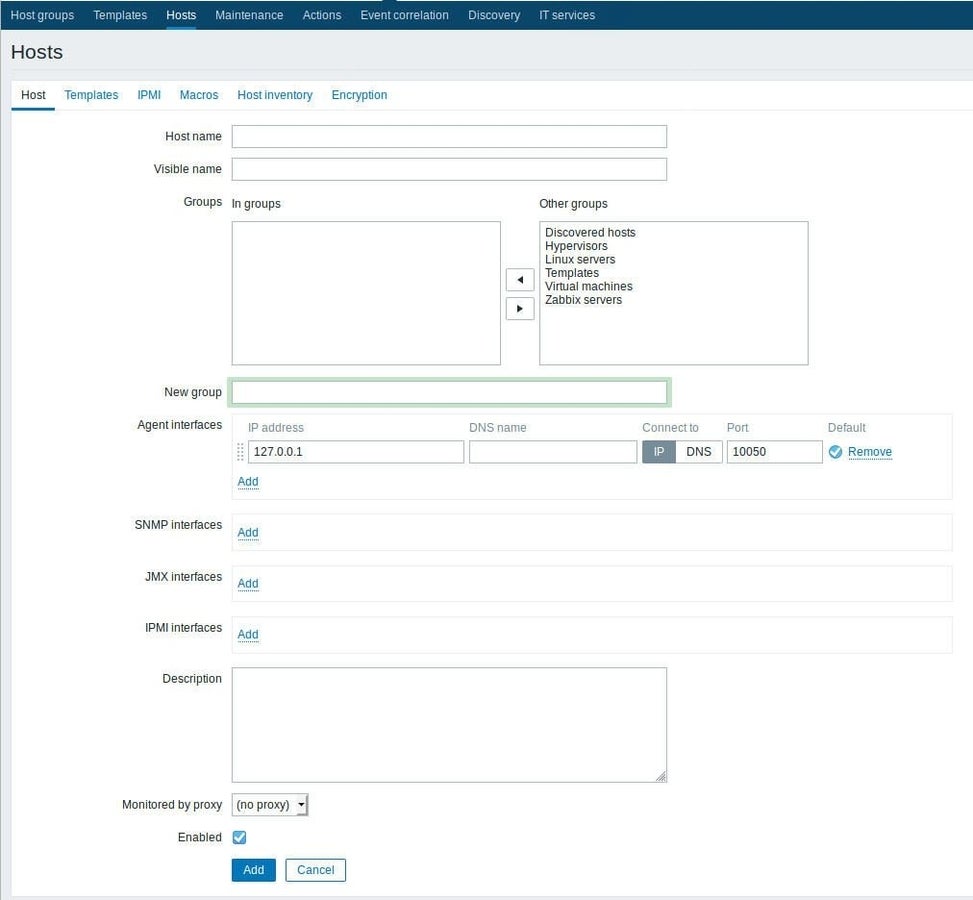
Add the host to a group (select the Linux Servers group and click the left-pointing arrow). Next, click on the Templates tab and type Template OS Linux in the search field and then click Add to include this template. Click on the Encryption tab and select PSK for both Connections to host and Connections from host (Figure B).
Figure B
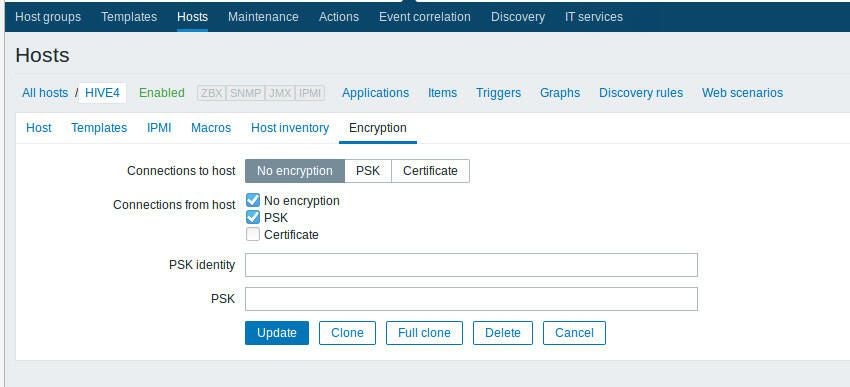
In the PSK Identity section, enter PSK 001 and in the PSK field, paste the PSK key you copied earlier. Finally, click the Add (or Update) button to add the host.
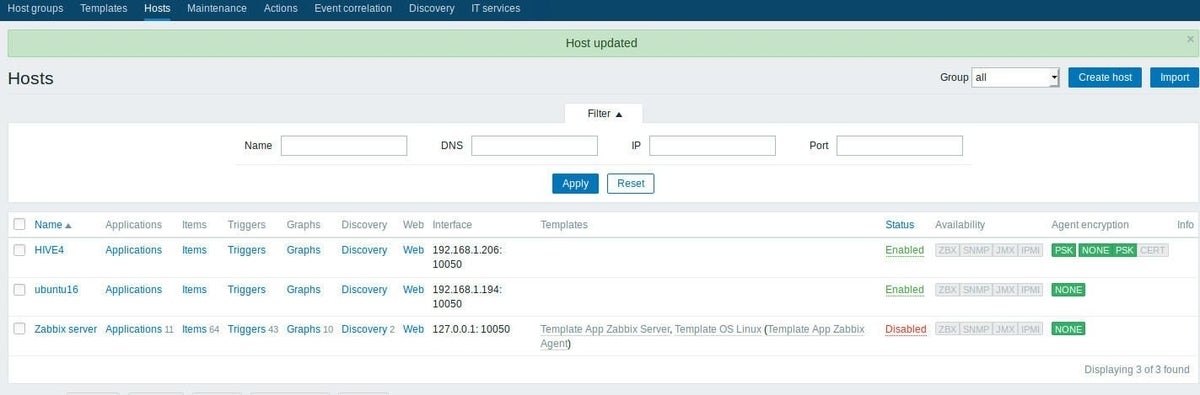
Your remote host should show up with everything green (indicating all is well and the connection is encrypted (Figure C).
Figure C
All set
Your Zabbix Monitor is now keeping track of the remote server. You can head to the dashboard and start monitoring that server for issues. Add all of your data center Linux servers as hosts to Zabbix, and you are all set to monitor from a single location.