Image: stnazkul, Getty Images/iStockPhoto
Every time you unlock a locked Microsoft Windows 10 computer you are presented with a lock screen that you then must click or swipe to get to the logon screen where you enter your credentials. The lock screen typically displays an image, particularly if you run Windows 10 Spotlight, but not much else that is useful.
In a previous article, we showed you how to disable the Windows 10 lock screen by tweaking a key in the Windows Registry File. While that method still works, it does involve a marginally risky and slightly complicated editing procedure that, if performed carelessly, could require a reinstallation of the operating system. There is a much simpler and safer method for disabling the lock screen.
SEE: Windows, Linux and Mac commands everyone needs to know (free PDF) (TechRepublic)
This how-to tutorial shows you how to unlock a computer screen in Windows 10 without resorting to an edit of the Windows Registry File.
The easy way to disable the Windows 10 lock screen
Security best practices require users to lock their workstations whenever they leave their computers unattended. It doesn’t matter whether the PC will be unattended for just a minute while you get a cup of coffee, you should lock it every time. This security step is vital even if you are working from home—it should be a reflexive habit.
Of course, this also means that you will be entering your logon credentials often during the day, which can get a bit annoying, especially if you have to first clear an unnecessary lock screen each time. This is why it may be advantageous to disable the Windows 10 lock screen.
SEE: How to change Windows 10 Spotlight lock screen settings (TechRepublic)
If you’d like to take a simpler route without messing with the Registry, then open File Explorer and navigate to your Windows directory.
The file folder we are looking for will generally follow this path:
C:WindowsSystemApps
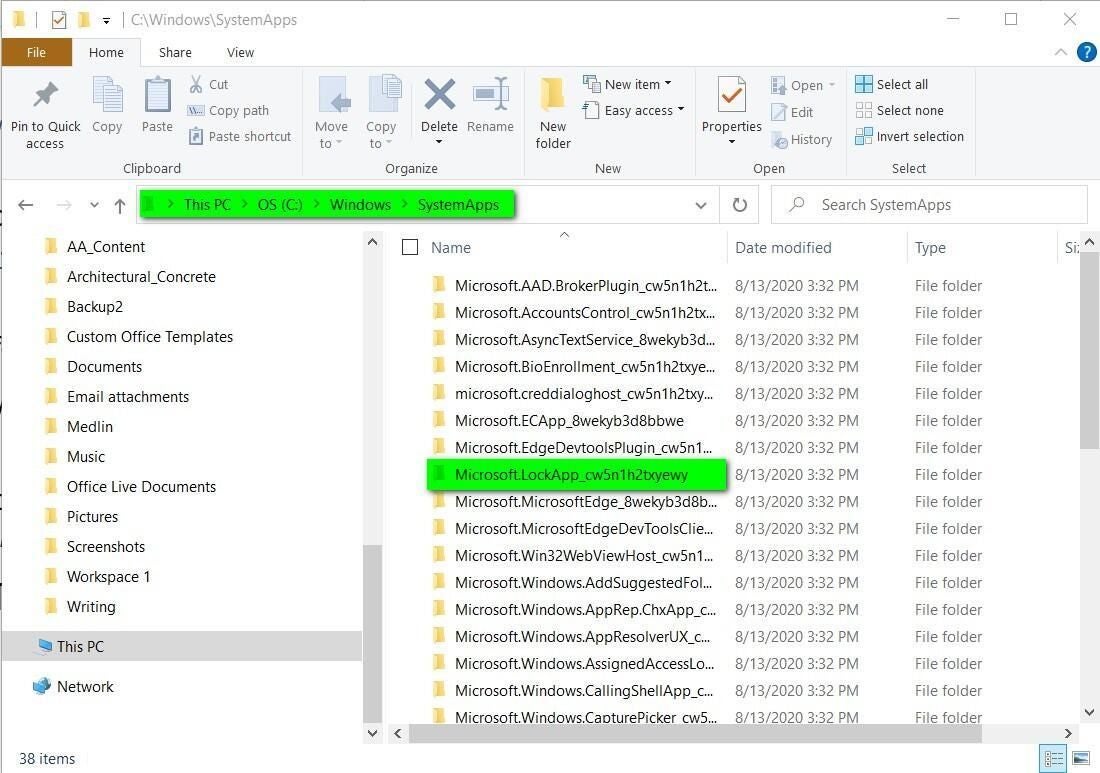
As you can see in Figure A, this file folder contains a large number of system folders. We want to concentrate our efforts on the folder labeled: Microsoft.LockApp_cw5n1h2txyewy.
Figure A

Once you find the Microsoft.LockApp_cw5n1h2txyewy folder, right-click on it and select the Rename function from the context menu.
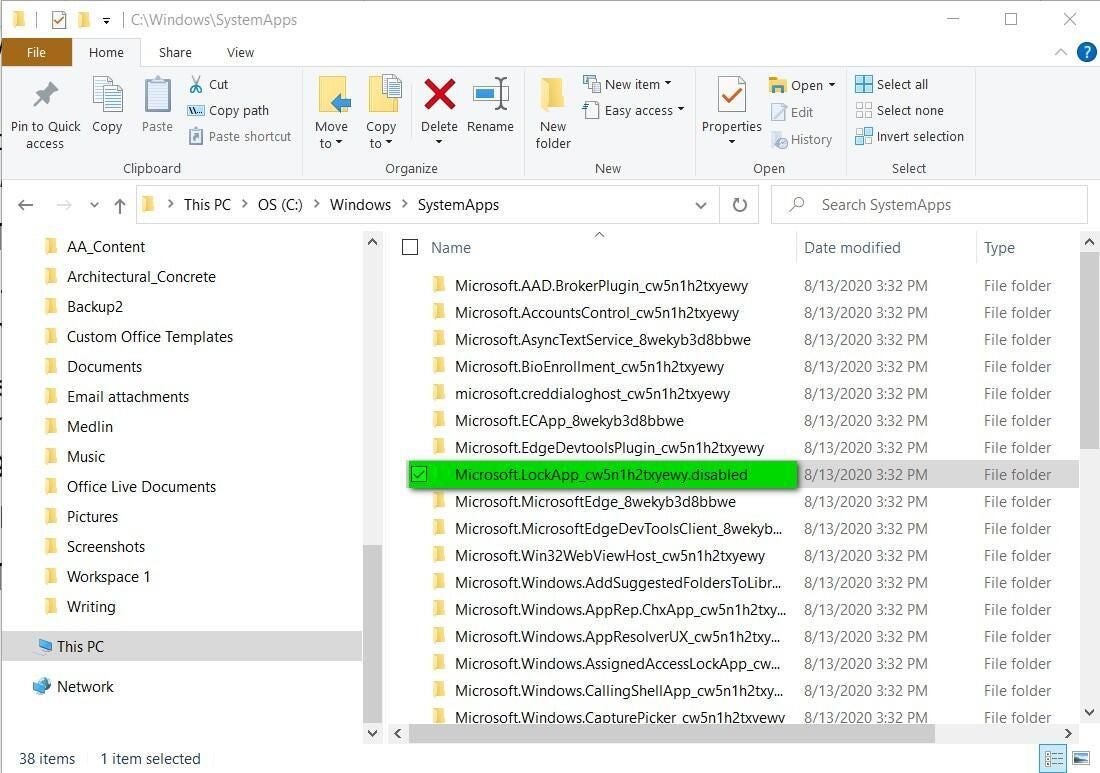
Just in case we want to enable the lock screen again, we don’t want to change the name of the folder too much, so just add “.disabled” to the end of the current folder name (Figure B). The system will ask for confirmation. When complete, it should look like this:
Microsoft.LockApp_cw5n1h2txyewy.disabled
Figure B

Once this step is complete, save your work and close all of your open apps and then reboot your PC.
Now, when you unlock a locked Windows 10 PC, you will go directly to the logon screen where you can enter your credentials. The unnecessary intermediary step of clicking or swiping away the lock screen will be eliminated.