


Getty Images/iStockphoto
If your company makes use of virtual machines, and you are the one in charge of the associated admin tasks, you might find yourself wishing you could do so with the help of a handy GUI environment. Thanks to the likes of Proxmox Virtual Environment, you can. This particular platform is based on QEMU/KVM and LXC and offers a user-friendly, web-based GUI to make it possible for you to manage those virtual machines from a single point of entry–from anywhere you have access to your LAN.
Before we get into the installation of Proxmox VE, know that the tool is open source, but isn’t free. Once installed, you’ll then need to purchase a license to make use of the platform. A Proxmox VE license ranges from approximately $100 USD per year (for the Community version) all the way up to approximately $942 USD per year (for the Premium version). For more information on the pricing, take a look at the Proxmox VE version matrix.
After taking a look at the pricing, and you’re still interested in getting Proxmox VE up and running, let’s make that happen.
SEE: Resolve IT issues quickly with these 10 PowerShell cmdlets (TechRepublic download)
What you’ll need
There are two ways to install Proxmox: On top of an already running Debian (or Ubuntu) machine or onto bare metal. I’m going to walk you through both methods. If you’re installing on bare metal, you’ll need to download the latest ISO image from the Proxmox download page, burn the image onto a USB drive, and boot from the drive.
I’m going to first walk you through the installation on a currently running Debian Buster (server) instance. Unfortunately, you cannot install Proxmox VE over Ubuntu Server, so it’s Debian or nothing.
How to add the repository
Before you take care of any of the first steps, you’ll need to change to the root user with the command:
su
Now you can add the Proxmox VE repository by issuing the command:
echo "deb http://download.proxmox.com/debian/pve buster pve-no-subscription" > /etc/apt/sources.list.d/pve-install-repo.list
With that completed, add the Proxmox GPG key with the command:
wget http://download.proxmox.com/debian/proxmox-ve-release-6.x.gpg -O /etc/apt/trusted.gpg.d/proxmox-ve-release-6.x.gpg
Grant the key read permission (if necessary) with the command:
chmod +r /etc/apt/trusted.gpg.d/proxmox-ve-release-6.x.gpg
Next, update apt with the command:
apt update
Run a distribution upgrade with the command:
apt full-upgrade
How to install Proxmox VE on Debian
Finally, install Proxmox VE and Postfix with the command:
apt install proxmox-ve postfix open-iscsi
During this installation, you’ll be asked to configure Postfix, by way of selecting from:
-
No Configuration
-
Internet Site
-
Internet With Smarthost
-
Satellite System
-
Local Only
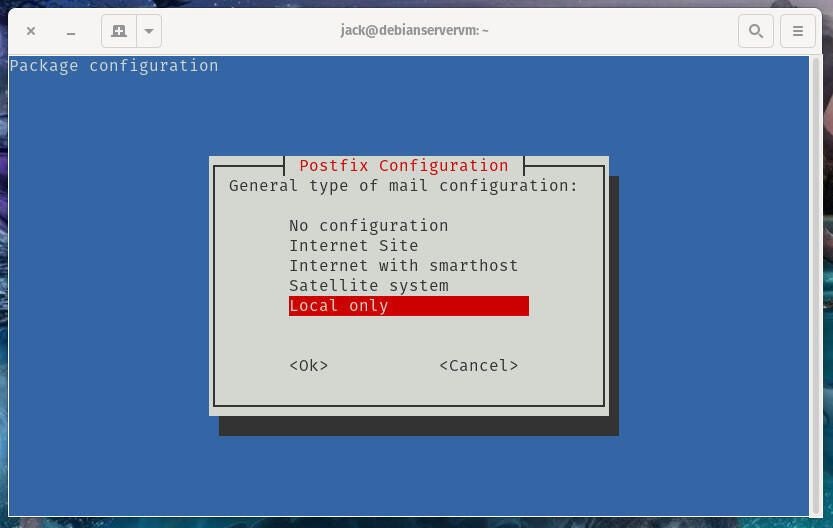
This configuration will determine how email alerts are sent. If you will be viewing alerts on the local machine, you can select Local Only. If you’ll be using a third-party email host, select Internet Site. If, however, your mail server is the same machine hosting Proxmox, select Internet With Smarthost (Figure A).
Figure A
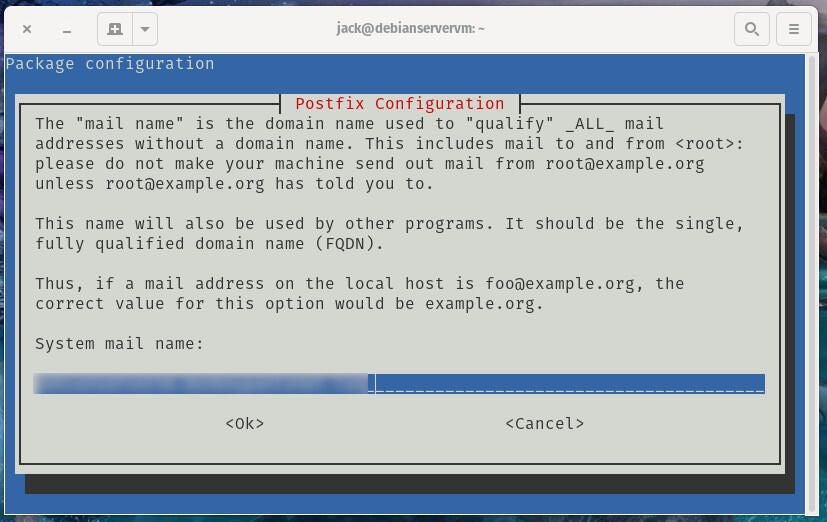
In the next window, you’ll be asked to enter your full FQDN (Figure B).
Figure B
When the installation completes, you should be able to point a web browser to https://SERVER_ADDRESS:8006 (where SERVER_ADDRESS is either the IP address or the domain of the server) to reach the Proxmox web-based GUI.
How to install Proxmox on bare metal
Let’s take a look at how to install on bare metal, which is the route most will take. Once you have the ISO downloaded and burned to your USB drive, boot up the machine.
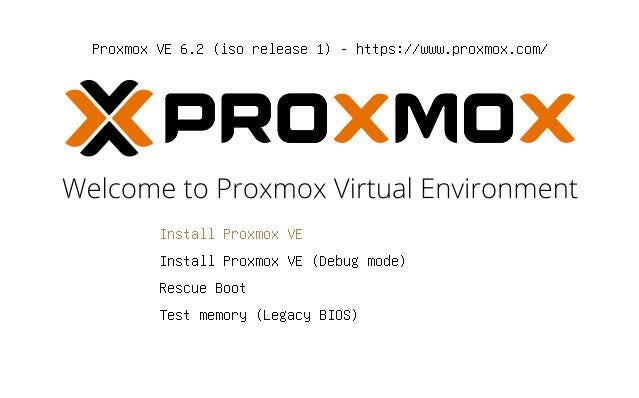
In the first screen, select Install Proxmox VE and hit Enter on your keyboard (Figure C).
Figure C
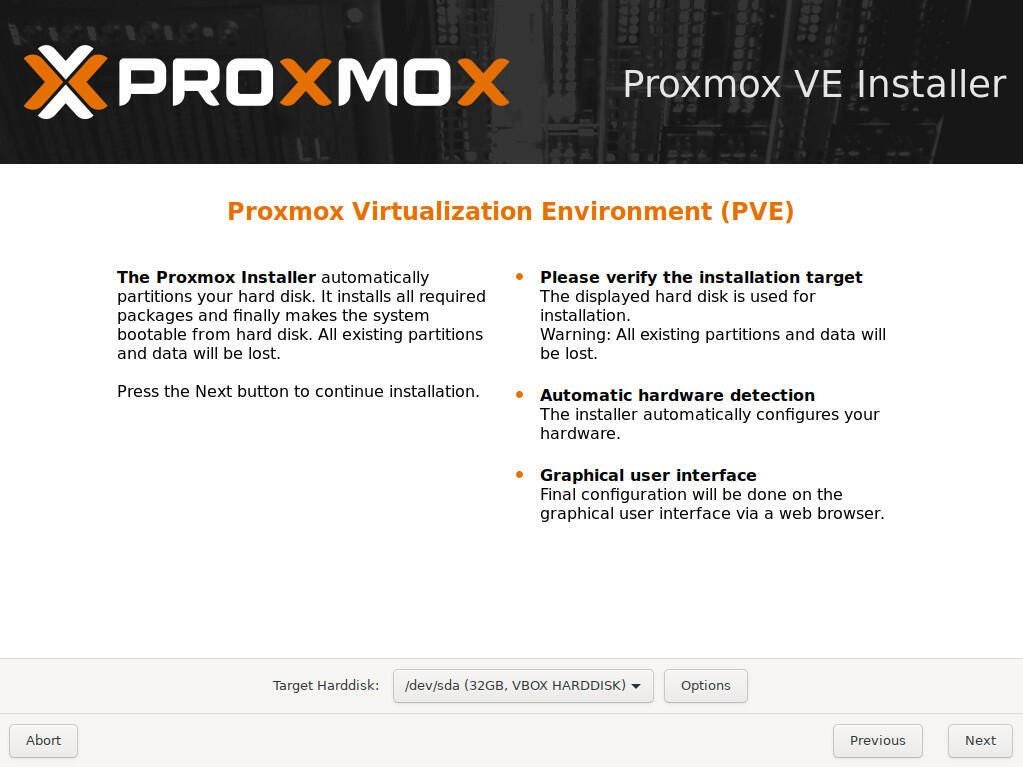
The next window requires that you agree to the EULA. Click I Agree to continue on. In the resulting window, you’ll need to select the target harddisk for the installation, from the Target disk drop-down, and then click Next (Figure D).
Figure D
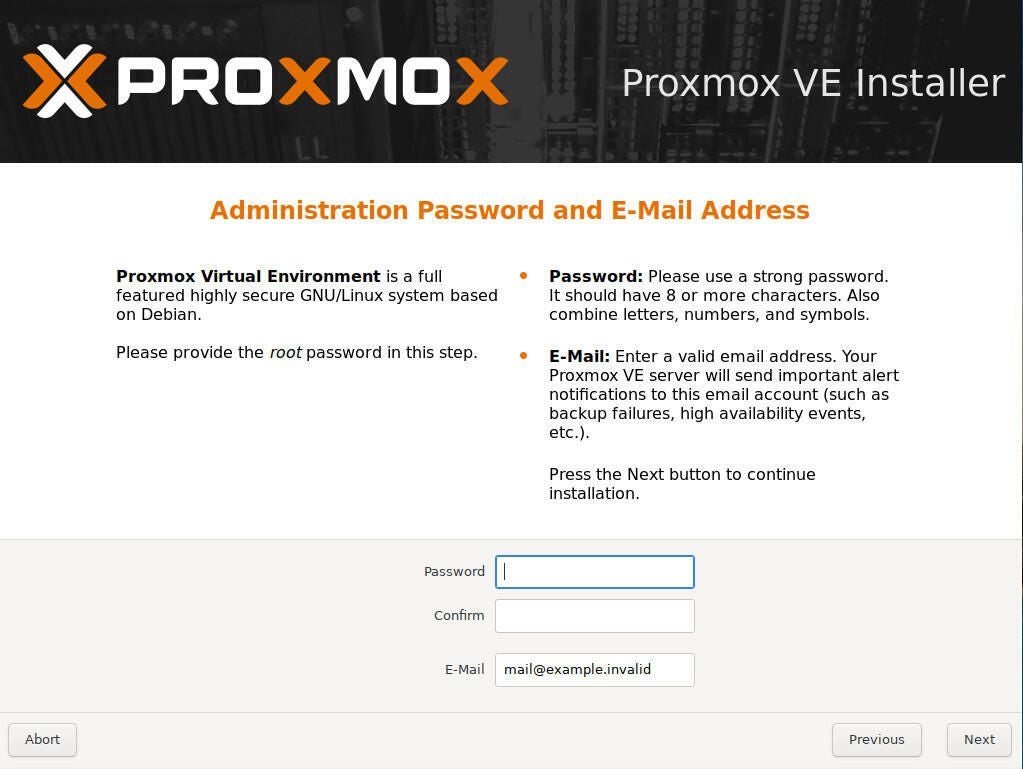
With the harddisk selected, choose your Country/Time Zone/Keyboard Layout and click Next. You will then be asked to type and verify a new password for the admin user and add an email address for alerts. Do that and click Next (Figure E).
Figure E
Finally, you must configure the FQDN of the server, as well as the IP Address, Netmask, Gateway, and DNS Server (Figure F).
Figure F

Click Next and then, when prompted, click Install.
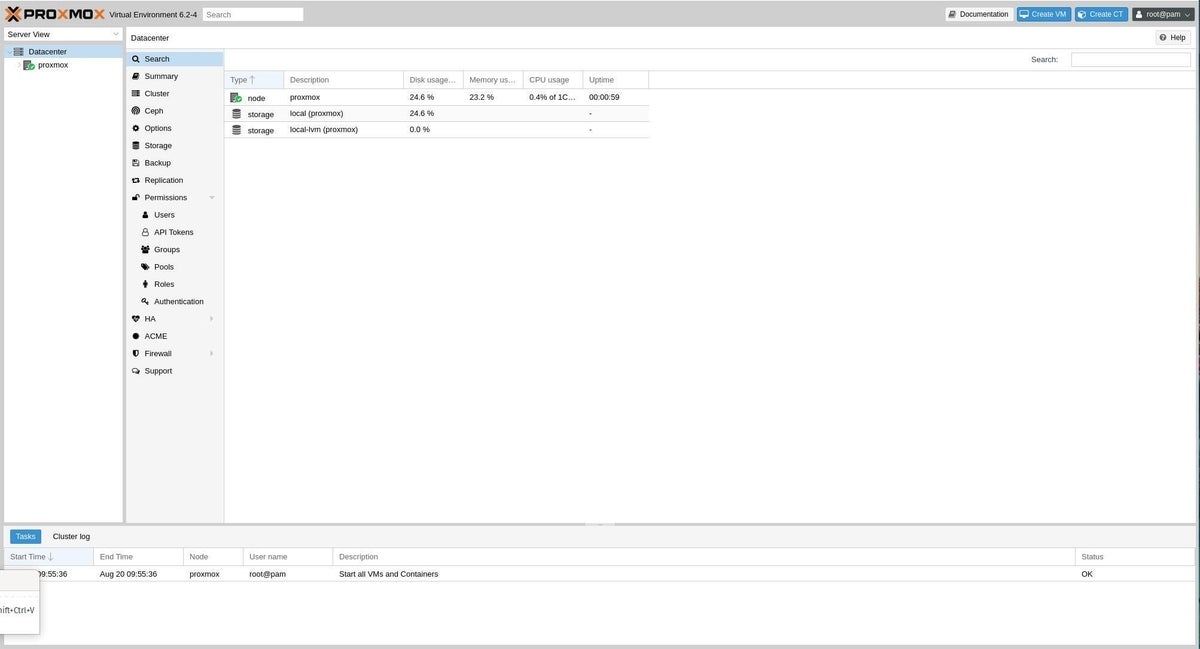
The installation process will only take about two to five minutes, depending on your network connection and the speed of your hardware. When it completes, click Reboot to finish up. Once the machine reboots, point your server to https://SERVER_ADDRESS:8006 (where SERVER_ADDRESS is either the domain or the IP address of the hosting server) and log in with the username root and the password you created during installation. You will find yourself on the Proxmox main page, where you can start working with this powerful platform (Figure G).
Figure G
And that’s all there is to installing the Proxmox VE platform.